You will also need:
Animation Shop. This is from CNET, so it's a safe download.
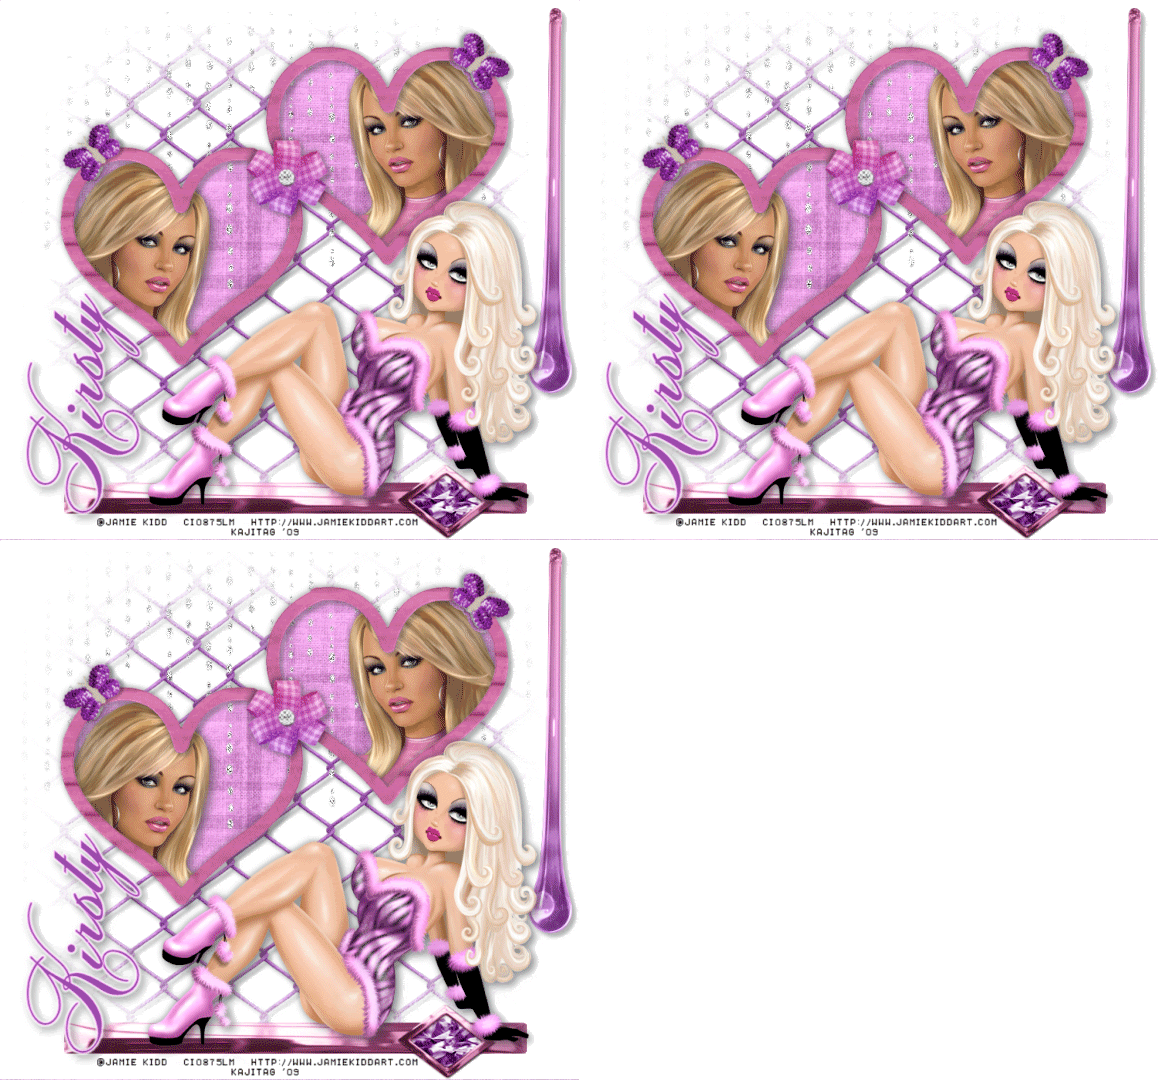
A tube (or tubes) of your choice. Including a sitting or reclining tube would be best for this one. I'm using the sexy artwork of Jamie Kidd. You must have a license to use her artwork. You can get that license and art at C.I.L.M..
Scrap kit is by Kirsty, of Kirsty's Scraps. This is a FTU kit, called Misfit. Be sure to leave some love for the freebies!!
Filters: Eye Candy 4000 > Gradient Glow, dsb Flux > Bright Noise
Font: I used Alice.
Supplies: Again, just the mask. I do not know the origin of this mask, so if any of you know, let me know so that I may give credit where credit is due!
Also, please, if you have problems with any download link for supplies, drop me a line via e-mail. Leaving a comment without a way for me to contact you back doesn't help. If you e-mail me, I'll send you the supplies.
Okay let's do it! I wish you to have fun! :)
Open a new image, 750 x 700, white.
Open frame2. Resize 85%. Copy and paste as a new layer. Position as you would like. I found I had to move mine up higher as I got into the tag.
Highlight your white background layer.
Open Paper12. Copy and paste as a new layer.
Highlight the frame layer. Grab your magic wand and click inside both frames.
Selections > Modify > Expand by 5. Selections > Invert.
Highlight your paper layer. Hit delete. Selections > Select none.
Open your tube that you want in the frames. Copy and paste as a new layer. Resize and position as you wish. Drag this layer below the frame layer, but above the paper layer.
Duplicate this tube layer and mirror. Position into the other frame. Merge down these two tube layers and drop shadow.
Again, highlight the frame layer. Grab your magic wand and click inside both frames.
Selections > Modify > Expand by 1. Selections> Invert.
Highlight your tube layer. Hit delete. Drop shadow your frame.
Again highlight your white background layer.
Open Wire1. Copy and paste as a new layer. Resize to 750 x 700. Position centrally on the canvas. Drop shadow.
Apply the mask. Delete the mask layer, answer "yes" to the pop-up question, and merge group.
Apply mask again. Keep doing so until you get the "fade" effect you want.
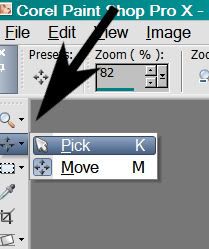
Open "Falling Bling." Copy and paste as a new layer. For this one, I took my pick tool

and dragged the edges until the bling was the size I wanted. Drag this layer below the frame and tube layers, but above the paper layer.
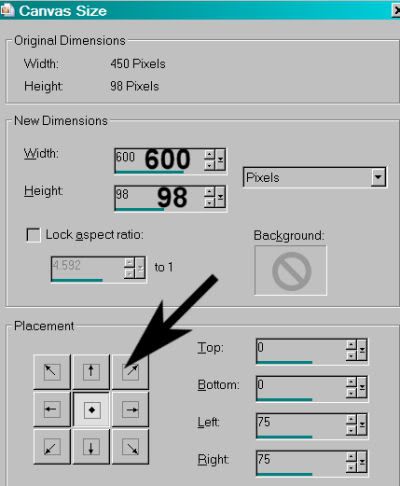
Open the Barrett. Image > Canvas Size:

Again, use your pick tool to drag the sides out to a size with which you're happy.
Copy and paste as a new layer. Position at the bottom of your tag. Drop shadow the barrett.
Add your sitting or reclining tube. Resize and position as you like with relation to the frames and the barrett. Get everything situated. :) Drop shadow your tube.
Open the Glass Drop. Copy and paste as a new layer. Position on whichever side with which you'd be happy. Drop shadow. This layer is below your reclining tube, but above the wire and bling layers.
Highlight the falling bling layer. Apply the mask. Delete the mask layer, answer "yes" to the pop-up question, and merge group. I just did this one, once!
Go back to the top layer and add your name. I used color #9a4aa9 for fill and #ffbafc for the stroke, stroke, stroke set at 1. I added a Gradient Glow, settings 3 - 0 - 100, color white. Drop shadow the name. Rotate and position as you please.
Add your copyright, license information if applicable, and taggers'/watermark.
Resize your tag to the size with which you're most comfortable.
If you're NOT going to animate, you can just merge and save. You're done!
A N I M A T I O N
Highlight your falling bling layer. Duplicate this layer twice, for a total of three falling bling layers.
Still on the bottom bling layer...
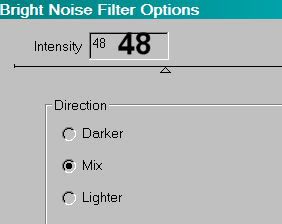
Effects > dsb Flux > Bright Noise with the settings shown below:

Hit "mix" a few times, then hit okay.
Highlight the middle bling layer. Again, add Bright Noise, and click on "mix" a few times, then hit okay.
Highlight the top bling layer. Add Bright Noise again, clicking "mix" a few times more.
Hit okay.
In order to get a REAL good effect, I did all the above twice. But the second time I went through the layers I had my dsb Flux intensity set to 58.
Close out the top two bling layers, leaving the bottom bling layer open.
Edit > Copy merged
Open Animation Shop, right-click on the desktop area, and paste as a new animation.
Return to PSP. Close out the bottom bling layer, and open the middle bling layer.
Edit > Copy merged.
Return to Animation Shop and Edit > Paste > After Current Frame.
Back to PSP. Close out the middle bling layer, and open the top bling layer.
Edit > Copy merged.
And, back to Animation Shop. Edit > Paste > After Current Frame.
View > Animation. If you like what you see, save! And, we're done! I hope you've enjoyed this tutorial! Thanks for trying it out!
.


No comments:
Post a Comment