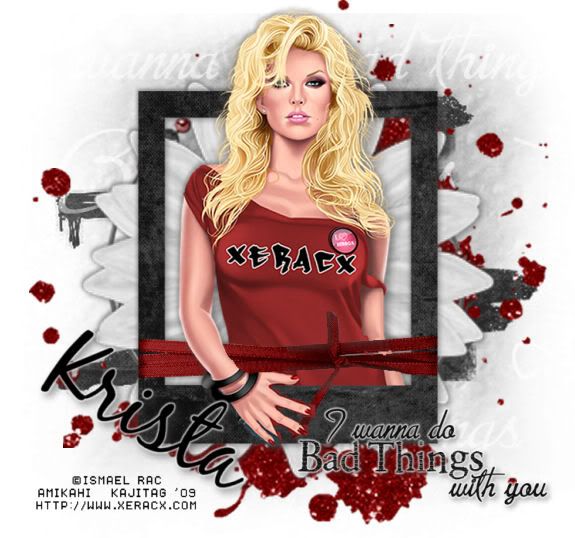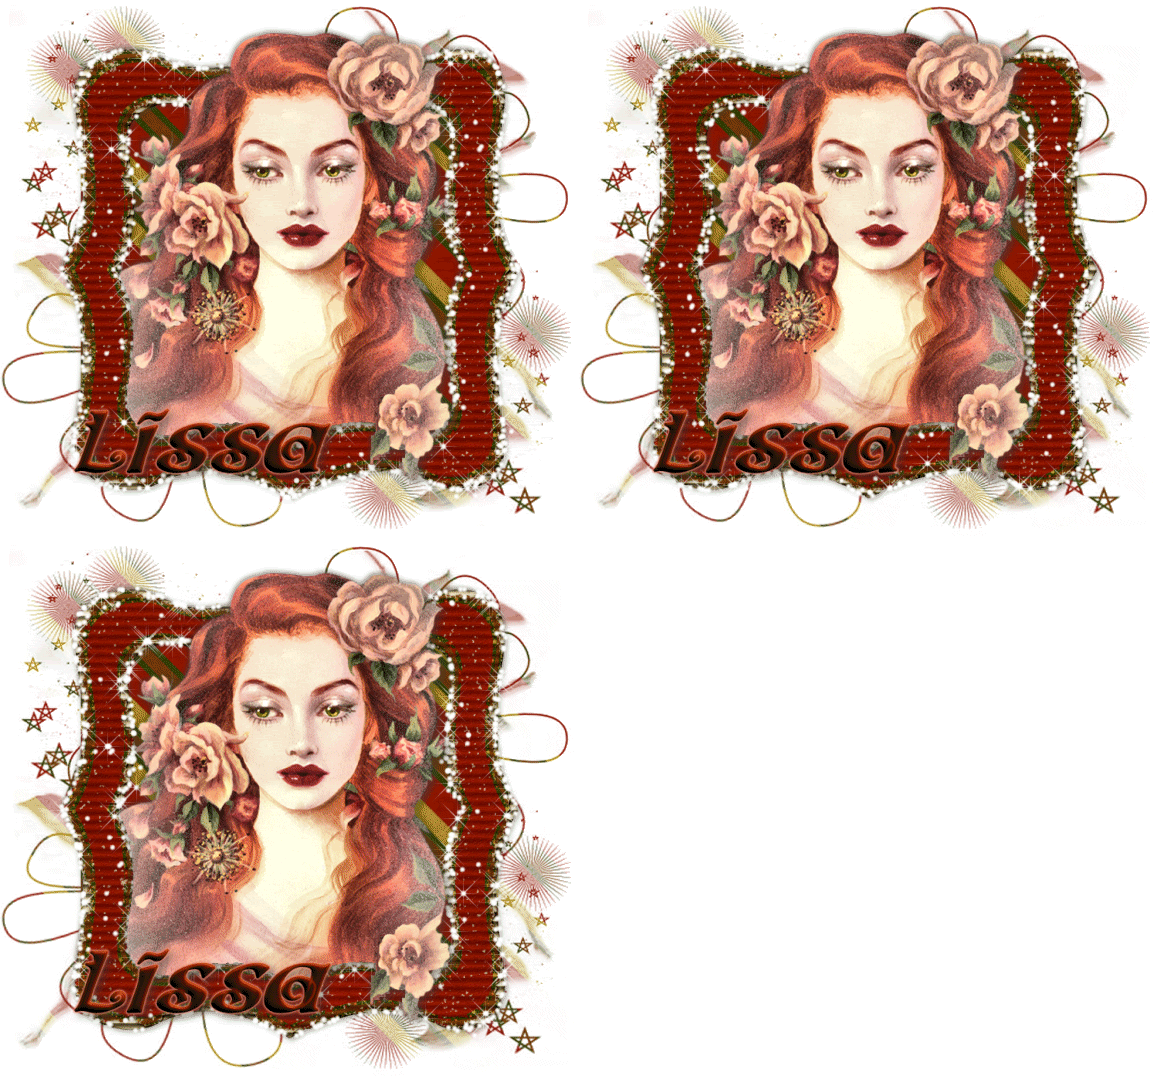
Wednesday, September 30, 2009

Gotta Feeling

.


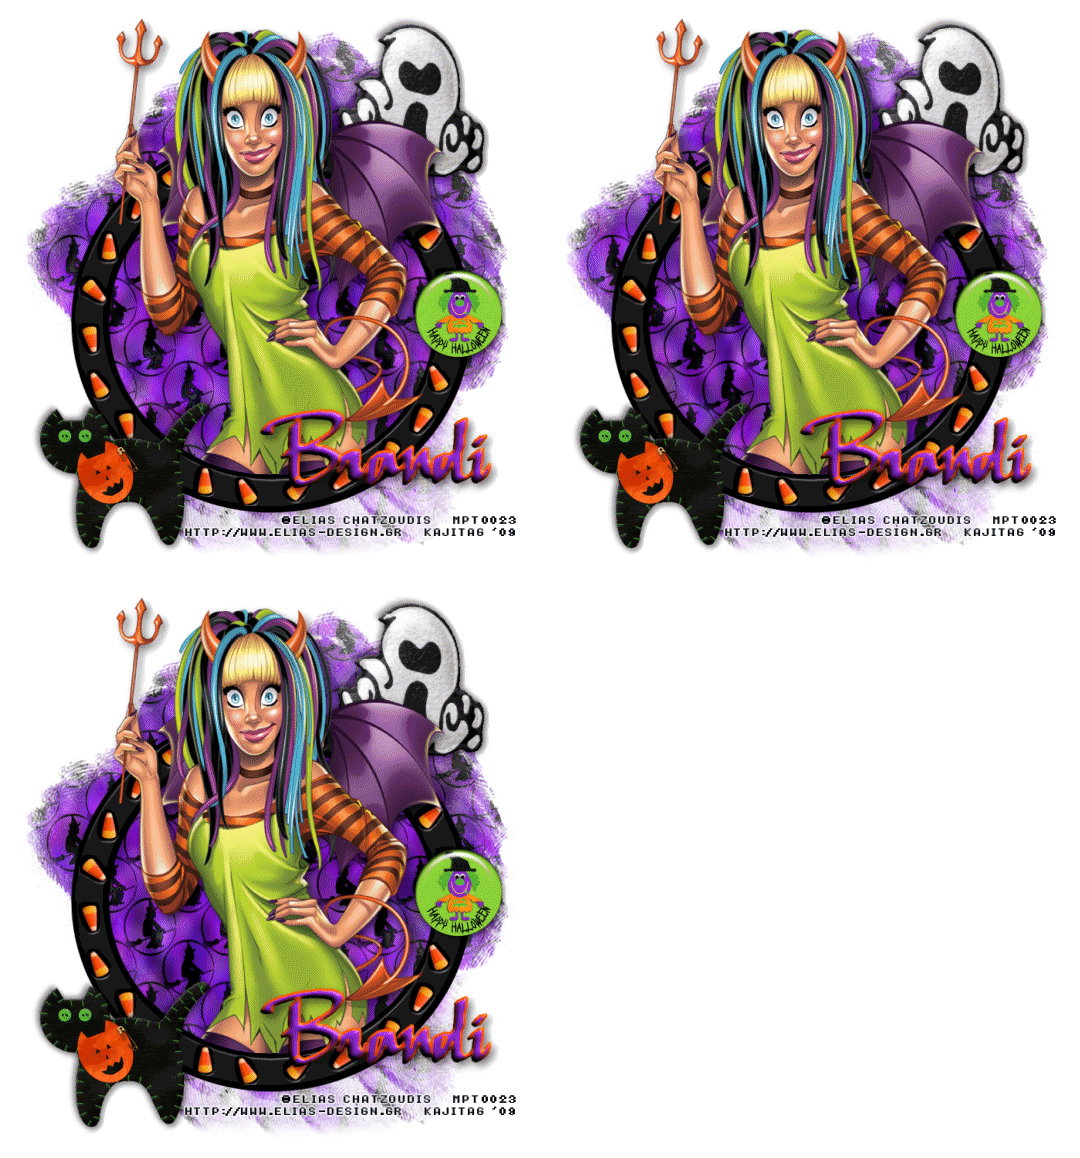
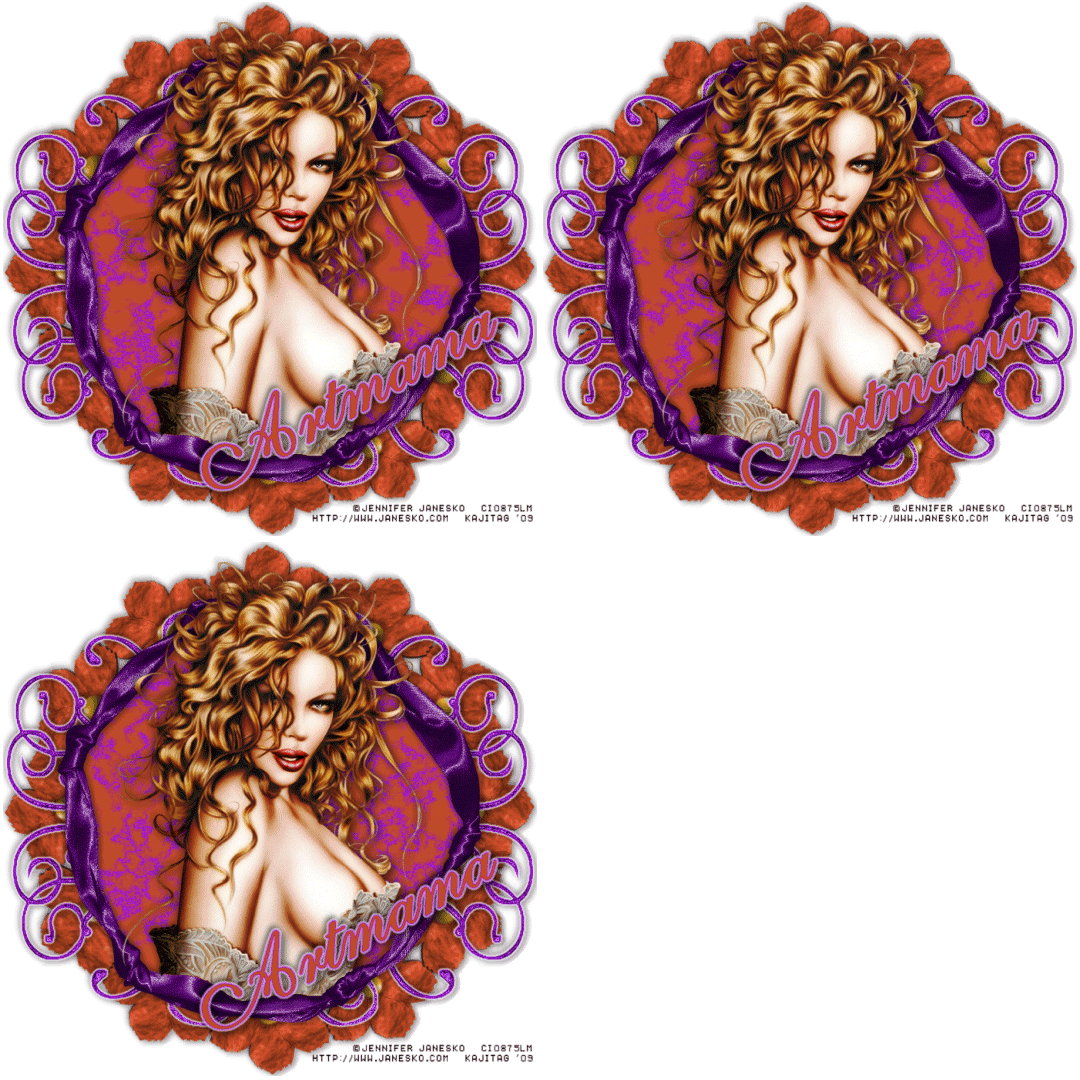
[Click image above to go to full sized image.]


This tutorial was written on September 30, 2009, using Paint Shop Pro, version X.03. It should be okay to do with other versions as well. I just find X.03 more comfortable for me. You may download a free trial of Paint Shop Pro, version X2, from Corel. Any similarities between this tut and any others you may see are purely coincidental.

You will also need:

Animation Shop. This is from CNET, so it's a safe download. However, it costs. That changed pretty recently. I don't know why!!

HOWEVER ..... a LOVELY person named solshne (and another named Chris) wrote to let me know that one might find Animation Shop for free at this location. This is an FTP link and I have no idea if it's safe or not. So keep your antivirus handy to scan it after download!

A tube of your choice. I'm using the glamorous artwork of Jennifer Janesko. You must have a license to use her artwork. You can get that license and art at C.I.L.M.

The scrap kit is by Artmama of Artmama's Studio. This is a FTU kit, called I've Got A Feeling. As always, leave thanks for the freebies!

Filters: Eye Candy 4000 > Marble, Eye Candy 4000 > Gradient Glow

Font: I used Estranged 2.

Supplies: No outside supplies used in this tut!

Let's start....

Open a new canvas, 700 x 700, white.

Open elem03. Copy and paste as a new layer.

Add your tube. Resize, position, and drop shadow to your taste.

Highlight your elem03 layer. Grab your magic wand, and click inside the center of the "frame." Selections > Modify > Expand by 1. Selections > Invert.

Highlight your tube layer. Grab your eraser brush and erase any of the tube that overhangs the bottom of the "frame."

Selections > Select none.

Highlight your white background layer.

Open paper 04. Copy and paste as a new layer.

Again, highlight your elem03 layer. Grab your magic wand and again, click inside. Selections > Modify > Expand by 10. Selections > Invert.

Highlight your paper 04 layer. Hit delete. Selections > Select none.

Open elem29. Copy and paste as a new layer. Position it more to the top left of your canvas (I alwasy find this easier to do if it's the top layer, then I drag it down.) Duplicate this layer. Image > Mirror. Merge these two layers down. Duplicate that layer. Image > Flip. Move your elem29s (LOL) until you like the arrangement. I moved the top one down and the bottom one up. Up to you! Merge these layers down. Drag this layer down below your paper layer.

Effects > Eye Candy 4000 > Gradient Glow set on 3-0-100, color white.

Drop shadow.

Go to your top layer. Open elem13. Copy and paste as a new layer.

Effects > Mura's Meister > Copies > with the following settings:
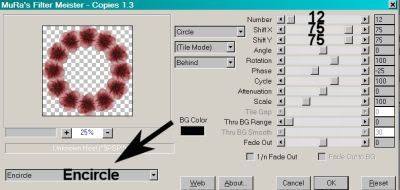


Hit okay. Bring this layer down BELOW the combo elem29 (doodle) layer. Drop shadow.

Go back to the top layer and add your name. I used color #c04b27 for the fill and #a118db for the stroke, stroke set at 2.

I then added a Gradient Glow in white, same as we did above.

Drop shadow your name.

Resize your canvas to a size with which you are comfortable.

Add your copyright, license information if applicable, and taggers'/watermark.

If you choose not to animate, you're now done, and you can merge your layers and save!


A N I M A T I O N


Highlight your paper 04 layer. Duplicate twice, for a total of three paper 04 layers.

Highlight your bottom paper 04 layer.

Effects > Eye Candy 4000 > Marble with the following settings:
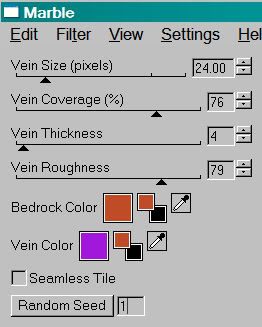


We're using the same dark orange and purple that we used for the name.

Hit okay.

Highlight the middle paper 04 layer.

Add Marble again, this time hitting "Random Seed" once.

Hit okay.

Now, on the top paper 04 layer. Add Marble one last time, again hitting "Random Seed."

Hit okay.

Close out the top two paper 04 layers, leaving the bottom paper 04 layer open.

Edit > Copy Merged.

Open Animation Shop. Right-click on the desktop area and paste as a new animation.

Return to PSP. Close out the bottom paper 04 layer and open the middle paper 04 layer.

Edit > Copy merged.

Back to Animation Shop. Edit > Paste > After Current Frame.

Return again to PSP. Close out the middle paper 04 layer and open the top paper 04 layer.

Edit > Copy merged.

Again, back to Animation Shop. Edit > Paste > After Current Frame.

Edit > Select All.

Right-click on the top bar of your animation and choose "frame properties."

Change this number to 25.

View > Animation.

And we are done! I hope you enjoyed this tutorial! Thank you for stopping by!!

.

Tuesday, September 29, 2009

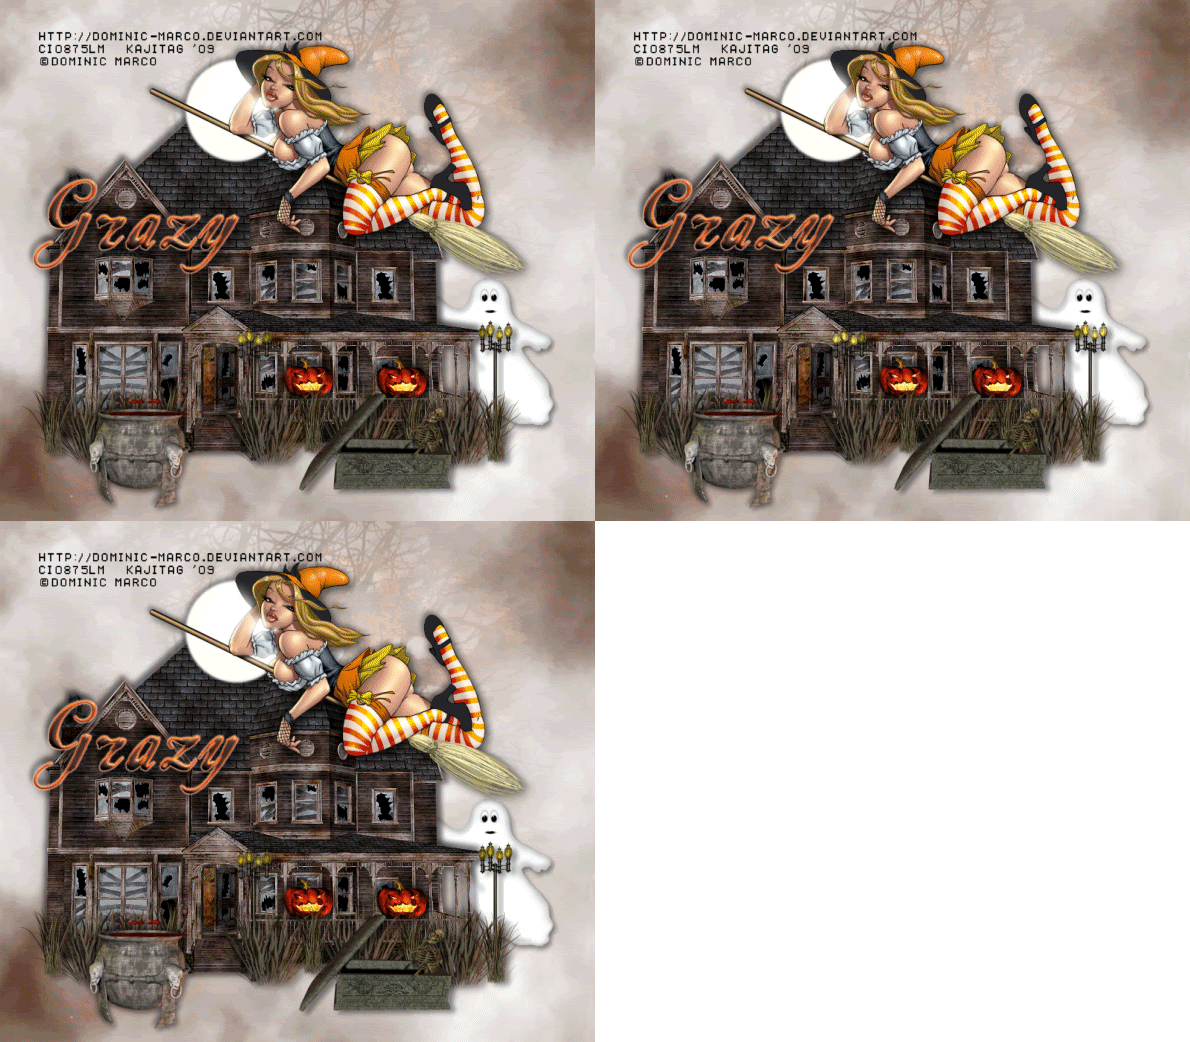
Creepy Hollow

.


[Click image above to go to full sized image.]


This tutorial was written on September 29, 2009, using Paint Shop Pro, version X.03. It should be okay to do with other versions as well. I just find X.03 more comfortable for me. You may download a free trial of Paint Shop Pro, version X2, from Corel. Any similarities between this tut and any others you may see are purely coincidental.

You will also need:

Animation Shop. This is from CNET, so it's a safe download. However, it costs. That changed pretty recently. I don't know why!!

HOWEVER!! .... a LOVELY person named solshne (and another named Chris) wrote to let me know that one might find Animation Shop for free at this location. This is an FTP link and I have no idea if it's safe or not. So keep your antivirus handy to scan it after download!

A tube of your choice. I'm using the fantastic artwork of Dominic Marco. You must have a license to use his artwork. You can get that license and art at C.I.L.M.

The scrap kit is by Grazy of Creation by Grazy. This is a PTU tagger-sized kit, available at Scraps With Attitude, and called Frightened Night.

Filters: Eye Candy 4000 > Gradient Glow, for the name only. Not essential for the tut, if you don't want it.

Font: I used Escrita.

Supplies: I'm using two masks on this one. I don't know from where I got either of them! So if someone out there recognizes one or both, let me know and I'll give credit where it's due. You can find these masks here.

Also, please, if you have problems with any download link for supplies, drop me a line via e-mail. Leaving a comment without a way for me to contact you back doesn't help. If you e-mail me, I'll send you the supplies.

Let's begin!

Open your masks and minimize in PSP. Alternatively, you could file them in your PSP masks file for use at a later date.

Open a new canvas, 800 x 700, white.

The pieces of this scrap kit are not named, but numbered. It got kind of confusing when I was copying things, so I will also refer to them as the names I labeled my layers to get me by.

Open 5, house. Copy and paste as a new layer. Drop shadow.

Open 28, the shorter, squatter grass. Resize 50%. Copy and paste as a new layer. Drop shadow.

Open 4, the tall grass. Resize 25%. Copy and paste as a new layer. Drop shadow.

Position these grasses, making the copies you feel you want there, along the bottom of the house. You'll want a couple of the tall grasses for the lamplight....

Open 36, the lamplight. Resize 10%. Copy and paste as a new layer. Position wherever you'd like it along the edge of the house. I duplicated mine and positioned another one by the right corner of the house. Merge down these two layers. Drop shadow the lamplights.

Now, the tall grasses in front of the lamplights, and sprinkled among the short grasses along the edge of the house, as you see fit. See my example for reference purposes, if you like.

Add your tube. Resize, position, and drop shadow to your taste.

Highlight your white background layer.

Open the paper labeled 10. Resize 800x800. Copy and paste as a new layer.

Apply the Halloween mask. Invert transparency!! Delete mask layer, answer "yes" to the pop-up question, and merge group. Apply the same mask again, again deleting the mask layer, saying "yes," yada-yada.

Now, apply mask FireCN. Delete the mask layer, answer "yes" to the pop-up question and merge group.

If you've done a few of my tuts, you know I don't like it when the edges of the finished product aren't feathered to white before the edges. I could NOT find a good way to do that with this tag, without taking completely away from the "ambiance" or "environment" of the tag. So I made this one exception! Sorry if you're anal about that, like me. I don't like it when I see the edges like that, but the overall results, I do like. So you can play with that all you like, and if you figure out a way that would work drop me a note!

Now, back to the tag...

Open 28, the ghost. Resize 50%. Position where you'd like it on your tag and drop shadow your ghost.

Open 37, the skeleton coming out of the concrete coffin. Resize 27%. Copy and paste as a new layer. Drop shadow.

Open 25, the pot. Resize 45%. Copy and paste as a new layer. I still think that pot looks a bit out of place, so if you think that too, you can try one of the other elements Grazy created in the kit. But, if you did select the pot, then...

Open 6, the contents of the pot. Resize 50%. Position on the top of the pot, so that it looks as if the pot is full and boiling. I did have to crop out a teeny portion of the contents "in" the pot to make it the right size.

Drop shadow your pot and its contents.

Open 9, the pumpkin. Resize 18%. Copy and paste as a new layer. I played around with places to put them, and found that around the railing on the porch was best for me. You can do it another way if you like. Duplicate the pumpkin and position it where you'd like it. Drop shadow both pumpkins. Merge the two pumpkin layers down.

Go to the top layer and add your name. I used color #4b3834 for the fill, #f86226 as the stroke, and stroke set at 2.

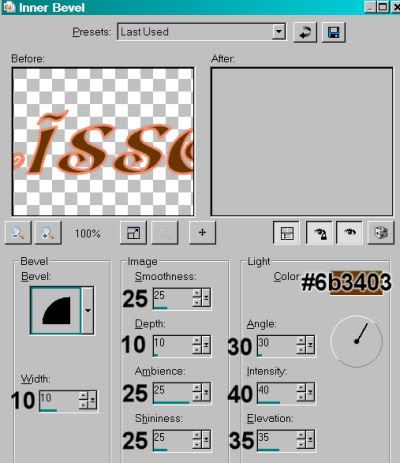
Effects > Eye Candy 4000 > Gradient Glow set at 3-0-100 in the color #fdba9f. I also added a slight bevel to the name, that's up to you.

Drop shadow your name.

You don't need to do this next part if you're not going to animate.

Now, grab your lasso tool, set on point-to-point, mode in add/shift. Scroll your mouse ball to zoom in on your lamplights. Draw a selection around the bulb area of the lamps... however many you like. I ended up with three on each lamplight.


Now, do the same thing on your pumpkins. Draw around their eyes and mouth.

DO NOT DESELECT!

Zoom back out and resize your canvas to a size with which you are comfortable.

Add your copyright, license information if applicable, and taggers'/watermark.

If you choose not to animate, you're now done, and you can merge your layers and save!


A N I M A T I O N

Highlight your pumpkin layer. Duplicate twice, for a total of three pumpkin layers.

Highlight your lamplight layer. Duplicate this twice as well, for a total of three lamplight layers.

I find it easiest when doing this to just start at the bottom, so highlight the bottom of the set of three of either one. We'll say, pumpkins.

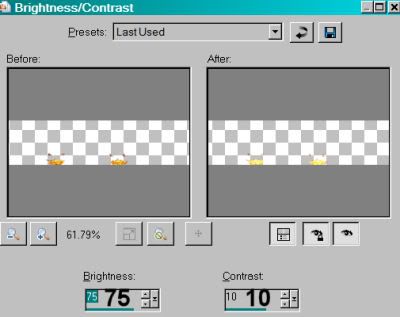
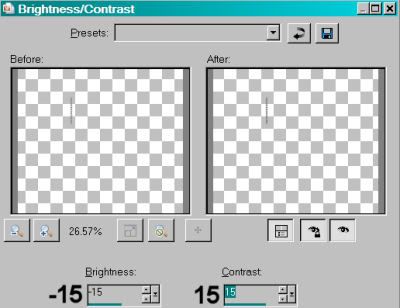
Adjust > Brightness and Contrast > Brightness/Contrast with the following settings:


Hit okay.

Now, highlight the bottom layer of the lamplights. Do the same thing with the brightness and contrast.

Highlight the middle layer of lamplights. Do the adjust brightness and contrast again, but this time change the first number to 50.

Now do that same thing to the middle pumpkin layer.

Highlight the top pumpkin layer. Adjust brightness and contrast again, but change the first number to 25.

Repeat on the lamplights, top layer.

Selections > Select none.

Now, close out the top two layers for both the lamplights and the pumpkins.

Actually, that's not necessarily so. If you want the flickering to NOT be in unison like in my example, close out different layers on, say, the pumpkin than you did the lamplight. Just keep track of what you're doing. Do it with all three layers of lamplights and pumpkins. Just choose one layer different than you have for the other set.

Geez, this sounds so dang weird as I type it. I sure hope you're understanding!

After you've closed out the two layers in each set that you've chosen....

Edit > Copy merged.

Open Animation Shop. Right-click on the desktop area and paste as a new animation.

Return to PSP. Close out the open layers in both the lamplight and pumpkin "sets." Open another one.

Edit > Copy merged.

Back to Animation Shop. Edit > Paste > After Current Frame.

Return again to PSP. Close out the open layers and open the layers you've not yet used.

Edit > Copy merged.

Again, back to Animation Shop. Edit > Paste > After Current Frame.

Edit > Select All.

Right-click on the top bar of your animation and choose "frame properties."

Change this number to 37.

View > Animation.

And we are done! I hope you could understand my meanderings on this one. I'm afraid I made a mess of it, while trying to put into words what I was thinking. Let me know if you're all "HUH?" on it! LOL.

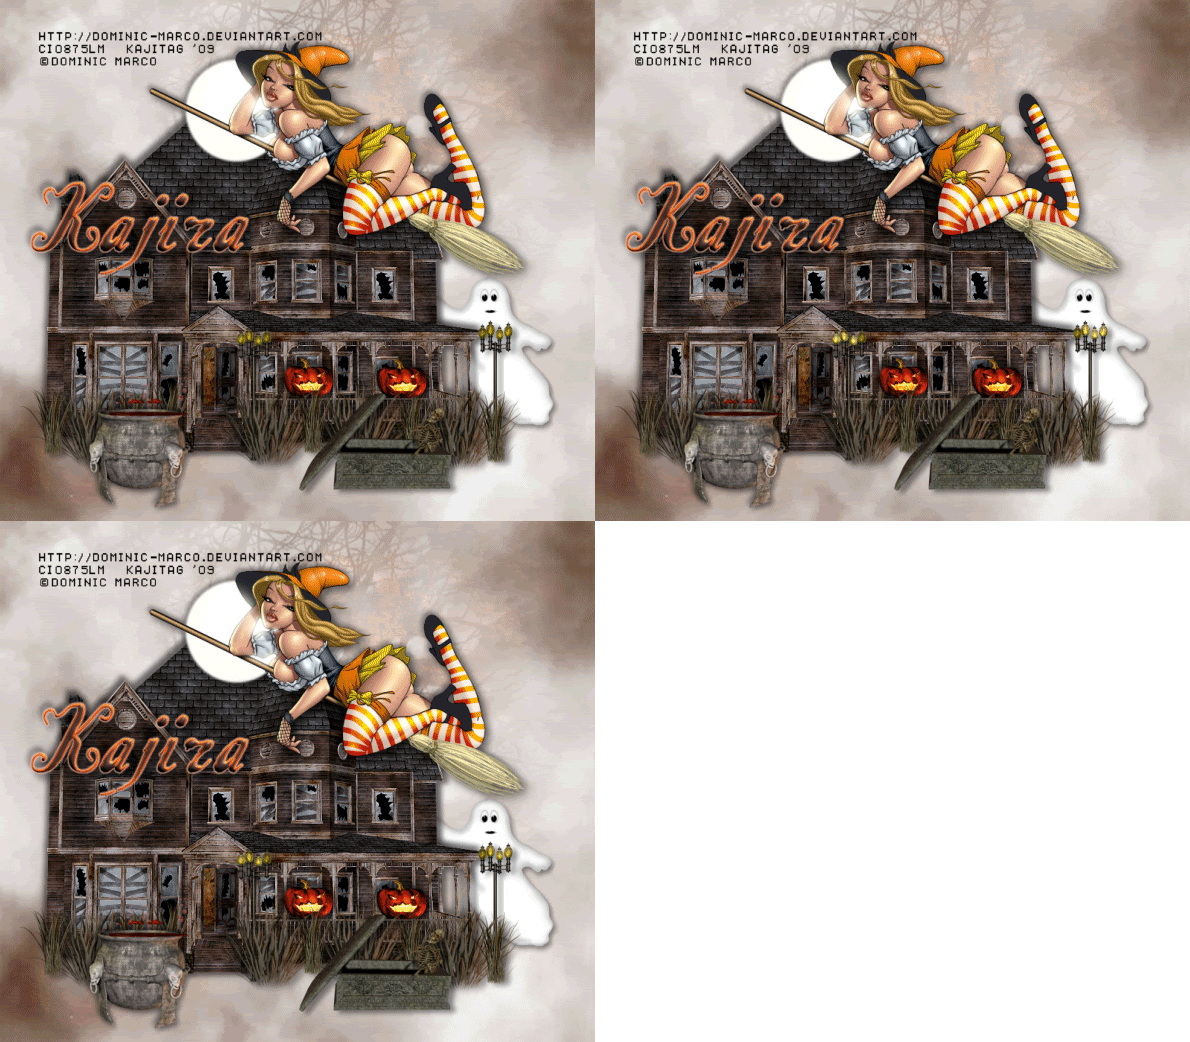
I've decided to add the one I made for myself, which shows a bit what you can accomplish by using the random layers in the animation, instead of going bottom, middle, top on both the lamplight and the pumpkin layers. It's very subtle, but it's there. If you're choosing to look at the bigger example, just click on this one. Just skip the top pic of the tool bar. That was for a different tut!

.


.

Monday, September 28, 2009

Dark & Spooky Night

.


[Click image above to go to full sized image.]


This tutorial was written on September 28, 2009, using Paint Shop Pro, version X.03. It should be okay to do with other versions as well. I just find X.03 more comfortable for me. You may download a free trial of Paint Shop Pro, version X2, from Corel. Any similarities between this tut and any others you may see are purely coincidental.

You will also need:

A tube of your choice. I'm using the fantastic artwork of Elias Chatzoudis. You must have a license to use his art. You may obtain that license and his art from My PSP Tubes.

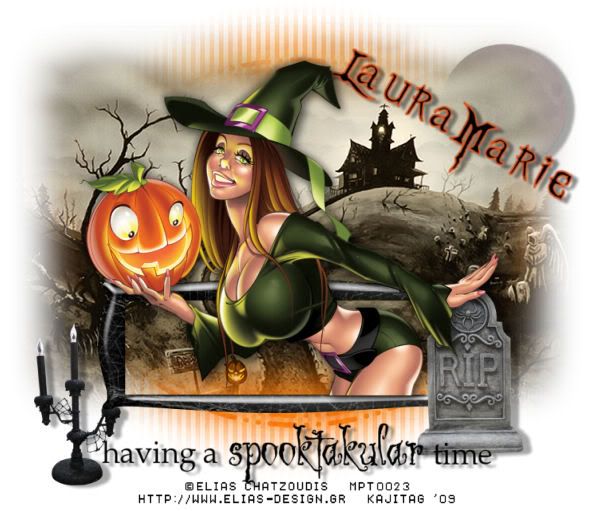
The scrap kit is by LauraMarie, from, of all things, LauraMarie Scraps! This is a FTU kit in a FULL SIZE, titled "Dark Night." Leave some love for the freebies!!

Supplies: You can find here. They include the mask, by Sophisticat Simone! A big thanks to Simone for sharing her great work! I'm also including the moon, the HauntedCreepyMtn file and the word art. I know the word art was done by Melissa, formerly of Scrappy Expressions. Not sure how to get in touch with her, but she's the one who did it! Great font, too -- wish I knew which one she used! The others, I have no knowledge about.

Filters: No outside filters used in this tut!

Font: I used Blood Omen.

Okay, let us begin! This one took me a while to finish, but it's not a difficult tut do... My power kept going off over the weekend, and I'd never saved it, any of the times the power blew. Today, re-building it, I saved it step-by-step!!!

Open your supplies in PSP and minimize. Alternatively, you could file them in with the rest of your PSP files for use at a later date. Totally up to you!

Open a new canvas, 800 x 700, white.

Remember, the scrap kit is full-sized, so the resizing is going to be major!

Open Spider Web Frame. Resize 16%. Copy and paste as a new layer. You can position this later. Helps to.....

Add your tube. Resize, position and drop shadow to your liking. I put mine as though she was popping out of that "frame." That was quite easy to do with this particular tube, but if yours happens to be a full body, then....

Highlight your frame layer. Grab your magic wand, and click inside the frame. Selections > Modify > Expand by 1. Selections > Invert.

Highlight your tube layer. Grab your eraser brush and delete the portions of your tube that you do not want showing at the bottom (and/or sides) of the frame.

Selections > Select none.

Highlight your white background.

Open paper7. Resize to 800 x 800. Copy and paste as a new layer.

Apply your mask. Delete mask layer, answer "yes" to the pop-up question, and merge group. Now, rotate your mask 90° either way.

Open your HauntedCreepyMtn. Copy and paste as a new layer. This should be below your tube and above your mask layer.

At this point, you can move your elements around to where they fit the best, according to your eye. Mine all came up a bit, I think it was. I used the pumpkins in the Haunted image as a focus point. I wanted at least one of them to show through the frame.

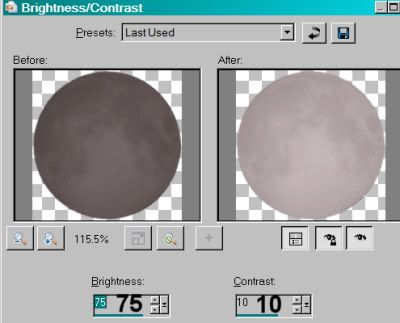
Open the moon. Change the "aura" of the moon by Adjust > Brightness and Contrast > Brightness/Contrast with the following settings:


Hit okay.

Move the moon to wherever you'd like, in relation to the tube, etc., that you're using. I put mine in the top right area of the canvas. I drug it down to under the HauntedCreepyMtn layer and above the mask layer. Drop shadow your moon.

Open the gravestone. Resize 10%. Copy and paste as a new layer. Position where you'd like it. I have it so it looks like my tube is trying to lean on it, or was just leaning on it, or something! For that reason, I have it, in the layer palette, below the tube. Drop shadow your gravestone.

Open the candles. Resize by 10%. Copy and paste as a new layer. Position where you'd like it. You can use my example for placement reference, if you like. Drop shadow your candles.

Open the word art. Copy and paste as a new layer. Position at the bottom center of your canvas. Again, you can use my example for placement reference if you want to. Drop shadow your word art.

Using your selection tool set on rectangle, crop out any of the excess white you feel just doesn't need to be in the finished product. (You may use the crop tool if you like. I never quite got the hang of that, and have always done the large selection, then gone Image > Crop to Selection.)

Go to the top layer and add your name. I used black for the fill and #d75625 for the stroke, stroke set at 2.

Rotate the name 30° right and place between your house and the moon, kinda-sorta. See my example to see what I mean. lol.

Drop shadow your name.

Resize your canvas to a size with which you're comfortable.

Add your copyright, license information if applicable, and taggers'/watermark.

Layers > Merge > and save! We are done!

Thanks for trying my tut!! I hope it was easy to understand and follow! Have a grrrrrreat day!

.

Friday, September 25, 2009

Witchy Woman

.


[Click image above to go to full sized image.]


This tutorial was written on September 25, 2009, using Paint Shop Pro, version X.03. It should be okay to do with other versions as well. I just find X.03 more comfortable for me. You may download a free trial of Paint Shop Pro, version X2, from Corel. Any similarities between this tut and any others you may see are purely coincidental.

You will also need:

Animation Shop. This is from CNET, so it's a safe download. However, it costs. That changed pretty recently. I don't know why!!

BUT..... a LOVELY person named solshne (and another named Chris) wrote to let me know that one might find Animation Shop for free at this location. This is an FTP link and I have no idea if it's safe or not. So keep your antivirus handy to scan it after download!

A tube of your choice. I'm using the fantastic artwork of Elias Chatzoudis. You must have a license to use his artwork. You can get that license and art at My PSP Tubes.

The scrap kit is by Brandi of Grunge & Glitter Scraps. This is a FTU *FULL SIZED* kit, called Trick or Treat. As always, leave thanks for the freebies!

Filters: Eye Candy 4000 > HSB Noise

Font: I used Halloween_ScriptanaREG.

Supplies: The mask. This is by Ali, of Designs By Ali. She seems now to have a store, a tut web site and a tut blog. I could not find her mask, so I left her a note in her chat box. But I thank you Ali for the verrrry useful mask!

Also, please, if you have problems with any download link for supplies, drop me a line via e-mail. Leaving a comment without a way for me to contact you back doesn't help. If you e-mail me, I'll send you the supplies.

Let's get it started! Let's get it started in here!! (LOL, care to dance?)

Open your mask and minimize in PSP. Alternatively, you could file it in your PSP masks file for use at a later date.

Open a new canvas, 700 x 750, white.

Open frame2. Resize 75%. Copy and paste as a new layer. I moved mine up a bit, it's up to you. Remember, if you move your frame up, you might need to move the mask down a bit. I've covered it, below.

Add your tube. Resize, position, and drop shadow to your taste.

Highlight your frame layer. Grab your magic wand, and click inside the center of the frame. Selections > Modify > Expand by 1. Selections > Invert.

Highlight your tube layer. Grab your eraser brush and erase any of the tube that overhangs the bottom of the frame.

Selections > Select none.

Highlight your white background layer.

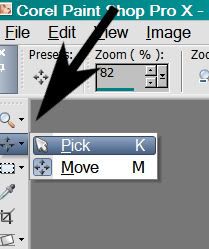
Open paper2. Copy and paste as a new layer. I needed the pick tool


To stretch the paper to fill the top and bottom of the canvas.

Apply your mask. Delete mask layer, answer "yes" to the pop-up question, and merge group.

I moved my mask down just a bit. And to keep the bottom part of the mask from butting up to the bottom of the tag....

Grab your lasso tool, set on freehand. Feather set to 17.

Be sure you're on your mask layer. Draw a curve from left to right, curve going downward, and then bring the line back, below the area of the first curve. It should look like a smile, of sorts.

Hit delete. Selections > Select none.

Open feltghost. Resize 35%. Copy and paste as a new layer. I chose to put mine behind my tube, in the upper right corner. See my example for placement reference. Drop shadow your ghost.

Open button3. Resize 20%. Copy and paste as a new layer. I put mine on the right side of the frame. See my example for placement reference. Drop shadow your button.

Open feltkitty. Resize 35%. Copy and paste as a new layer. I put mine on the bottom left of the canvas area. Again, see my example if you wish. Drop shadow your kitty.

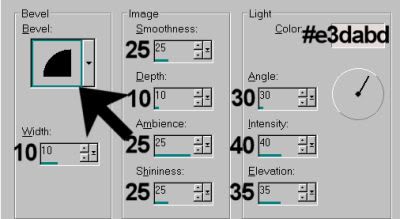
Go to your top layer and add your name. I used color #7926b5 for the fill and #eb4305 for the stroke, stroke set at 3.

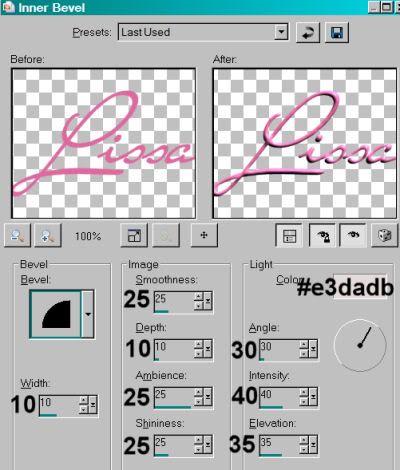
I then added a small a bevel as follows:


Drop shadow your name.

Resize your canvas to a size with which you are comfortable.

Add your copyright, license information if applicable, and taggers'/watermark.

If you choose not to animate, you're now done, and you can merge your layers and save!


A N I M A T I O N


Highlight your mask layer. Duplicate twice, for a total of three mask layers.

Highlight your bottom mask layer.

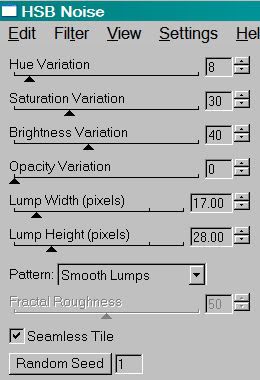
Effects > Eye Candy 4000 > HSB Noise with the following settings:


Hit okay.

Highlight the middle mask layer.

Add HSB Noise again, this time hitting "Random Seed" once.

Hit okay.

Now, on the top mask layer. Add HSB Noise one last time, again hitting "Random Seed."

Hit okay.

Close out the top two mask layers, leaving the bottom mask layer open.

Edit > Copy Merged.

Open Animation Shop. Right-click on the desktop area and paste as a new animation.

Return to PSP. Close out the bottom mask layer and open the middle mask layer.

Edit > Copy merged.

Back to Animation Shop. Edit > Paste > After Current Frame.

Return again to PSP. Close out the middle mask layer and open the top mask layer.

Edit > Copy merged.

Again, back to Animation Shop. Edit > Paste > After Current Frame.

Edit > Select All.

Right-click on the top bar of your animation and choose "frame properties."

Change this number to 35.

View > Animation.

And we are done! I hope you enjoyed this tutorial! Thank you for stopping by!!

.
Thursday, September 24, 2009

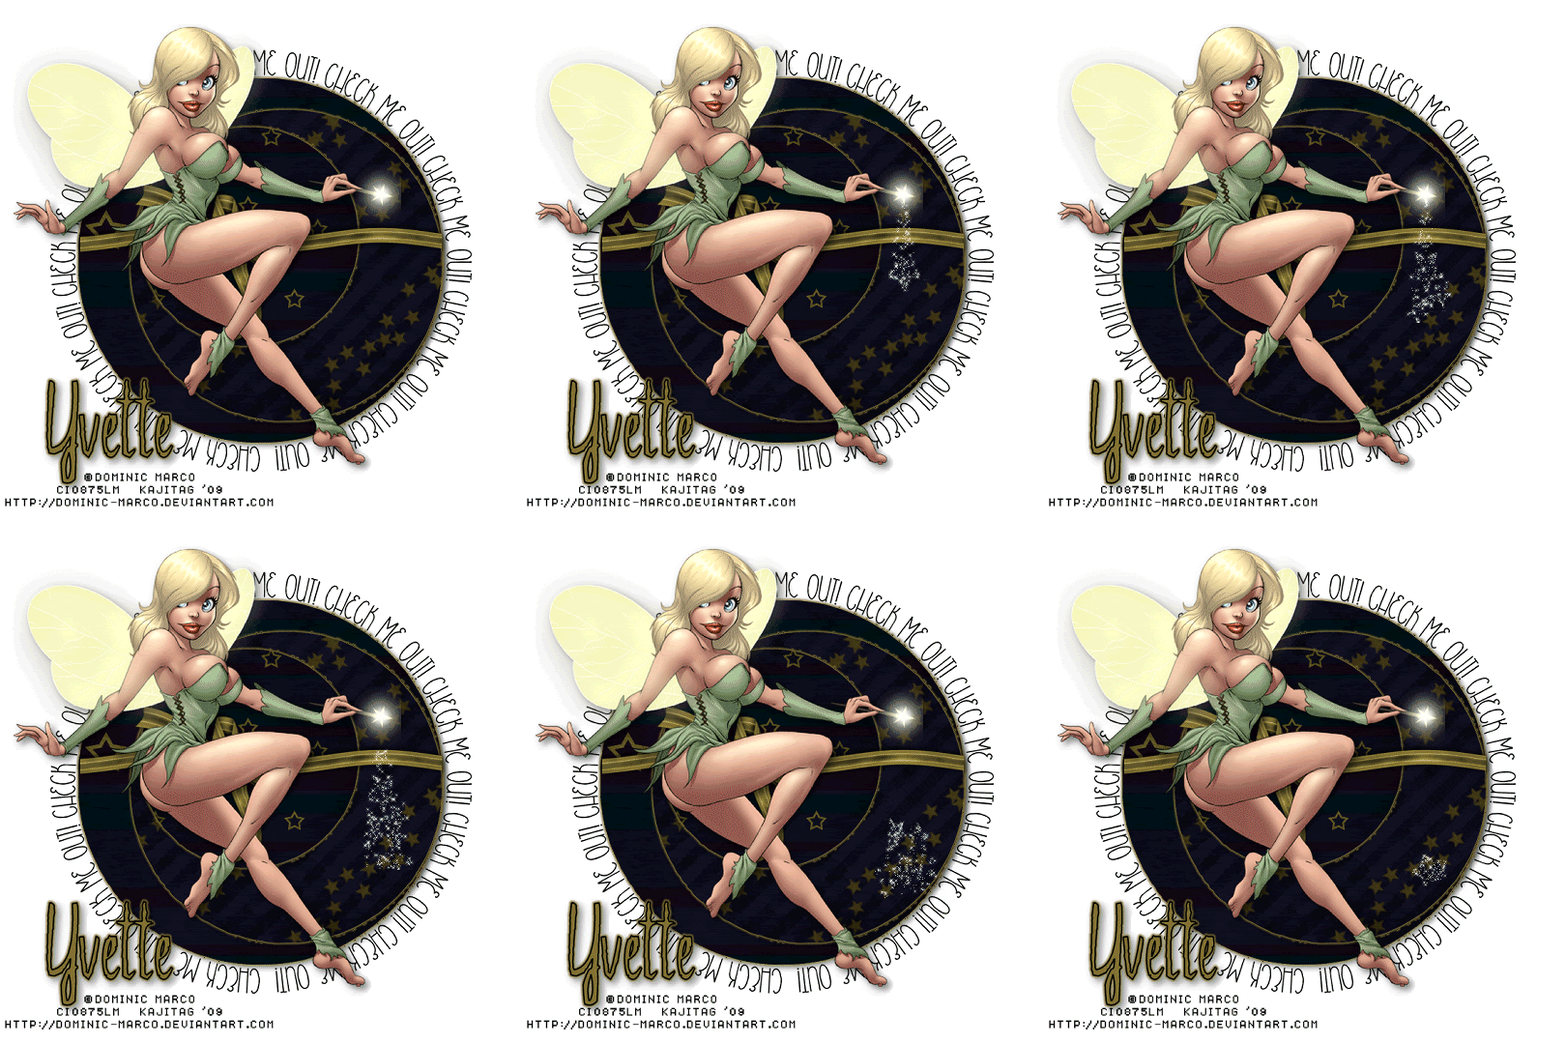
Check Me Out!

.


[Click image above to go to full sized image.]


This tutorial was written on September 15, 2009, using Paint Shop Pro, version X.03. It should be okay to do with other versions as well. I just find X.03 more comfortable for me. You may download a free trial of Paint Shop Pro, version X2, from Corel. Any similarities between this tut and any others you may see are purely coincidental.

You will also need:

Animation Shop. This is from CNET, so it's a safe download. However, it costs. That changed pretty recently. I don't know why!!

BUT..... a LOVELY person named solshne wrote to let me know that one might find Animation Shop for free at this location. This is an FTP link and I have no idea if it's safe or not. So keep your antivirus handy to scan it after download!

A tube of your choice. I used the fun, sex art of Dominic Marco. You must have a license to use his art. You may obtain that license and his art from C.I.L.M.

The scrap kit is by Lissa, from Lissa E Designz. This is a FTU kit, called Midnight Star. This is in the third row, first kit.

Supplies: I've supplied the template, by Yvette. Thank you again, Yvette! You're the best! (Among many....) This is Template 66. Scroll aaallllll the way down (I'm viewing her site with Firefox, and she states quite obviously it's best viewed in IE. So at least for Firefox, it's aaallllll the way down) to the bottom of the page and she lists the links to all her templates. I've also supplied the bling. These supplies may be found here!

Filters: No outside filters used in this tut!

Font: I used BeautySchoolDropoutII.

Let us begin, then, shall we??

Open the template in PSP. File the bling to where it will be handy when we get to Animation Shop.

Window > Duplicate your template. Close out the original. Delete the copyright layer.

Resize for a working area of your choice.

Highlight Raster1. Open Paper10. Copy and paste as a new layer. Position your paper so that the amount of stars you'd like showing ..... will show within the circle.

Back to Raster1.

Selections > Select All. Selections > Float. Selections > Defloat. Selections > Modify > Smooth > Both boxes, checked, 10 in each box. Selections > Invert.

Highlight your paper10 layer. Hit delete. Selections > Select none.

Delete the template circle.

Repeat this process with the other two circle layers. For Raster2, I used Paper1 and rotated it 45° right. For Raster3, I used Paper10 again.

Delete the original circle layers.

I added a Gradient Glow of 4 - 0 - 100, color #837435 to each circle. I then added a drop shadow to each circle -- even though they're all black and you can't really see it. lol. Dunno if it makes a difference or not!

Open LargeBowWrapGold. Resize 50%. Position where you'd like it in relation to the circles. I used my pick tool


to stretch the ribbon out on both sides, so it fit the circles the way I liked it. Drop shadow your Bow Wrap.

Add your tube. Resize, position and drop shadow to your liking.

On your top layer, add your name. I again used color #837435 for the fill, black for the stroke, stroke set at 2. I then again added the same Gradient Glow as we used above. Drop shadow your name.

Add your copyright, license information if applicable, and taggers'/watermark.

A N I M A T I O N

Edit > Copy merged

Open Animation Shop, right-click on the desktop area and paste as a new animation.

Duplicate this frame until you have a total of 21 frames. Move your slider at the bottom back to the first frame.

Locate and open your bling. Edit > Select All. Edit > Copy

Return to your animation that you're building and Edit > Select All. Edit > Paste into Selected Frame.

Hover your mouse until the tip of the bling appears. If you have a tube like mine with a wand or glowing tip of some kind, move the tip of the bling over the wand and release your mouse button.

If you're not using a similar-type tube, go your own way! :)

Animation > Resize Animation > Size the finished product to a size with which you're comfortable.

View > Animation. Save as .gif and, voila once more! We are done!! Thanks for taking it on! I hope you enjoy your results!


.

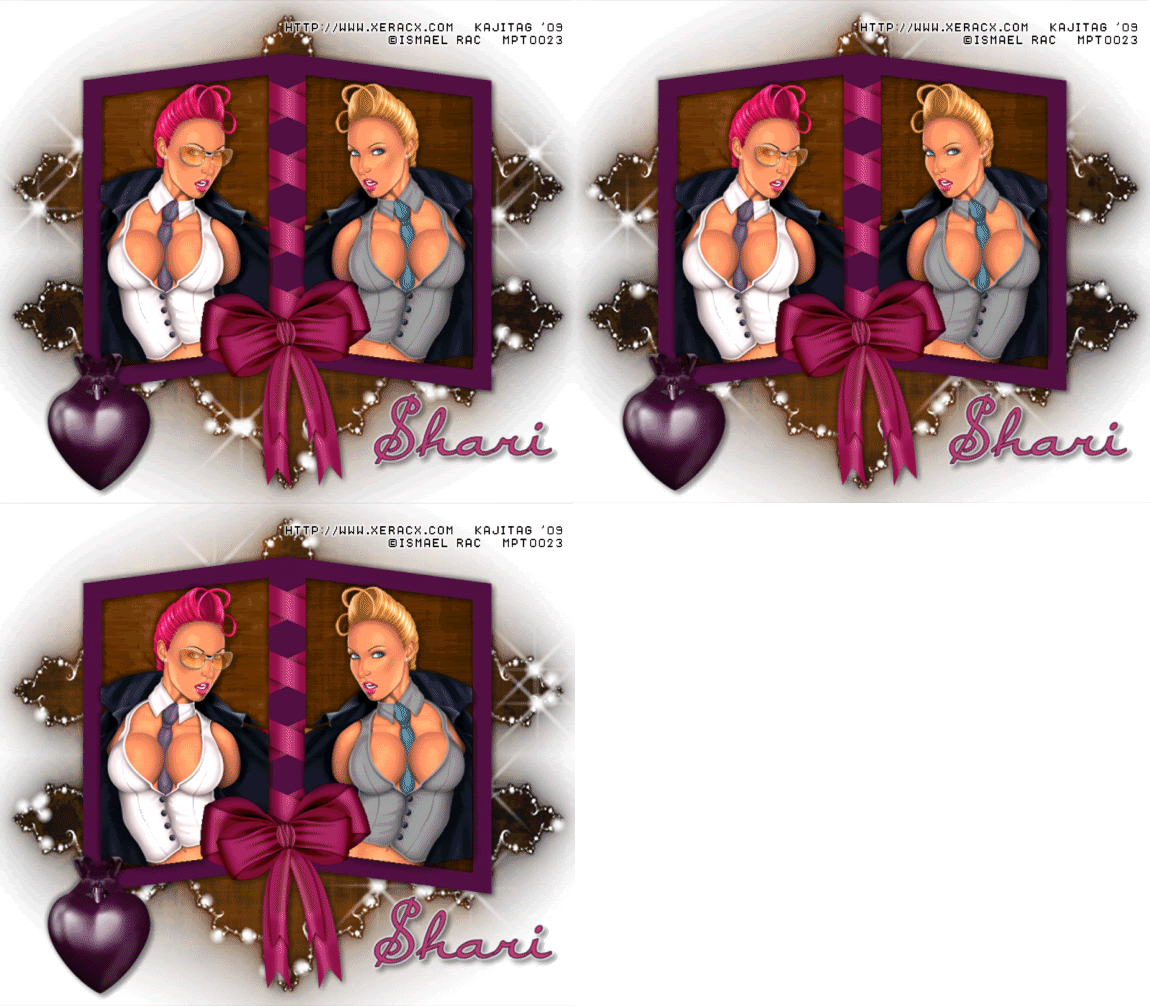
Trouble Twins

.


[Click image above to go to full sized image.]


This tutorial was written on September 15, 2009, using Paint Shop Pro, version X.03. It should be okay to do with other versions as well. I just find X.03 more comfortable for me. You may download a free trial of Paint Shop Pro, version X2, from Corel. Any similarities between this tut and any others you may see are purely coincidental.

You will also need:

Animation Shop. This is from CNET, so it's a safe download. However, it costs. That changed pretty recently. I don't know why!!

BUT..... a LOVELY person named solshne wrote to let me know that one might find Animation Shop for free at this location. This is an FTP link and I have no idea if it's safe or not. So keep your antivirus handy to scan it after download!

A tube (or two) of your choice. I'm using the great art of Ismael Rac. You must have a license to use his artwork. You can get that license and art at Artistic Minds, Inc. (I have used my MPT license with this one, as Ismael was with MPT when I bought these tubes.)

The scrap kit is by Shari of Shari Ez's Scrapez Scrap Kits. This is a FTU *FULL SIZED* kit, called Grunge. This is part of a collaberation called, apparently, "Total Disorder Blog Train." As always, leave thanks for the freebies!

Filters: Xenofex 2 > Constellation

Font: I used BayernHandschriftNF.

Supplies: The mask, again by from the great mask-maker, Essex Girl! A great big thanks for these great masks!

Also, please, if you have problems with any download link for supplies, drop me a line via e-mail. Leaving a comment without a way for me to contact you back doesn't help. If you e-mail me, I'll send you the supplies.

Let's get this started!

Open your mask and minimize in PSP. Alternatively, you could file it in your PSP masks file for use at a later date.

Open a new canvas, 800 x 700, white.

Open doublewrappedframe1. Resize 25%. Copy and paste as a new layer.

Add your tubes. Resize, position, and drop shadow each tube to your taste.

Highlight your frame layer. Grab your magic wand, and click inside both open areas of the frame. Selections > Modify > Expand by 1. Selections > Invert.

Highlight one of your tube layers. Hit delete. Highlight your next tube layer. Hit delete.

Selections > Select none.

Highlight your white background layer.

Open grungebkg3. Resize to 800x800. Copy and paste as a new layer. Twice (two layers of grungebkg3).

Highlight your frame layer again. Click inside each area of the frame with your magic wand. Selections > Modify > Expand by 10. Selections > Invert.

Highlight your top layer of grungebkg3. Hit delete. Selections > Select none.

Highlight the next grungebkg3 layer. Apply your mask. Delete mask layer, answer "yes" to the pop-up question, and merge group.

Open hearthanger1. Resize 35%. Copy and paste as a new layer. Position where you'd like it. I chose the bottom left corner of the double frame. Drop shadow.

Drop shadow your frame.

Go to your top layer and add your name. I used color #c4407a for the fill and #58284c for the stroke, stroke set at 2.

I then added a small Gradient Glow of 3 - 0 - 100, color white. Drop shadow your name.

Resize your canvas to a size with which you are comfortable.

Add your copyright, license information if applicable, and taggers'/watermark.

If you choose not to animate, you're now done, and you can merge your layers and save!


A N I M A T I O N


Highlight your mask layer. Duplicate twice, for a total of three mask layers.

Highlight your bottom mask layer.

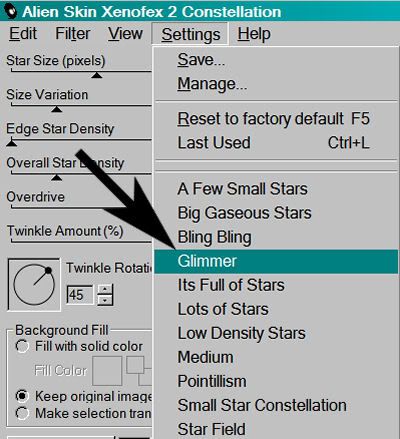
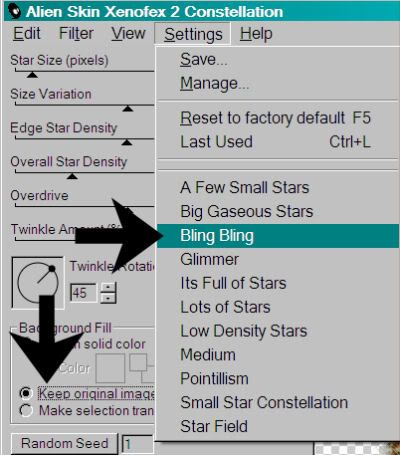
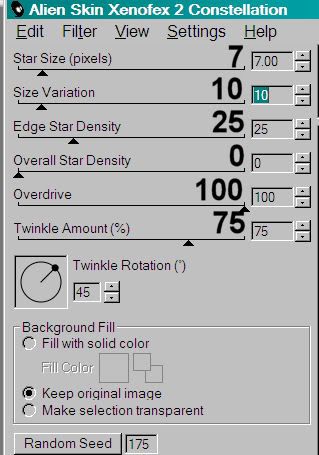
Effects > Xenofex 2 > Constellation set at Glimmer:


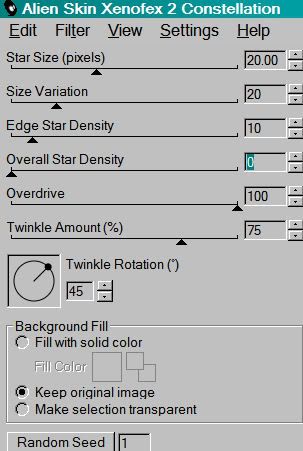
With the following settings:


Hit okay.

Highlight the middle mask layer.

Add Constellation again, this time hitting "Random Seed" once.

Hit okay.

Now, on the top mask layer. Add Constellation one last time, again hitting "Random Seed."

Hit okay.

Close out the top two mask layers, leaving the bottom mask layer open.

Edit > Copy Merged.

Open Animation Shop. Right-click on the desktop area and paste as a new animation.

Return to PSP. Close out the bottom mask layer and open the middle mask layer.

Edit > Copy merged.

Back to Animation Shop. Edit > Paste > After Current Frame.

Return again to PSP. Close out the middle mask layer and open the top mask layer.

Edit > Copy merged.

Again, back to Animation Shop. Edit > Paste > After Current Frame.

Edit > Select All.

Right-click on the top bar of your animation and choose "frame properties."

Change this number to 27.

View > Animation.

Et, voila, we are done! I hope you enjoyed doing this tutorial, and I thank you for stopping by!!

.
Wednesday, September 23, 2009

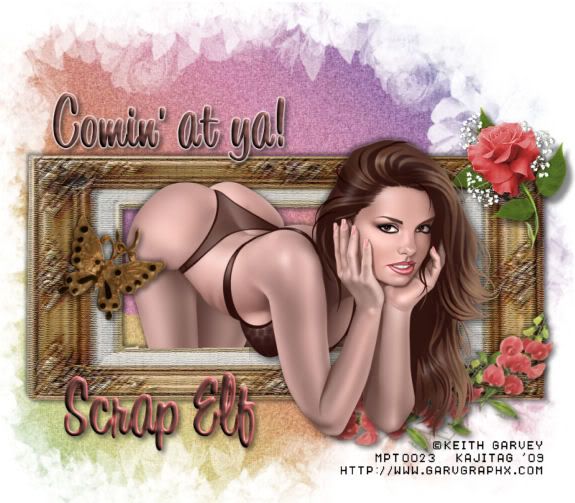
Comin' At Ya'!

.


[Click image above to go to full sized image.]


This tutorial was written on September 14, 2009, using Paint Shop Pro, version X.03. It should be okay to do with other versions as well. I just find X.03 more comfortable for me. You may download a free trial of Paint Shop Pro, version X2, from Corel. Any similarities between this tut and any others you may see are purely coincidental.

You will also need:

A tube of your choice. I'm using the fantastic artwork of Keith Garvey. You must have a license to use his art. You may obtain that license and his art from My PSP Tubes.

The scrap kit is by ScrapElf, from, of all things, Scrap Elf! This is a FTU kit in her shop, titled "Truely." You will have to register to get it, but it *is* free, so.... as always, leave thanks for the free stuff!

Supplies: The mask, from the great mask-maker, Essex Girl! Once again, a big thanks to her for these great masks! I'm also including the curved garland of begonias and the rose. The begonias are by Cari Lopez, from her scrap kit of 2007 titled Begonia's Garden. You'll see there that there is (or was, I haven't tried it) a freebie frame to go with it, too. The scrap kit is no longer available, either, so that's why I thought it would be okay to share it with you separately. For the rose, I'm afraid, I was unable to find the artist. If you know who it is, or it's YOU, let me know, so that I might give you credit!

Filters: Eye Candy 4000 > Gradient Glow

Font: I used 1 BeanSprout DNA.

Open your supplies in PSP and minimize. Alternatively, you could file them in with the rest of your PSP files for use at a later date. Totally up to you!

Okay, let us begin! This one took me a while to build, but I don't think the tut will be that difficult to do... There was a tutorial like this (with the tube kneeling, popping out of a long skinny frame) when I first started following tuts, and I really liked it. So, though I don't remember that author, this is a tribute to her! I hope YOU like it!

(It's also the first time I've volutarily used a brunette instead of blondes, without a holiday dictating the hair colors. Just HAD to use this tube with this frame!)

Open a new canvas, 800 x 700, white.

Open element 10. Resize 50%. Copy and paste as a new layer.

Add your tube. Resize, position and drop shadow to your liking.

Highlight your frame layer. Grab your magic wand, and click inside the frame. Selections > Modify > Expand by 1. Selections > Invert.

Highlight your tube layer. Grab your eraser brush and delete the portions of your tube that you do not want showing at the bottom (and/or sides) of the frame.

Selections > Select none.

Highlight your white background.

Open background2. Resize to 800 x 800. Copy and paste as a new layer.

Once again, highlight the frame layer. Click inside the frame with your magic wand. Selections > Modify > Expand by 5. Selections > Invert.

Highlight your background2 layer. Hit delete. Selections > Select none.

Sorry for the repetition, but again highlight the white background layer.

Again, open background2. I'm presuming you saved it at 800x800. If not, resize again. Copy and paste as a new layer. Rotate 90° either way.

Apply your mask. Delete mask layer, answer "yes" to the pop-up question, and merge group.

Open Garden embell2. Rotate 45° right. Position in the bottom right corner of your frame.

Open FRubyR. Copy and paste as a new layer. Position in the top right corner of your frame.

Drop shadow all your flowers! :)

Open element 3. Resize 15%. Copy and paste as a new layer. Rotate 20° right. Position on the inside, left area of your frame. Drop shadow.

Drop shadow your frame.

Go to the top layer and add your name. I used color #6b4742 for the fill and #cc6265 for the stroke, stroke set at 2.

Choose the text you'd like to use. Since this one POPS so well out of the frame, I chose "Comin at ya!"

Effects > Eye Candy 4000 > Gradient Glow with settings 3 - 0 - 100, color white.

Drop shadow your text and your name.

Resize your canvas to a size with which you're comfortable.

Add your copyright, license information if applicable, and taggers'/watermark.

Layers > Merge > and save! We are done!

Thanks for trying my tut!! I hope it was easy to understand and follow! Have a grrrrrreat day!

.

Sorry Everyone!!

It seems as if images aren't loading, neither from my back-up site nor Photobucket for the screen shots. I don't know what the problem is, and don't know how long it will be a problem. I'm so sorry!! It seems to be out of my control. Let's all throw positive vibes to the ether, to make this blog load, okay????

Tuesday, September 22, 2009

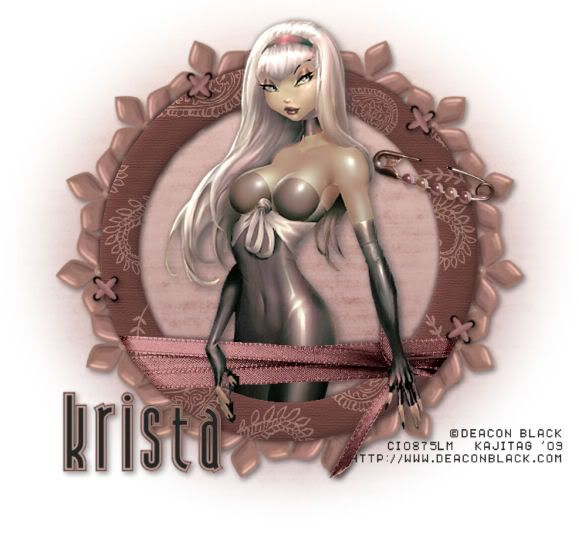
Sensual Magic

.


[Click image above to go to full sized image.]


This tutorial was written on September 14, 2009, using Paint Shop Pro, version X.03. It should be okay to do with other versions as well. I just find X.03 more comfortable for me. You may download a free trial of Paint Shop Pro, version X2, from Corel. Any similarities between this tut and any others you may see are purely coincidental.

You will also need:

A tube of your choice. I'm using the great artwork of Deacon Black. The URL I put on my tag must be incorrect, as that site no longer exists. CILM just references themselves, so... You must have a license to use his artwork. You can get that license and art at CILM.

Scrap kit is by Krista, of Rainy Day Scraps. This is a FTU mini kit, called Just Paisley. Be sure to leave your thanks to Krista for the freebie sharing!!

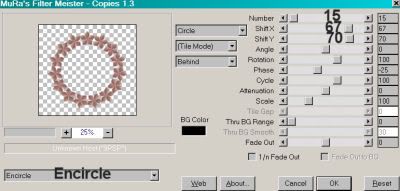
Filters: Mura's Meister > Copies

Font: I used Andiron Outline.

Supplies: The mask. This one also is by Wee Scots Lass. She still has all her masks there, right on the front page. So if you'd like her collection, there you go! Be sure to thank her for her generosity!

Let's get this started!

Open your mask and minimize in PSP. Alternatively, you could file it in your PSP masks file for use at a later date.

Open a new canvas, 750 x 700, white.

Open Frame1. Copy and paste as a new layer.

Add your tube. Resize, position, and drop shadow to your taste.

Highlight your frame layer. Grab your magic wand, and click inside the frame. Make sure you get both sections, above and below the bow wrap on the frame! Selections > Modify > Expand by 1. Selections > Invert.

Highlight your tube layer. Grab your eraser brush and delete the portions of your tube that you do not want showing at the bottom of the frame. In my case, I wanted her hands showing (again, I must have some kinda weird "thing" for hands lol), so reduced the size of my eraser brush to get in and around all the nooks and crannies. :)

Selections > Select none.

Highlight your white background layer.

Open Paper7. Copy and paste as a new layer. Using your pick tool,


... stretch the paper out at the sides so it fills your canvas.

Apply your mask. Delete the mask layer, answer "yes" to the pop-up question, and merge group. I found that I preferred the mask after moving it up a little, then resizing it by 105%. Up to you!

Highlight your top layer. Open Flower3. Resize 50%. Copy and paste as a new layer.

Effects > Mura's Meister > Copies with the following settings:


Hit okay.

Draw this layer down below your frame layer, and above your mask layer. Drop shadow.

Drop shadow your frame here, too.

Open the BeadedSafetyPin. Copy and paste as a new layer. Rotate about 15° right. Position on your frame as you would like it.

Grab your lasso tool, set on point-to-point. Draw a small section around the top area of the safety pin, and hit delete. This helps make it look like it's pinned to the frame. Drop shadow the safety pin.

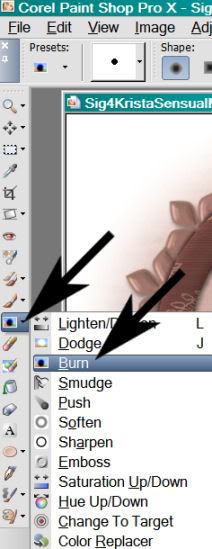
Here is where I used my burn brush. You can leave this off if you want, but I like it when I'm using pins.


With these settings


[click on the above pic to get a larger size]

Now, with the burn brush, click a few times at each edge of the safety pin, where it goes "into" the frame. This will give it much more of a realistic look.

Open CrossStitch 3. Copy and paste as a new layer. I positioned mine so they look (I hope) like they're attaching the frame to the background circle we created. Position yours as you like. Duplicate this layer and move them around to where you'd like them. Merge all these layers down and drop shadow your cross stitches.

Go to your top layer and add your name. I used color #242525 for the fill and #b78b7e for the stroke, stroke set to 1.

Drop shadow your name.

Resize your canvas to a size with which you are most comfortable.

Add your copyright, license info if applicable, and taggers'/watermark.

Layers > Merge > and save! We are done!

Thanks for trying my tut!! Have a great day!

.

Monday, September 21, 2009

Portrait

.


[Click image above to go to full sized image.]


This tutorial was written on September 13, 2009, using Paint Shop Pro, version X.03. It should be okay to do with other versions as well. I just find X.03 more comfortable for me. You may download a free trial of Paint Shop Pro, version X2, from Corel. Any similarities between this tut and any others you may see are purely coincidental.

You will also need:

Animation Shop. This is from CNET, so it's a safe download. However, it costs. That changed pretty recently. I don't know why!!

Okay, so.... a LOVELY person named solshne wrote to let me know that one might find Animation Shop for free at this location. This is an FTP link and I have no idea if it's safe or not. So keep your antivirus handy to scan it after download!

A tube of your choice. I'm using the glamorous artwork of Jennifer Janesko. You must have a license to use her artwork. You can get that license and art at CILM.

Scrap kit is again by Lissa, of Lissa E Designz. This is a FTU kit, called Mint Mayhem. Be sure to leave your thanks for the freebies!! Again, this is one in the set of seven she posted as a freebie, so as always, leave thanks for the free stuff! This one's the third row down, second kit. This is the last kit from here for me for a while!!

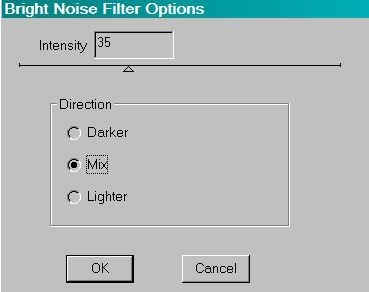
Filters: Eye Candy 4000 > Gradient Glow, dsb Flux > Bright Noise

Font: I used Beau Rivage One.

Supplies: The mask, again by Wee Scots Lass. She has a lot of masks there, right on the front page. So if you'd like her collection, there you go! Be sure to thank her for her generosity!

Also, please, if you have problems with any download link for supplies, drop me a line via e-mail. Leaving a comment without a way for me to contact you back doesn't help. If you e-mail me, I'll send you the supplies.

Okay let's begin!!

Open your mask in PSP and minimize. Alternatively, you could file it in your PSP masks file for use at a later date. Totally up to you!

Okay, let us begin! This one's not too ornate at all....

Open a new canvas, 700 x 800, white.

Open Frame1. Rotate 90° right. Resize 85%. Copy and paste as a new layer.

Add your tube. Resize, position and drop shadow to your liking.

Highlight your frame layer. Grab your magic wand, and click inside the frame. Selections > Modify > Expand by 1. Selections > Invert.

Highlight your tube layer. Grab your eraser brush and delete the portions of your tube that you do not want showing at the bottom (and/or sides) of the frame.

Selections > Select none.

Highlight your white background layer.

Open Paper7. Copy and paste as a new layer.

Apply your mask. Delete mask layer, answer "yes" to the pop-up question, and merge group.

Highlight your frame layer.

Open GemDoodle1. Copy and paste as a new layer. Position on the top right corner of your frame. See my example for placement reference, if you like. Duplicate this layer. Image > Mirror, Image > Flip. Merge these two layers down.

Go to the top layer and add your name. I used color #3c3c3c for the fill and stroke, stroke set at 2.

Effects > Eye Candy 4000 > Gradient Glow with settings 4 - 25 - 100, color #429e9d.

Add an extra Gradient Glow in white.

Drop shadow your name. I rotated mine 25° left and positioned on the bottom right corner of the frame. (On the layer palette, the name layer is just below the GemDoodle layer.)

Resize your tag to a size with which you are comfortable.

Add your copyright, license information if applicable, and taggers'/watermark.

If you choose not to animate, you can merge your layers here and be done! Congrats!

A N I M A T I O N

Highlight your GemDoodle layer. Duplicate three times, for a total of four GemDoodle layers.

Concentrate now on the bottom GemDoodle layer.

Effects > dsb Flux > Bright Noise with the following settings:


Hit okay.

Move up to the next GemDoodle layer. Again, add Bright Noise, but change the intensity to 37. Hix mix a couple times.

Hit okay.

Move up to the next GemDoodle layer. Adding Bright Noise again, but this time change the intensite to 40. Hit mix a couple times.

Hit okay.

Now, on the top GemDoodle layer. Add Bright Noise again, with the intensity at 42 and hit mix a time or two for the last time.

Hit okay.

Close out the top three GemDoodle layers, leaving the bottom GemDoodle layer open.

Edit > Copy Merged.

Open Animation Shop. Right-click on the desktop area and paste as a new animation.

Return to PSP. Close out the bottom GemDoodle layer and open the next GemDoodle layer up.

Edit > Copy merged.

Back to Animation Shop. Edit > Paste > After Current Frame.

Return again to PSP. Close out the open GemDoodle layer and open the next GemDoodle layer up.

Edit > Copy merged.

Again, back to Animation Shop. Edit > Paste > After Current Frame.

One last time, return to PSP. Close out the open GemDoodle layer and open the top GemDoodle layer.

Edit > Copy Merged.

Finally, back to Animation Shop. Edit > Paste > After Current Frame.

View > Animation.

Et, voila, we are done! I hope you enjoyed doing this tutorial, and I thank you for stopping by!!

.
Saturday, September 19, 2009

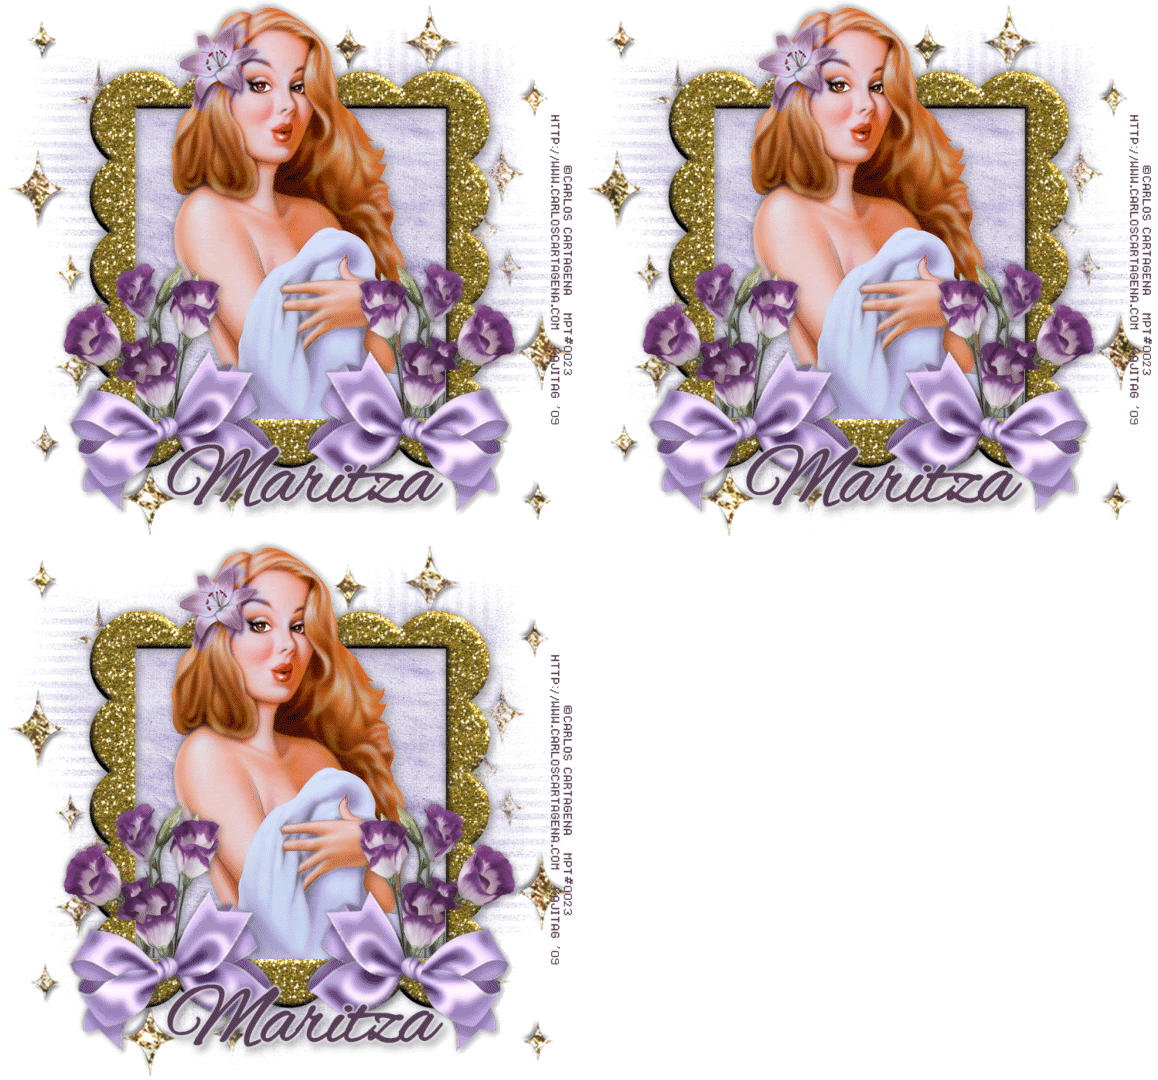
Soft Violet

.

[PLEASE NOTE!! IT WAS BROUGHT TO MY ATTENTION THAT THE SCRAP KIT USED IN THIS TUTORIAL IS NO LONGER AVAILABLE. THE ENTIRE BLOG HAS DISAPPEARED. I'M SURE THERE ARE OTHER KITS YOU MAY HAVE THAT WILL DO NICELY FOR THIS TUT, IF YOU TRY!!! SORRY ABOUT THAT, AND 'THANK YOU' ELLIE FOR BRINGING THIS TO MY ATTENTION!]


'


[Click image above to go to full sized image.]


This tutorial was written on September 11, 2009, using Paint Shop Pro, version X.03. It should be okay to do with other versions as well. I just find X.03 more comfortable for me. You may download a free trial of Paint Shop Pro, version X2, from Corel. Any similarities between this tut and any others you may see are purely coincidental.

You will also need:

Animation Shop. This is from CNET, so it's a safe download. However, it costs. That changed pretty recently. I don't know why!!

Okay, so.... a LOVELY person named solshne wrote to let me know that one might find Animation Shop for free at this location. This is an FTP link and I have no idea if it's safe or not. So keep your antivirus handy to scan it after download!

A tube of your choice. I'm using the great art of Carlos Cartagena. You must have a license to use his artwork. You can get that license and art at My PSP tubes.

Scrap kit is by Maritza, of Scrappy Lover Scraps. This is a FTU kit, and I don't believe it actually has a name! You can find it here. Be sure to leave your thanks for the freebies!!

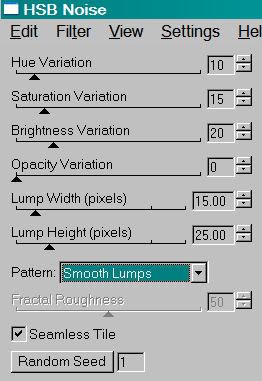
Filters: Eye Candy 4000 > Gradient Glow, Eye Candy 4000 > HSB Noise

Font: I used Alex Brush.

Supplies: The mask, again by Wee Scots Lass. She has a lot of masks there, right on the front page. So if you'd like her collection, there you go! Be sure to thank her for her generosity!

Also, please, if you have problems with any download link for supplies, drop me a line via e-mail. Leaving a comment without a way for me to contact you back doesn't help. If you e-mail me, I'll send you the supplies.

Okay let's begin!!

Open your mask in PSP and minimize. Alternatively, you could file your mask into your masks file, for use in the future. It is, of course, up to you!

Open a new image, 750 x 700, white.

Open Frame2. Resize 65%. Copy and paste as a new layer. Add the following bevel:


Add your tube. Resize, position, and drop shadow to your taste.

Highlight your frame layer. Grab your magic wand, and click inside the frame. Selections > Modify > Expand by 1. Selections > Invert.

Highlight your tube layer. Grab your eraser brush and delete the portions of your tube that you do not want showing at the bottom of the frame.

Selections > Select none.

Drop shadow your frame.

Open Flowers. Resize 65%. Copy and paste as a new layer. Move to the bottom left of your frame. Duplicate this layer. Image > Mirror. Merge down these two layers and drop shadow.

Open Bow4. Resize 65%. Rotate 20° left. Copy and paste as a new layer. Position over the bottom of your left flowers tube. Duplicate this layer, and Image > Mirror. Merge these two layers down and drop shadow.

Highlight your white background.

Open Paper7. Copy and paste as a new layer.

Apply your mask. Delete mask layer, answer "yes" to the pop-up question, and merge group.

Highlight white background layer again.

Open GoldGlitter. Resize 175%. Copy and paste as a new layer. Position to the upper left background of your canvas. Duplicate this layer. Image > Mirror. Image > Flip. Merge these two layers down.

Your GoldGlitter layer should be below your mask layer.

Go to the top of your layer palette and add your name. I used color #593f54 for stroke and fill, stroke set at 1.5.

Effects > Eye Candy 4000 > Gradient Glow set at 4 - 0 - 100, color #e4e0ee.

Drop shadow your name.

Resize your canvas to a size with which you're most comfortable.

Add your copyright, license information where applicable, and taggers'/watermark.

If you choose not to animate, you can merge layers and save, and you're done!

A N I M A T I O N

Highlight your GoldGlitter layer. Duplicate this layer twice, for a total of three layers.

On the bottom GoldGlitter layer, Effects > Eye Candy 4000 > HSB Noise with the following settings:


Hit okay.

Highlight the middle GoldGlitter layer. Apply HSB Noise again, clicking on "Random Seed" once or twice... to your liking.

Hit okay.

Highlight the top GoldGlitter layer. Apply HSB Noise once again, and again click on "Random Seed" some more.

Close out the bottom two GoldGlitter layers, leaving the bottom layer open.

Edit > Copy merged.

Open Animation Shop. Right-click on the desktop area and paste as a new animation.

Return to PSP. Close out the bottom GoldGlittler layer and open the middle GoldGlitter layer.

Edit > Copy merged.

Back to Animation Shop. Edit > Paste > After Current Frame.

Return again to PSP. Close out the middle GoldGlitter layer and open the top GoldGlitter layer.

Edit > Copy merged.

Once again, back to Animation Shop. Edit > Paste > After Current Frame.

Edit > Select All.

Right-click on the top bar of your animation and choose "Frame Properties." Change this number to 35.

View > Animation. If you like it, save it, and now, voila, we are done! Thank you for trying this tutorial! I'd love to see your results! :)


.

Thursday, September 17, 2009

Out of Commission -- Sorry!

.


It's beyond my control. My DSL modem went out last Friday afternoon. I was shipped a new modem with all new wires and it still didn't work. Verizon assured me a technician was coming to my house yesterday to fix it, but nobody came. When I called (for the fifth time) this morning, I was given the same run-around as all the other times, so I called cable and a guy is supposed to be out tomorrow to install a cable modem. Supposed to be faster than DSL so maybe it's a good thing all the way around. Only problem is... all my "normal size" (where I say click on the image above to get to the full sized image) tags are on my Verizon account. And my cable company says all I get for web space is 5meg. So, we shall see!!

Being without the Internet for a week has been killing me. I'm currently at an Internet cafe where I'm sure I've worn out my welcome (sifting through all my e-mail thus far).

Please be assured I *HAVE* been writing tuts offline, and have about eight of them to upload once I get back (if???). And I'll get to the blog mail then, too. I did write to one of you....

I miss the ether!!! Pray for my quick return!! I have been. :)

Kajira


.

Thursday, September 10, 2009

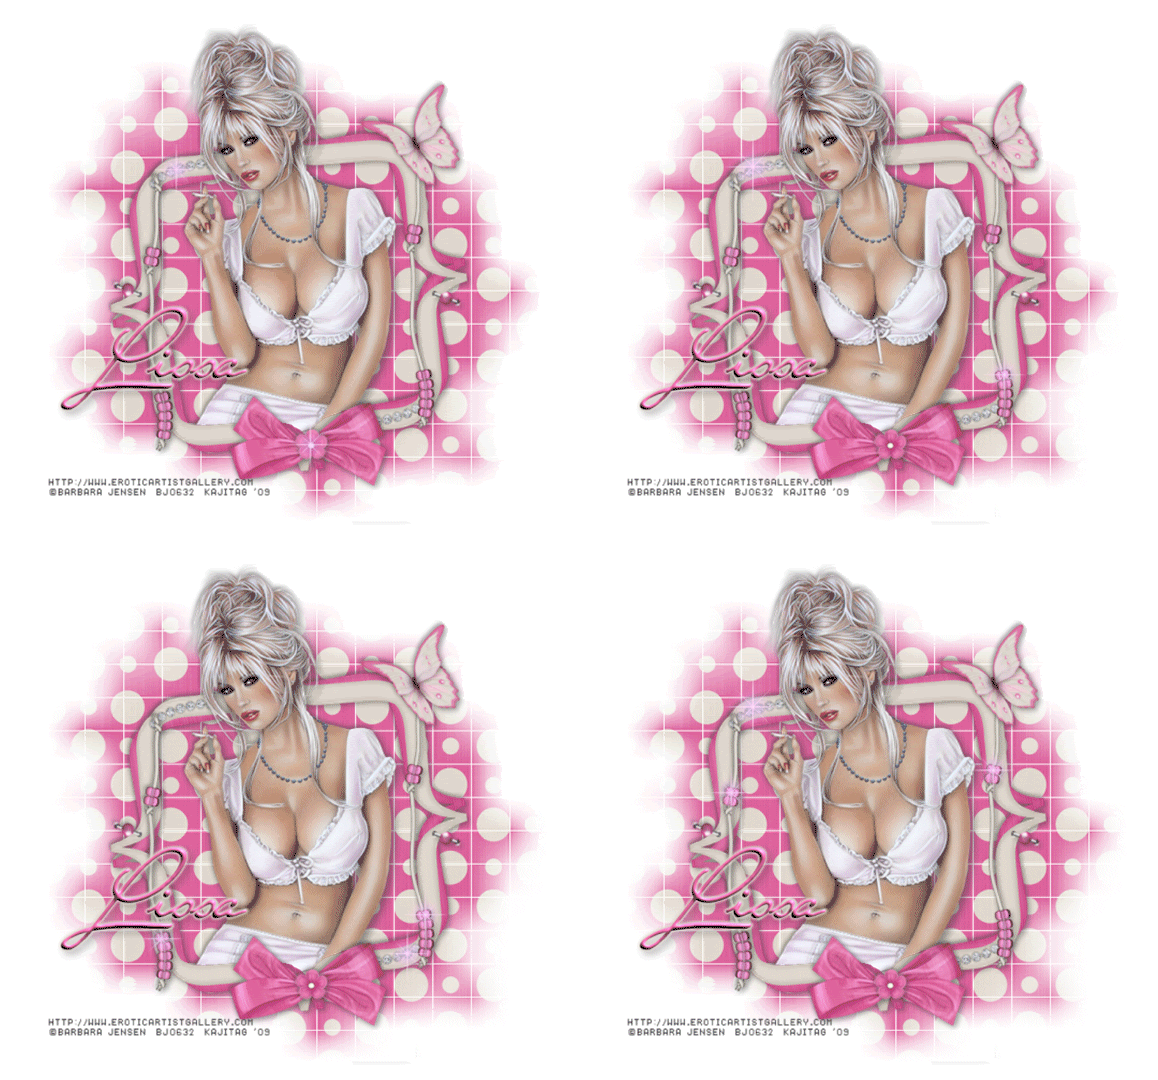
Shiny Dots

.


[Click image above to go to full sized image.]


This tutorial was written on September 10, 2009, using Paint Shop Pro, version X.03. It should be okay to do with other versions as well. I just find X.03 more comfortable for me. You may download a free trial of Paint Shop Pro, version X2, from Corel. Any similarities between this tut and any others you may see are purely coincidental.

You will also need:

Animation Shop. This is from CNET, so it's a safe download.

I checked to make sure the above link was still valid, and was surprised to see that they're now charging $19 for Animation Shop! I'm so sorry, I didn't realize it. It's been free for ages. I don't know when they started charging....

A tube of your choice. I'm using the sensual artwork of Barbara Jensen. You must have a license to use her artwork. You can get that license and art at her web site!

Scrap kit is by Lissa, of Digital Scrap'n Designz. This is a FTU kit, called Gone Dotty. This is one in a seven-pack of freebie kits she's posted in that one post. Second row down, second kit. Be sure to leave your thanks for the freebies!!

Filters: Eye Candy 4000 > Gradient Glow

Font: I used Miss Stanfort.

Supplies: The mask, which I got from Wee Scots Lass!! If you go to her blog, you'll see links to all her masks at the very top. Collect them all! And thank you so much, Lassie, for the sharing of the work!! I also included in that file, the pink sparkle I used.

Also, please, if you have problems with any download link for supplies, drop me a line via e-mail. Leaving a comment without a way for me to contact you back doesn't help. If you e-mail me, I'll send you the supplies.

Okay let's get to it!!

Open your supplies in PSP and minimize. Alternatively, you could file your mask into your masks file, for use in the future. You could also file the sparkle wherever you stash those types of files. It is, of course, up to you!

Open a new image, 750 x 700, white.

Open Frame5. Copy and paste as a new layer.

Add your tube. Resize, position and drop shadow to your taste.

Highlight your frame layer. Grab your magic wand and click inside the frame. Selections > Modify > Expand by 1. Selections > Invert.

Highlight your tube layer. Grab your eraser brush and erase any of the tube that overlaps the frame, which you do not want to be showing.

Drop shadow your frame.

Highlight the white background layer.

Open Paper15. Copy and paste as a new layer.

Apply your mask. Delete mask layer, answer "yes" to the pop-up question, and merge group. I found that moving the mask down a smidge made it look better, in my eyes. May be different for you!

Open BeadString5. Copy and paste as a new layer. Position that it appears to have been stapled to the top corner (one or the other) of the frame.

Duplicate this layer and Image > Mirror. Position as you like, opposite the other. Merge these two layers down and drop shadow.

Open Bow5. Copy and paste as a new layer. Rotate 20° left. Position on the bottom center of the frame. Drop shadow.

Open Flower5. Resize 15%. Copy and paste as a new layer. Position over the center of your bow. Drop shadow.

Open Butterfly5. Resize 65%. Copy and paste as a new layer. I mirrored mine. Position where you'd like your butterfly. Drop shadow.

Open StapleSingle5. Resize 115%. Copy and paste as a new layer. Rotate 20° right. Place on your frame so that it would maybe look like it's holding the frame onto the dotted background. Drop shadow.

Duplicate the staple layer and Image > Mirror. Image > Flip. Arrange this on the opposite side of your frame.

Go to your top layer if you're not already there. Open your pink sparkle. Resize 50%. Copy and paste as a new layer. Position where you'd like something to sparkle. LOL. You're going to duplicate this layer many times, and put your sparkles wherever you want them. But we're going to be opening and closing these layers to get the animation. I have enough for four layers of two each on mine. You can label them 1, 2, 3 and 4 if you like, to keep things straight. For instance my original sparkle and one of my duplicated layers is labeled 1, two are labeled 2, etc., etc.

After you place all your sparkles and have them where you want them on the layers, then make sure again that you are on the top layer.

Add your name. I used color #de699f as the fill and the stroke, stroke size 1.5.

I then added the following bevel:


Effects > Eye Candy 4000 > Gradient Glow set at 3 - 25 - 100, color #e4dcd1.

Drop shadow your name.

Resize your tag to the size with which you're most comfortable.

Add your copyright, license information if applicable, and taggers'/watermark.

If you're NOT going to animate, you can just merge and save. You're done!

A N I M A T I O N

Close out all your sparkle layers except those labeled "1."

Edit > Copy merged

Open Animation Shop, right-click on the desktop area, and paste as a new animation.

Return to PSP. Close out the layers labeled "1," and open those labeled "2."

Edit > Copy merged.

Return to Animation Shop and Edit > Paste > After Current Frame.

Back to PSP. Close out the layers labeled "2," and open those labeled "3."

Edit > Copy merged.

Back to Animation Shop. Edit > Paste > After Current Frame.

Finally, return to PSP. Close out the layers labled "3" and open those labeled "4."

Edit > Copy merged.

And back to Animation Shop. Edit > Paste > After Current Frame.

Edit > Select all.

Right-click on the top bar of your animation and choose "Frame Properties." Change this number to 35.

View > Animation. If you like what you see, save! And, we're done! I hope you've enjoyed this tutorial!

.

Wednesday, September 9, 2009

Let's Be Bad

.


[Click image above to go to full sized image.]


This tutorial was written on September 9, 2009, using Paint Shop Pro, version X.03. It should be okay to do with other versions as well. I just find X.03 more comfortable for me. You may download a free trial of Paint Shop Pro, version X2, from Corel. Any similarities between this tut and any others you may see are purely coincidental.

You will also need:

A tube of your choice. I'm using the great artwork of Ismael Rac. You must have a license to use his artwork. You can get that license and art at Artistic Minds, Inc.

Scrap kit is by Krista, of Rainy Day Scraps. This is a FTU mini kit, called Bad Things. Be sure to leave your thanks to Krista for the freebie sharing!!

Filters: Eye Candy 4000 > Gradient Glow

Font: I used Black Jack.

Supplies: The mask. I know where I got this!! Go to Wynter's blog and you can find this one, plus some others!! Thank you, Wynter. Please come back!! :) (She's been inactive since last year....)

Okay! Let's get started! This is a relatively quick-n-easy tut!

Open a new image, 750 x 700, white.

Open Frame2. Copy and paste as a new layer.

Add your tube. Resize, position and drop shadow to your liking. Close off this layer.

Highlight your frame layer. Grab your magic wand and click inside the frame. Be sure to click on all the white areas within the ribbons, etc.

Selections > Modify > Expand by 1. Selections > Invert.

Re-open and highlight your tube layer. Grab your eraser tool and erase the portion of your tube that you don't want showing at the bottom of the frame. Again, I chose to leave the hand of the tube. It's whatever you like.

Selections > Select none.

Highlight your white background layer.

Open Paper8. Copy and paste as a new layer. Stretch with your pick tool to fill the background.


Apply your mask. Delete mask layer, answer "yes" to the pop-up question and merge group.

Open Blood Spatter 2. Resize 200%. Copy and paste as a new layer. Position as you like, above your mask layer.

Open Blood Spatter 4. Resize 200%. Copy and paste as a new layer. Position as you like, also above the mask layer.

Open Wire Beads. Resize 200%. Copy and paste as a new layer. This layer should be above your blood layers.

Open Flower3. Resiize 235%. Copy and paste as a new layer. This layer should be above your Wire Beads layer. Drop shadow your flower.

Drop shadow your frame.

Go to the top layer. Open the Word Art1. Resize 50%. Copy and paste as a new layer. Position where you like. I gave this a Gradient Glow, set at 3 - 0 - 100, color white. Drop shadow word art.

Add your name. I used black, with the same Gradient Glow as above. Drop shadow your name.

Add your copyright, license information if applicable, and taggers'/watermark.

Resize your tag to the size with which you're most comfortable.

If you like what you see, save and, we're done! I hope you've enjoyed this tutorial! I told you it was quick-n-easy!!


.
Tuesday, September 8, 2009

Goddess

.


[Click image above to go to full sized image.]


This tutorial was written on September 8, 2009, using Paint Shop Pro, version X.03. It should be okay to do with other versions as well. I just find X.03 more comfortable for me. You may download a free trial of Paint Shop Pro, version X2, from Corel. Any similarities between this tut and any others you may see are purely coincidental.

You will also need:

Animation Shop. This is from CNET, so it's a safe download.

I checked to make sure the above link was still valid, and was surprised to see that they're now charging $19 for Animation Shop! I'm so sorry, I didn't realize it. It's been free for ages. I don't know when they started charging....

A tube of your choice. I'm using the amazing artwork of Maxine Gadd. You must have a license to use her artwork. You can get that license and art at My PSP tubes.

Scrap kit is by Lissa, of Digital Scrap'n Designz. This is a FTU kit, called Colors of Fall. This is one in a seven-pack of freebie kits she's posted in that one post. First row, second kit. Be sure to leave your thanks for the freebies!!

Filters: Alien Skin > Xenofex 2 > Constellation, Eye Candy 4000 > Gradient Glow

Font: I used Coiled Uncial.

Supplies: The mask, by Zuzzanna. She has a lot of beautiful masks there, so look around! Thank you, Zuzzanna!!

Also, please, if you have problems with any download link for supplies, drop me a line via e-mail. Leaving a comment without a way for me to contact you back doesn't help. If you e-mail me, I'll send you the supplies.

Okay let's begin!! This is a very quick tut. I found at the end, (after only three steps), that it looked fine the way it was. So if you choose not to put the "bling" on it in the animation, it's perfectly fine.

Open your mask in PSP and minimize. Alternatively, you could file your mask into your masks file, for use in the future. It is, of course, up to you!

Open a new image, 750 x 700, white.

Open Frame1. Copy and paste as a new layer.

Add your tube. Resize, position and drop shadow to your taste.

Highlight your frame layer. Grab your magic wand and click inside the frame. Selections > Modify > Expand by 1. Selections > Invert.

Highlight your tube layer. Grab your eraser brush and erase any of the tube that overlaps the frame, which you do not want to be showing. I chose to let a rose from my chosen tube to hang over, but erased the rest.

Drop shadow your tube and your frame.

Highlight the white background layer.

Open Paper8. Copy and paste as a new layer.

Apply your mask. Delete mask layer, answer "yes" to the pop-up question, and merge group.

Looks good just like that, does't it? But I went and added more. First!!! ....

Add your name. I used color #6b3504 as the fill, #ee8d6f -- stroke size 3.

I then added the following bevel:


I then added Eye Candy 4000 > Gradient Glow, settings 3 - 0 - 100, color #ee8d6f.

Drop shadow your name.

Resize your tag to the size with which you're most comfortable.

Add your copyright, license information if applicable, and taggers'/watermark.

If you're NOT going to animate, you can just merge and save. You're done!

A N I M A T I O N

Highlight your frame layer. Duplicate this layer twice, for a total of three frame layers.

Highlight the bottom frame layer ...

Effects > Alien Skin > Xenofex 2 > Constellation, choosing the following settings first:


Hit okay.

Xenofex 2 > Constellation again, this time changing the numerical settings as shown, except your "random seed" will be at 1. That's okay, leave it there:


Hit okay.

Now, highlight the middle frame layer. Add the Constellation again, but click on "random seed" as many times as you like. I usually click a few times to get the look I want. Up to you!

Hit okay.

Repeat this with the bottom frame layer.

Close out the top two frame layers, leaving the bottom frame layer open.

Edit > Copy merged

Open Animation Shop, right-click on the desktop area, and paste as a new animation.

Return to PSP. Close out the bottom frame layer and open the middle frame layer.

Edit > Copy merged.

Return to Animation Shop and Edit > Paste > After Current Frame.

Back to PSP. Close out the middle frame layer, and open the top frame layer.

Edit > Copy merged.

And, back to Animation Shop. Edit > Paste > After Current Frame.

Right-click on the top bar of your animation and choose "Frame Properties." Change this number to 35.

View > Animation. If you like what you see, save! And, we're done! I hope you've enjoyed this tutorial!

.
Saturday, September 5, 2009

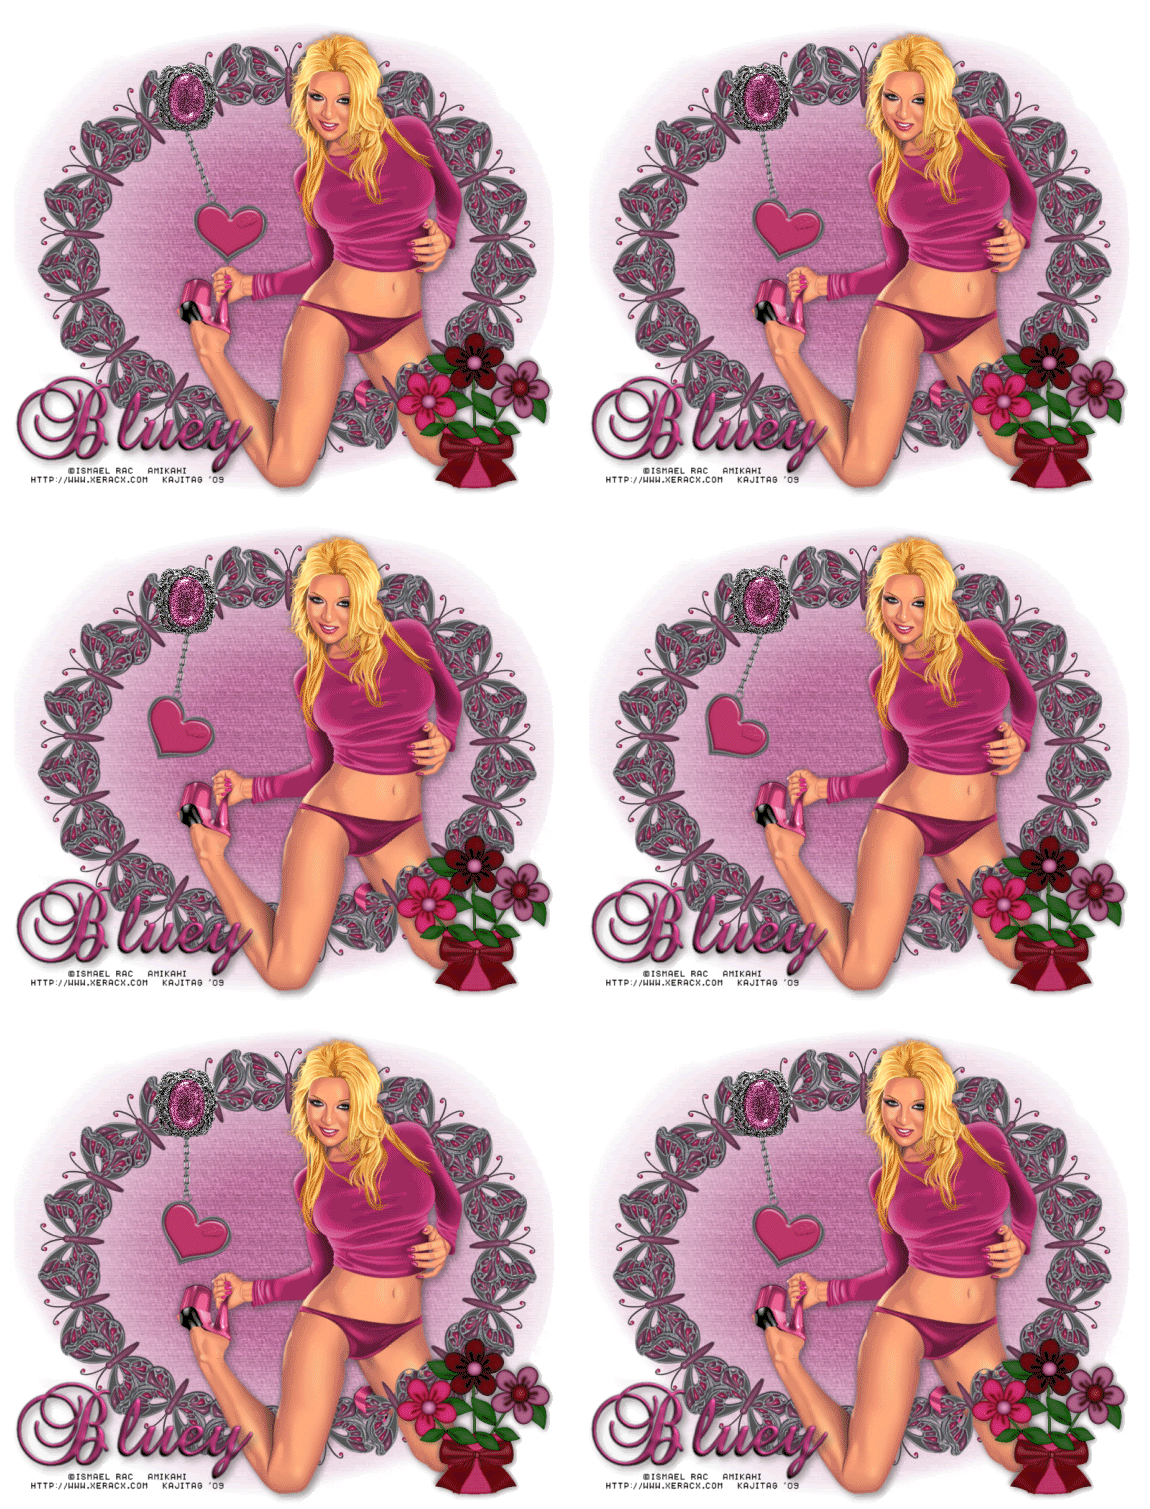
Sweetheart

.


[Click image above to go to full sized image.]


This tutorial was written on September 5, 2009, using Paint Shop Pro, version X.03. It should be okay to do with other versions as well. I just find X.03 more comfortable for me. You may download a free trial of Paint Shop Pro, version X2, from Corel. Any similarities between this tut and any others you may see are purely coincidental.

You will also need:

Animation Shop. This is from CNET, so it's a safe download.

I checked to make sure the above link was still valid, and was surprised to see that they're now charging $19 for Animation Shop! I'm so sorry, I didn't realize it. It's been free for ages. I don't know when they started charging....

A tube of your choice. I'm again using the great artwork of Ismael Rac. You must have a license to use his artwork. You can get that license and art at Artistic Minds, Inc.

Scrap kit is again by Bluey, of Bluedream Designs. This is a FTU kit, called Girly. Scroll down a bit and you'll find it. Be sure to leave your thanks for the freebies!!

Filters: Mura's Meister > Copies, Eye Candy 5000 > Gradient Glow

Font: I used Brock Script.

Supplies: [NOTE: 10-20-2009] I just received notice from 4shared that these files have been reported as an abuse of some sort, so they are no longer available. I apologize. As you can see, below, I asked for anyone whose work I'd included to let ME know. I don't get it. But I did identify the mask, so you may have it. Also, the chain is just a miscellaneous chain I'd picked up along the way. Perhaps you have one or two, as well? My apologies, again. I have no CLUE what's up with this.

The chain and the mask, here. This again is the 20-20 mask. I don't know who made either of these files. If you know who, or if it's YOU, let me know! I'll give you credit! :)

Also, please, if you have problems with any download link for supplies, drop me a line via e-mail. Leaving a comment without a way for me to contact you back doesn't help. If you e-mail me, I'll send you the supplies.

Okay let's begin!! Just to warn you, this swinging effect is a bit tricky. I'll explain it the best I can. Good luck!

Open your supplies in PSP and minimize. Alternatively, you could file your mask into your masks file, for use in the future. Same for the chain, of course. Up to you!

Open a new image, 800 x 700, white.

Open Butterfly3. Resize 25%. Copy and paste as a new layer.

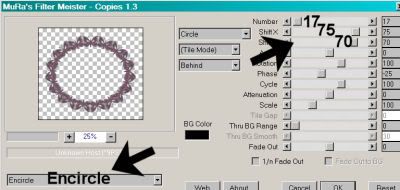
Effects > Mura's Meister > Copies, with settings below:


Hit okay.

Add your tube. Resize, position and drop shadow to your taste. Place it to one side or the other of your frame. If you happen to have a tube that either kneels with her legs apart like mine, or stands the same way, and you'd like to have it "step out" of the frame you just made, then....

Still on the butterfly copies layer, Selections > Select All. Selections > Float. Selections > Defloat. Selections > Modify > Contract by 1. Selections > Invert.

Highlight the tube layer. Grab your eraser brush and delete the area of your tube that overlaps the frame. Selections > Select none. There! :)

Highlight the white background layer.

Open Paper14. Copy and paste as a new layer. Using your pick tool, stretch the edges of your paper so that it just fills your canvas.

Apply your mask. Delete the mask layer, answer "yes" to the pop-up question, and merge group.

If you, like me, are picky enough to not want your fading mask effect to come to an abrupt edge, then this is what I did:

Grab your lasso tool, set at Freehand, feather 17. Draw a curve over each of the four sides. For instance, the curve on the bottom would look somewhat like a "smile." I'm sorry I didn't take screen shots for this. Do this for each of the four edges where it looks like the fade is too wide. Hit delete. Selections > Select none.

Open the Flowerpot. Resize 65%. Copy and paste as a new layer. Position to your liking. Drop shadow.

Open the Gem. Copy and paste as a new layer. Position, again, where it looks best for your creation. lol. Drop shadow.

Open Heart1. Resize 35%. Copy and paste as a new layer. Rotate 25° right. Drop shadow.

Open the chain2 tube I supplied with the mask. Copy and paste as a new layer.

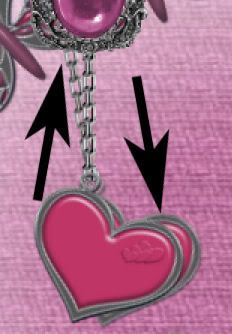
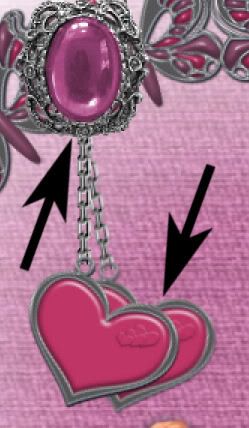
Now, line up the Gem, chain and heart layers, In the layer palette, the chain should be below both the gem and the heart. Make it look like the chain is attached to the heart's little charm hole (for lack of a better term), while hanging from perhaps a pin in the back of the gem.

Highlight your chain layer. To make it look the same color as the rest of the metal in this tag....

Adjust > Brightness and Contrast > Brightness/Contrast with the following settings:


Hit okay.

Merge your heart layer down with your chain layer.

Go back to the top layer and add your name. I used color #c06e9e. No stroke color nor measurement. I then added the Gradient Glow, settings at 3 = 0 = 100, color #5e5e5e.

Hit okay. Drop shadow your name.

Resize your tag to the size with which you're most comfortable.

Add your copyright, license information if applicable, and taggers'/watermark.

If you're NOT going to animate, you can just merge and save. You're done!

A N I M A T I O N


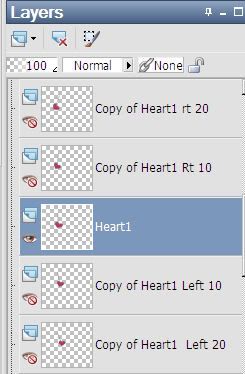
Duplicate your heart/chain layer four times, for a total of five heart/chain layers. To help me keep track in this process, I always put the original heart/chain layer in the center of the five in the layer palette.


If that helps... hope it does!!!

This may be confusing. It's much easier to do than it is to write out he steps!

Okay, I just took a HUUUUGE break because I'm so intimidated by the possibility no one will understand what I'm trying to explain. Which is stupid, because I've done two other tuts with this same type of animation and I don't recall those affecting me this way! (On a positive note, I found a lot more freebie kits for upcoming tuts for y'all. That new search engine from Microsoft? Bing? Really found me lots more stuff than Google ever does!)

So, here we go... I'm presuming here that you put the main heart/chain layer in the middle, as I said earlier.

Highlight the first layer down from the main heart/chain layer. Rotate this 10° left. Now, you'll notice that things have shifted and this won't turn out right at all, right?


So, you need to move that heart/chain element you just rotated so that the TOP of the chain lines up as closely as you can possibly get it with the main layer in the middle.


See? Move it so it's hanging from the same point behind the Gem.

Highlight the bottom heart/chain layer. Rotate this 20° left. DO THE SAME THING WITH THIS ONE! Line it up with the top of the chain in the center, under the gem, so it all seems it's coming from the same place.

Now, highlight the layer that is just above the "main" heart/chain layer. Rotate this 10° right. Line it up.

And finally, highlight the top heart/chain layer, and rotate it 20° right. Line it up as well.

Capice? I sure hope so!!

Now, I complicated matters even more by having my Gem sparkle. I just thought the tag needed something extra. If you don't want to do this part, it will make it a lot easier for you. It's all up to you. But I *AM* going to be giving the instructions for this, in case you want yours to sparkle, too.

Highlight the Gem layer. Duplicate this layer four times, for a total of five Gem layers.

Go to the bottom Gem layer.

Adjust > Add/Remove Noise > Add Noise with the Noise set at 35 and the Uniform button clicked. Also, make sure the Monochrome option is checked off. (I tried to get a screen shot of this for you guys, but my PSP kept crashing, so I hope I got that across alright.)

Hit okay.

Highlight the next up from the bottom Gem layer and Add Noise again, this time changing the reading to 40.

Hit okay.

Highlight the middle Gem layer, adding Noise again, this time changing the reading to 45.

Hit okay.

Now highlight the next Gem layer. Add Noise once more, this time changing the reading back to 40.

Hit okay.

And finally the top Gem layer. Add noise one last time with the reading set at 35.

And hit okay. Whew!!

Now, we're doing two clusters of animation here. You have the five layers of the heart/chain and five layers of the gem. Close out the top four layers of each layer cluster. (For lack of a better term...)

Edit > Copy merged.

Open Animation Shop, right-click on the desktop area, and paste as a new animation.

Return to PSP. Close out the bottom layers of both the gem and the heart/chain layers. Open the next layer up in both.

Edit > Copy merged.

Return to Animation Shop and Edit > Paste > After Current Frame.

Back to PSP. Close out the just-used layers, and open the middle layers in both groups.

Edit > Copy merged.

And, back to Animation Shop. Edit > Paste > After Current Frame.

Back again to PSP. Close out the middle layer of both groups of layers, and open the next-to-the-top layer in each.

Edit > Copy merged

Return to Animation Shop and Edit > Paste > After Current Frame.

Again, return to PSP. Close out the open layers of these two groups and open the top layers of each.

Edit > Copy merged

Back to Animation Shop and Edit > Paste > After Current Frame.

We're not done yet!! Return again to PSP.

Close out the top layer of each group and re-open the next layer down of each.

Edit > Copy merged

Return again to Animation Shop. Edit > Paste > After Current Frame.

Now, back to PSP. Close out the open heart/chain and gem layers, and open the middle layers of both.

Edit > Copy merged.

In Animation Shop, Edit > Paste > After Current Frame.

Finally, return to PSP. Close out the middle layers of each group and open the layer below. (NOT the bottom layer!)

Edit > Copy merged.

And return to Animation Shop and Edit > Paste > After Current Frame.

NOW WE'RE DONE!

In Animation Shop, Edit > Select All.

Right-click on the top bar of your animation and choose "Frame Properties." Change this number to 17.

View > Animation. If you like what you see, save! And, we're done! I hope you liked this tut better than I liked writing the steps down! And I sincerely hope you're not just completely confused!! Sorry for all the repetition. Thanks for trying it out and sticking with it!


.
 

webtracker

©kajira hill 2009
http://kajituts.blogspot.com