You will also need:
Animation Shop. This is from CNET, so it's a safe download.
I checked to make sure the above link was still valid, and was surprised to see that they're now charging $19 for Animation Shop! I'm so sorry, I didn't realize it. It's been free for ages. I don't know when they started charging....
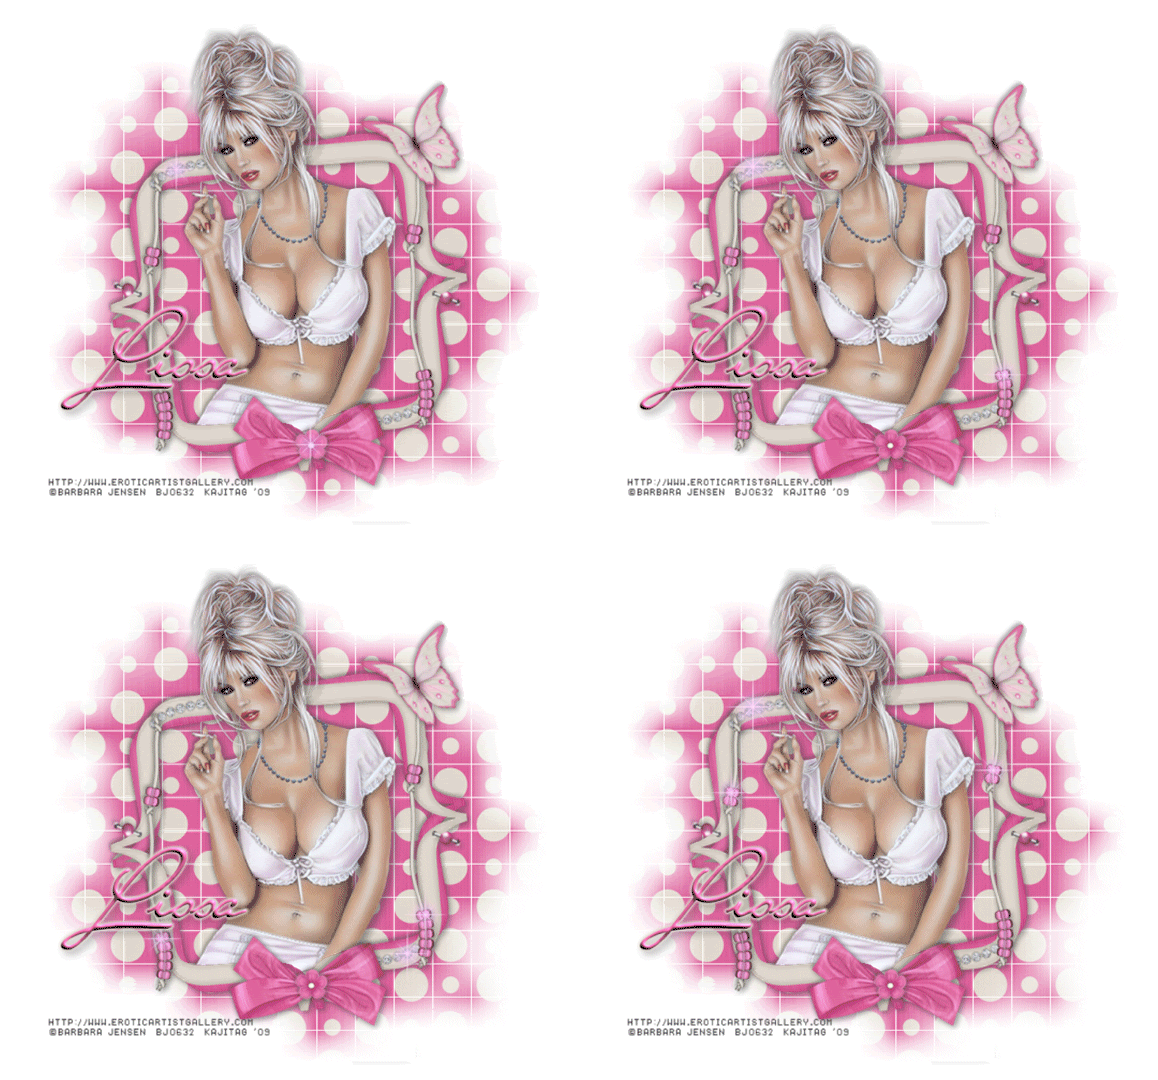
A tube of your choice. I'm using the sensual artwork of Barbara Jensen. You must have a license to use her artwork. You can get that license and art at her web site!
Scrap kit is by Lissa, of Digital Scrap'n Designz. This is a FTU kit, called Gone Dotty. This is one in a seven-pack of freebie kits she's posted in that one post. Second row down, second kit. Be sure to leave your thanks for the freebies!!
Filters: Eye Candy 4000 > Gradient Glow
Font: I used Miss Stanfort.
Supplies: The mask, which I got from Wee Scots Lass!! If you go to her blog, you'll see links to all her masks at the very top. Collect them all! And thank you so much, Lassie, for the sharing of the work!! I also included in that file, the pink sparkle I used.
Also, please, if you have problems with any download link for supplies, drop me a line via e-mail. Leaving a comment without a way for me to contact you back doesn't help. If you e-mail me, I'll send you the supplies.
Okay let's get to it!!
Open your supplies in PSP and minimize. Alternatively, you could file your mask into your masks file, for use in the future. You could also file the sparkle wherever you stash those types of files. It is, of course, up to you!
Open a new image, 750 x 700, white.
Open Frame5. Copy and paste as a new layer.
Add your tube. Resize, position and drop shadow to your taste.
Highlight your frame layer. Grab your magic wand and click inside the frame. Selections > Modify > Expand by 1. Selections > Invert.
Highlight your tube layer. Grab your eraser brush and erase any of the tube that overlaps the frame, which you do not want to be showing.
Drop shadow your frame.
Highlight the white background layer.
Open Paper15. Copy and paste as a new layer.
Apply your mask. Delete mask layer, answer "yes" to the pop-up question, and merge group. I found that moving the mask down a smidge made it look better, in my eyes. May be different for you!
Open BeadString5. Copy and paste as a new layer. Position that it appears to have been stapled to the top corner (one or the other) of the frame.
Duplicate this layer and Image > Mirror. Position as you like, opposite the other. Merge these two layers down and drop shadow.
Open Bow5. Copy and paste as a new layer. Rotate 20° left. Position on the bottom center of the frame. Drop shadow.
Open Flower5. Resize 15%. Copy and paste as a new layer. Position over the center of your bow. Drop shadow.
Open Butterfly5. Resize 65%. Copy and paste as a new layer. I mirrored mine. Position where you'd like your butterfly. Drop shadow.
Open StapleSingle5. Resize 115%. Copy and paste as a new layer. Rotate 20° right. Place on your frame so that it would maybe look like it's holding the frame onto the dotted background. Drop shadow.
Duplicate the staple layer and Image > Mirror. Image > Flip. Arrange this on the opposite side of your frame.
Go to your top layer if you're not already there. Open your pink sparkle. Resize 50%. Copy and paste as a new layer. Position where you'd like something to sparkle. LOL. You're going to duplicate this layer many times, and put your sparkles wherever you want them. But we're going to be opening and closing these layers to get the animation. I have enough for four layers of two each on mine. You can label them 1, 2, 3 and 4 if you like, to keep things straight. For instance my original sparkle and one of my duplicated layers is labeled 1, two are labeled 2, etc., etc.
After you place all your sparkles and have them where you want them on the layers, then make sure again that you are on the top layer.
Add your name. I used color #de699f as the fill and the stroke, stroke size 1.5.
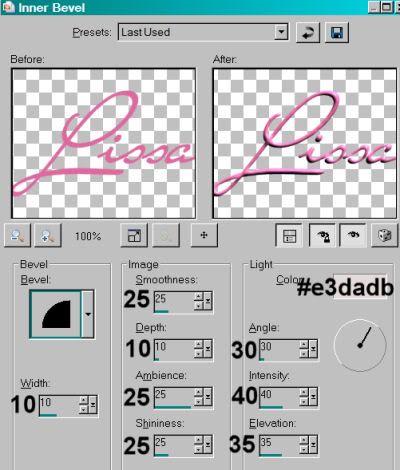
I then added the following bevel:

Effects > Eye Candy 4000 > Gradient Glow set at 3 - 25 - 100, color #e4dcd1.
Drop shadow your name.
Resize your tag to the size with which you're most comfortable.
Add your copyright, license information if applicable, and taggers'/watermark.
If you're NOT going to animate, you can just merge and save. You're done!
A N I M A T I O N
Close out all your sparkle layers except those labeled "1."
Edit > Copy merged
Open Animation Shop, right-click on the desktop area, and paste as a new animation.
Return to PSP. Close out the layers labeled "1," and open those labeled "2."
Edit > Copy merged.
Return to Animation Shop and Edit > Paste > After Current Frame.
Back to PSP. Close out the layers labeled "2," and open those labeled "3."
Edit > Copy merged.
Back to Animation Shop. Edit > Paste > After Current Frame.
Finally, return to PSP. Close out the layers labled "3" and open those labeled "4."
Edit > Copy merged.
And back to Animation Shop. Edit > Paste > After Current Frame.
Edit > Select all.
Right-click on the top bar of your animation and choose "Frame Properties." Change this number to 35.
View > Animation. If you like what you see, save! And, we're done! I hope you've enjoyed this tutorial!
.


No comments:
Post a Comment