

You will also need:
A tube of your choice. I'm using the great artwork of Deacon Black. The URL I put on my tag must be incorrect, as that site no longer exists. CILM just references themselves, so... You must have a license to use his artwork. You can get that license and art at CILM.
Scrap kit is by Krista, of Rainy Day Scraps. This is a FTU mini kit, called Just Paisley. Be sure to leave your thanks to Krista for the freebie sharing!!
Filters: Mura's Meister > Copies
Font: I used Andiron Outline.
Supplies: The mask. This one also is by Wee Scots Lass. She still has all her masks there, right on the front page. So if you'd like her collection, there you go! Be sure to thank her for her generosity!
Let's get this started!
Open your mask and minimize in PSP. Alternatively, you could file it in your PSP masks file for use at a later date.
Open a new canvas, 750 x 700, white.
Open Frame1. Copy and paste as a new layer.
Add your tube. Resize, position, and drop shadow to your taste.
Highlight your frame layer. Grab your magic wand, and click inside the frame. Make sure you get both sections, above and below the bow wrap on the frame! Selections > Modify > Expand by 1. Selections > Invert.
Highlight your tube layer. Grab your eraser brush and delete the portions of your tube that you do not want showing at the bottom of the frame. In my case, I wanted her hands showing (again, I must have some kinda weird "thing" for hands lol), so reduced the size of my eraser brush to get in and around all the nooks and crannies. :)
Selections > Select none.
Highlight your white background layer.
Open Paper7. Copy and paste as a new layer. Using your pick tool,
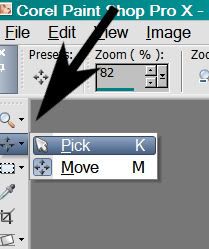
... stretch the paper out at the sides so it fills your canvas.
Apply your mask. Delete the mask layer, answer "yes" to the pop-up question, and merge group. I found that I preferred the mask after moving it up a little, then resizing it by 105%. Up to you!
Highlight your top layer. Open Flower3. Resize 50%. Copy and paste as a new layer.
Effects > Mura's Meister > Copies with the following settings:
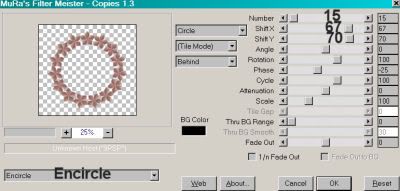
Hit okay.
Draw this layer down below your frame layer, and above your mask layer. Drop shadow.
Drop shadow your frame here, too.
Open the BeadedSafetyPin. Copy and paste as a new layer. Rotate about 15° right. Position on your frame as you would like it.
Grab your lasso tool, set on point-to-point. Draw a small section around the top area of the safety pin, and hit delete. This helps make it look like it's pinned to the frame. Drop shadow the safety pin.
Here is where I used my burn brush. You can leave this off if you want, but I like it when I'm using pins.
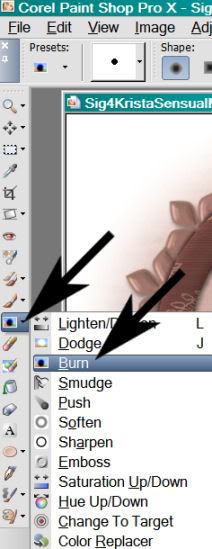
With these settings

[click on the above pic to get a larger size]
Now, with the burn brush, click a few times at each edge of the safety pin, where it goes "into" the frame. This will give it much more of a realistic look.
Open CrossStitch 3. Copy and paste as a new layer. I positioned mine so they look (I hope) like they're attaching the frame to the background circle we created. Position yours as you like. Duplicate this layer and move them around to where you'd like them. Merge all these layers down and drop shadow your cross stitches.
Go to your top layer and add your name. I used color #242525 for the fill and #b78b7e for the stroke, stroke set to 1.
Drop shadow your name.
Resize your canvas to a size with which you are most comfortable.
Add your copyright, license info if applicable, and taggers'/watermark.
Layers > Merge > and save! We are done!
Thanks for trying my tut!! Have a great day!
.


No comments:
Post a Comment