
You will also need:
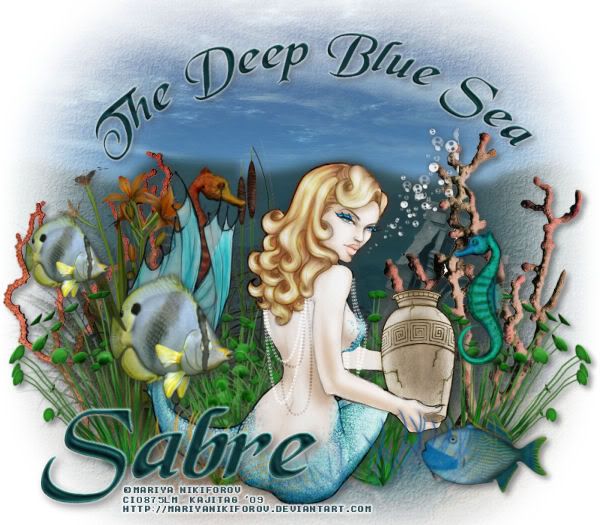
A tube of your choice. I'm using artwork of Mariya Nikiforov. Daisy left me this URL in my chat box. It works, but there's suddenly an "a" on the end of her last name! Go figure! Thanks, Daisy!! When I got this art, it was available only through C.I.L.M.. This is why my copyright, etc., reads as it does. She has since moved to My PSP Tubes.
All that said, there are lots of wonderful pieces of mermaid art out there that could be used!
Scrap kit is by Sabre, of Sabre's Quill and Parchment. This is a FTU kit, from back in April. Free is free, right?? This kit is called Deep Blue Sea. Be sure to leave some love for the freebies!!
Filters: Eye Candy 4000 Gradient Glow
Font: I used 36.
Supplies: Again, just the mask. I do not know the origin of this mask, so if any of you know, let me know so that I may give credit where credit is due!
Also, please, if you have problems with any download link for supplies, drop me a line via e-mail. Leaving a comment without a way for me to contact you back doesn't help. If you e-mail me, I'll send you the supplies.
This is a really picky-choosy-it's-up-to-you tutorial. The materials given in the scrap kit are a bit different, and placement really depends upon your tube and what you'd like to portray. I'd suggest looking at the preview shots of the kit for ideas. That's where I went.
Okay let's do it! I wish you luck! :)
Open a new image, 800 x 700, white. I know this is VERY large, but the backgrounds provided by Sabre are at this proportion almost, so I wanted to keep everything kinda to scale. We WILL be reducing the size considerably before it's over.
Open SeaFloor4. Copy and paste as a new layer. Grab your pick tool
.. and drag the top and bottom until your entire canvas is filled with the Sea Floor 4 image.
Add your tube. Resize, position and drop shadow as you like.
Now, what I did was to try and choose the elements as I wanted them in relation to the tube, etc. I'll give you my specifics, below.
Open TigerLily1. Resize 75%. Copy and paste as a new layer. (Most of these layers will end up below your tube layer.) Position as you like and drop shadow. You can always reposition later if you wish.
Open SeaPlant2. Resize 75%. Copy and paste as a new layer. I put mine toward the left side. Again, below the tube layer and in this case, over the Tiger Lily layer. Duplicate this layer and Image > Mirror. Merge these two layers down, place, and drop shadow.
Open Coral1. Copy and paste as a new layer. Drag this over to the right side, no re-sizing. Drag below the SeaPlant2 layer. Drop shadow.
Open Coral. Copy and paste as a new layer, positioning to the left side, no re-sizing. Drag this, too, below the SeaPlant2 layer. Drop shadow.
Open CatTails2. Resize 65%. Copy and paste as a new layer. I positioned mine toward the middle of the canvas, below the other vegetation layers. Drop shadow.
Open Seahorse1. This I played with a lot so don't have the exact proportions for you. I know I resized 50% and then a bit more. Place where you like, and drop shadow.
Open Fish1. Resize 75%. Copy and paste as a new layer. I placed mine to the left of the canvas. Drop shadow.
Open Fish1 again. Resize 50%. Copy and paste as a new layer. Place near the first Fish1 layer. Drop shadow. (See my tag for placement reference, if you like.)
Open Fish. This is a funky lookin' fish! lol! Resize 50%. Mirror. Copy and paste as a new layer. I put mine down in the bottom right corner. Drop shadow.
Open Seahorse2. Resize 50% twice. Copy and paste as a new layer. Image > Mirror. Place as you would like. Drop shadow.
NOW we get to the individual sea plants. This is a bit tricky. Let me see if I can get this right for you...
Open SeaPlant4. Resize 65%. Rotate 25° left. Position in the bottom right corner, so that the "stem" is off canvas, and the wavy tendrils are the corner of the tag. (Over that funky fish! lol!)
Open SeaPlant5. Do the same thing, resize 65%, rotate 25° right and place in the opposite corner.
Duplicate both sea plants and position them along the bottom of your tag so everything is lined up and wavy, is the best way for me to state this. I hope you're following, as it certainly isn't well represented on the finished product. Merge all your sea plant layers down. Drop shadow.
Now, make sure everything is positioned as you like it. Add more, subtract some, whatever you like. This next part gets tricky, as well.
Highlight your backround white layer.
Open SeaLifeSabreRender. Copy and paste as a new layer.
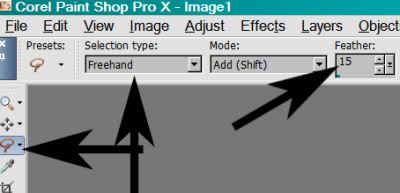
Now, grab your lasso tool, set on freehand, feather 15.
Highlight your original layer, the background you used to stage everything upon.
Now, select an area on the top ½ to ¾ down, and usy wavy movements, to create a somewhat believeable "sky" area above the sea. Don't despair, I had to do this about five times before I got it so that I thought it was at least acceptable. This will give you not a seamless, realistic look between sea and sky. But it will differentiate, and that's what we want. Play with it. The hardest part is how to direct the lasso tool along the "horizon." Then, just drag the lasso off-screen on the sides, and around the top to the other side, then hook it up to the "horizon" on that other side.
Hit delete. Selections > Select none.
Like I said, this took three to five or more times for me to say, "Okay, that'll do." So don't get discouraged!
Merge your render layer and background layers down to one layer.
Apply the mask. Delete the mask layer, answer "yes" to the pop-up question, and merge group.
Apply the mask again. Delete, answer, merge, etc.
Now go to the layers of sea plants that are running off the canvas. If you need to merge down a few other layers, go ahead.
Apply the mask again. Delete the mask layer, answer "yes" to the pop-up question, and merge group.
Go to the top layer. Grab your Preset Shape tool, set on Ellipse. Line width 2, stroke color as you like (doesn't matter, so long as you can see it) and fill color blank. Draw an ellipse so that the top curve is elongated. See my tag for text placement.
When you're satisfied with your ellipse curve, move this layer down (still as a vector layer) a few layers on your layer palette.
Go back to the top layer. Choose your text tool. Choose your font. I used 36. I used a font much smaller than that I was planning to use for the name. Fill color #294a53, stroke color #5ba096, stroke set at 2. Position your cursor over the ellipse you formed earlier, until you see a curved, rocker-like effect under your "A" of your cursor. This tells you that you're at the right spot for curved text. Type out whatever you like. I chose "The Deep Blue Sea." Position your text so that it is centered in the tag. See mine for placement. Change to raster layer.
Go down to the vector ellipse layer you created and delete.
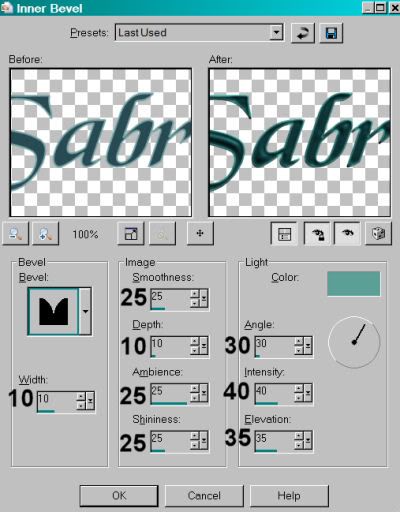
Back to your text layer. Add an Inner Bevel like so:
Now, Effects > Eye Candy 4000 > Gradient Glow settings at 3 - 0 - 100, color white. Drop shadow your text.
Go back to the top layer and add your name. I used the same colors, #294a53 for fill and #5ba096 for the stroke, stroke set at 2. Add the same inner bevel.
I again added a Gradient Glow, settings 3 - 0 - 100, color white. Drop shadow the name.
Add your copyright, license information if applicable, and taggers'/watermark.
Resize your tag to the size with which you're most comfortable.
If you like what you see, save! And, we're done! I hope you've enjoyed this tutorial! Sorry it was so "picky" and difficult. Hopefully it was easier done than said! Thanks for coming by!!
.


Mariya Nikiforova is at MPT
ReplyDelete