
This tutorial was written on June 17, 2010 using Paint Shop Pro, version X.03. It should be okay to do with other versions as well. I just find X.03 more comfortable for me. You may download a free trial of Paint Shop Pro, version X3, from Corel. The release of X3 is new to me, so hopefully Corel hasn't changed things up too much!!
You will also need:
Animation Shop. This is now a pay-for product, through Corel. That changed a while ago. I don't know why!!
A tube of your choice. I'm using the great artwork of Jamie Kidd. You must have a license to use her work. You can get that license and artwork from C.I.L.M.
The scrap kit used is by Twinky, of Twinky Dezines, and is called Happiness. While waiting for download, be sure to give Twinky lots of love for her freebies!
Template is by Yvette, from Essence Of Creativity,, and can be found there if you scroll down a bit on the right column to where it says "downloads." We're using template 80. Thanks, Yvette!!
Filters: Alien Skin > Xenofex 2 > Constellation, Eye Candy 4000 > Gradient Glow
Font: I used 25.
There's really not much, supply-wise, to this tut. But I did a lot of fiddling with settings 'n' stuff. Okay, let's get started!
Open Template 80. Duplicate template and close the original. Delete the top layer -- the one with the credits.
Resize template, keeping aspect ratio, but making it 800 pixels wide -- all layers.
The order in which I accomplished this one may seem weird to some of you, but this is how I did it!
Open the tube that you're going to place in the square. Copy and paste as a new layer. Resize, position in the square and drop shadow to your taste.
Highlight the "square" layer in the template.
Open Paper4. Copy and paste as a new layer. Move this paper so it covers the entire square.
Highlight the square layer again.
Grab your magic wand and click OUTSIDE the square.
Highlight your tube layer. Hit delete.
Selections > Modify > Contract by 2.
Highlight the paper layer. Hit delete.
Selections > Select none.
Delete the square template layer.
Highlight your tube layer again.
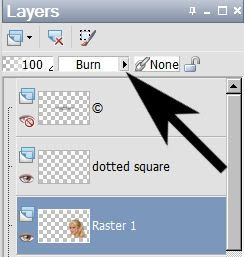
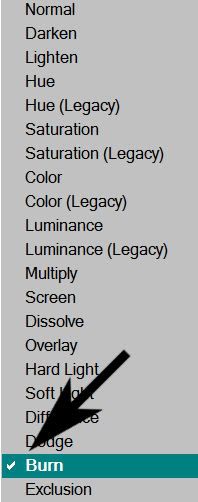
Change the blend mode on this layer to "Burn."
Drop shadow your square paper layer.
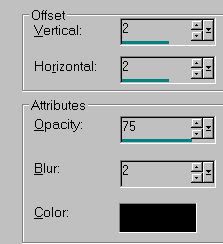
Highlight the dotted square layer of the template. Add a small, dark drop shadow. This is what I used:
Hit okay.
Highlight the rectangle layer in the template.
Open Paper3. Copy and paste as a new layer. You could either resize this layer wider, or choose your pick tool
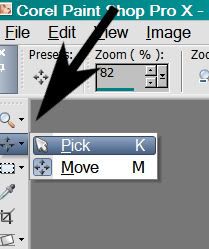
and widen it that way -- so that it covers the rectangle completely.
Highlight the rectangle layer again.
Grab your magic wand and click OUTSIDE the rectangle.
Selections > Modify > Contract by 2.
Highlight your Paper3 layer. Hit delete.
Selections > Select none.
Delete the template rectangle layer, and drop shadow your rectangle paper layer to your taste.
Open the other (fuller?) copy of your tube. Copy and paste as a new layer. Resize, position over the doodle, and drop shadow to your taste.
If you don't want this tube or its drop shadow to just be "sitting there," take these steps:
Grab your lasso tool, set on freehand, with feather set at 15. Draw a "smile" shape at the bottom of your tube.
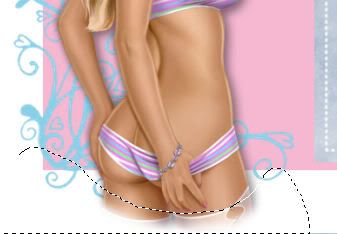
Hit delete.
Selections > Select none. There!
Highlight your doodle template layer.
Adjust > Hue and Saturation > Colorize, with the following settings:
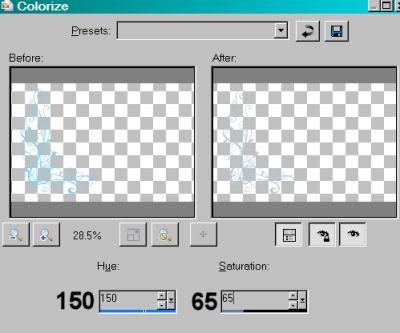
Hit okay.
Add the same small but dark drop shadow to the doodle as we did with the dots:
Hit okay.
You can choose to keep the text template layer or not. I just left it in.
In order to fit the name at the bottom, I moved my layers up a notch. Click on each layer, one at a time, and hit Ctrl + the up arrow. I left the tube on the left alone -- didn't move that layer up.
Go to the top layer and add your name. I used color #bdc9da for the fill and stroke, stroke set at 2. I drew this one out wider and squished it down a bit while it was still a vector layer. Wanted to make it look "right" in the tag. You may choose not to -- up to you!
I added a Gradient Glow of 5 - 25 - 100, color white.
Drop shadow your name like we did with the dots and the doodle.
Resize your canvas to a size with which you are comfortable. My larger size ended up 600 x 389.
Add your copyright, license information if applicable, and taggers'/watermark.
If you choose not to animate, you're now done, and you can merge your layers and save!
A N I M A T I O N
Highlight the dotted square layer. Duplicate this layer three times, for a total of four dot layers.
Highlight the bottom of the four layers.
Effects > Plug-ins > Alien Skin Xenofex 2 > Constellation, with the following setting:
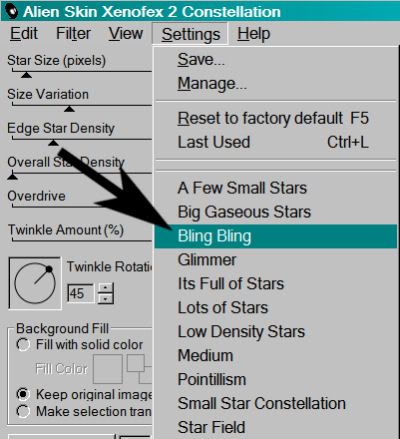
and the following numbers:
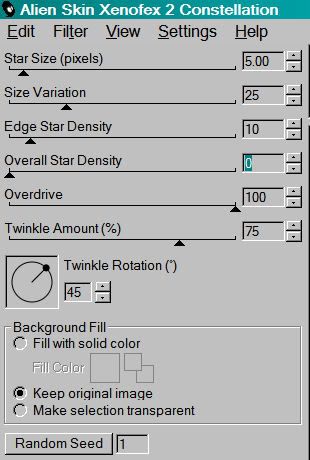
Hit okay.
Highlight the second layer up of your dot layers.
Apply Constellation again, but this time click on "Random Seed."
Hit okay.
Highlight the next layer up.
Again apply Constellation, again clicking on "Random Seed."
Hit okay.
Finally, highlight the top layer of the four.
Apply Constellation one last time, again hitting "Random Seed."
Hit okay.
Close the top three dot layers.
Edit > Copy Merged.
Open Animation Shop. Right-click on the desktop area and paste as a new animation.
Return to PSP.
Close your bottom layer and open the next layer up.
Edit > Copy Merged.
Go back to Animation Shop. Edit > Paste > After Current Frame.
Return again to PSP.
Close out the current layer, and open the next layer up.
Edit > Copy Merged.
Again, back to Animation Shop. Edit > Paste > After Current Frame.
One last time, back to PSP. Close out the open layer, and open the top layer.
Edit > Copy Merged>
Back to Animation Shop and Edit > Paste > After Current Frame.
We are done!
Now, View > Animation.
If you like what you see, save as a .gif file, and we're done! Thanks so much for trying out this tutorial! Would love to have some feedback, now that I'm in the groove again!! I hope you're having a spectacular day!
.


Great Job Hun, its Gorgeous!! and a Great job with the Kit, Thank you very much!!!
ReplyDelete