
You will also need:
Animation Shop. This is from CNET, so it's a safe download.
A tube of your choice. I'm using the great artwork of Dave Nestler. You must have a license to use his work. You may purchase that license at C.I.L.M..
Scrap kit is by Tina, of Tina's Magical Scrap World. This is a PTU kit, available through Scraps With Attitude, and it's called Magical Moments.
Filters: VM Natural > Sparkle -=- and -=- Eye Candy 4000 > Gradient Glow
Font: I used Boulevard.
Supplies: The mask, which is again from Zuzzanna. She has a lot of beautiful masks there, so look around! Thank you, Zuzzanna!!
Also, please, if you have problems with the download link for supplies, drop me a line via e-mail. Leaving a comment without a way for me to contact you back doesn't help. If you e-mail me, I'll send you the supplies.
Another note: I use a program called WinRAR for my compression of files. It has the capacity to save things as and/or open .rar files OR .zip files. I have been saving the supplies within this program, as .zip files. I'm beginning to use a .rar file for compression. I want to see if you guys have less problems getting supplies with this type of file. Wondering if, because the program is called WinRAR, maybe making .zip files with it is screwing people up? You can find WinRAR free at CNET Downloads. I hope this helps! I think I'll be doing this, and keeping this paragraph in as a boilerplate, while I see if it fixes the problem. *Fingers crossed!*
Okay,let's do this!
Open your mask in PSP and minimize. Alternatively, you could load it into your PSP masks file. This way, you'd have it to use later on....
Open a new image, 700 x 750, white.
Open bradframe4. Resize 85%. Copy and paste as a new layer. Rotate 90° either way.
Add your tube. Resize, position and drop shadow to your liking.
Highlight your frame layer. Grab your magic wand and click inside the frame. Selections > Modify > Expand by 1. Selections > Invert.
Highlight your tube layer. Now, get your eraser brush and erase any of your tube that is overlapping the frame in places you don't want it.
Selections > Invert. Selections > Expand by 7. Selections > Invert again.
Highlight your white background layer.
Open paper21. Resize to 750 x 750 pixels. Copy and paste as a new layer. Hit delete. Selections > Select none.
Highlight your white background layer again.
Open paper6. Resize to 750 x 750 pixels. Copy and paste as a new layer.
Apply your mask. Delete mask layer. Answer "yes" to the pop-up question and merge group.
Now, this mask is too big, right? Grab your pick tool (in PSP X it's in the same drop-down space as the mover tool) and move the edges of the "frame" part of the mask under the actual frame. Gosh, I hope I explained that well enough! In my case, I shrunk it down from all four sides.
Open starchain1. Resize 35%. Copy and paste as a new layer. Drag this layer to just below the frame layer, and position so that it looks like it's hanging from the frame. See my tag for placement reference. Drop shadow your starchain.
Open magicflower1. Resize 65%. Copy and paste as a new layer. Position on the bottom right side of your frame. Drop shadow.
Open magicflower4. Resize 65%. Image > Mirror. Copy and paste as a new layer. Position over the first magicflower layer, to your liking. Drop shadow.
Open tag3. Resize 50%. Copy and paste as a new layer. Rotate 20° left. Position over the stems of both magicflower layers. Drop shadow.
To get rid of the excess stems sticking out under the tag, grab your selection tool, set on rectangle, and select the area around all the stems you want to delete. Highlight one of the magicflower layers. Hit delete. Highlight the second magicflower layer and hit delete again. Selections > Select none.
Add your name. I used color #485762 for the fill and stroke, stroke set at 3. I then applied Eye Candy 4000 > Gradient Glow with settings of 5 - 0 - 100, color #aabec7.
Drop shadow your name.
Add your copyright, license information if applicable, and taggers'/watermark.
Resize your tag to the size with which you're most comfortable.
If you're NOT going to animate, you can just merge and save. You're done!
A N I M A T I O N
Highlight your starchain layer. This part is a bit tricky. I had to do it about 10 times before I got it to where I was satisfied with it.
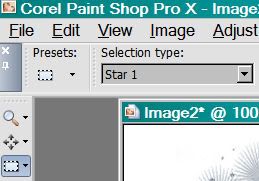
Grab your selection tool, still set on rectangle. Change THAT setting to "star1."
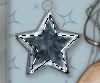
You should have something like the following:
Now, duplicate your starchain layer twice, for a total of three starchain layers.
Still on the bottom starchain layer...
Effects > Plugins > VM Natural > Sparkle, with settings somewhat like this:
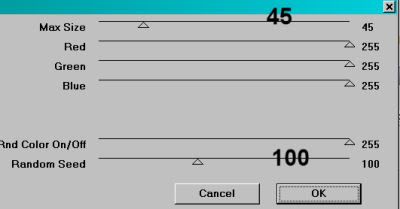
You can change the top and bottom numbers as much as you like. Look in the preview window while moving the sliders to see what changes are happening to the effect.
Hit okay.
Highlight the middle starchain layer. Again, apply Sparkle, changing your top and bottom sliders as you would like.
Hit okay.
Highlight the top starchain layer. Apply Sparkle again, and again change your sliders to your liking.
Hit okay.
Now, whenever I use this filter, I go through that process twice. Going back to the bottom layer and applying, then the middle, then the top. I do this to get more sparkles. It's up to you!
Selections > Select none.
Close out the top two starchain layers, leaving the bottom starchain layer open.
Edit > Copy merged
Open Animation Shop, right-click on the desktop area, and paste as a new animation.
Return to PSP. Close out the bottom starchain layer, and open the middle starchain layer.
Edit > Copy merged.
Return to Animation Shop and Edit > Paste > After Current Frame.
Back to PSP. Close out the middle starchain layer, and open the top starchain layer.
Edit > Copy merged.
And, back to Animation Shop. Edit > Paste > After Current Frame.
Still in Animation Shop, Edit > Select All.
Right-click on the top bar of your animation and change this number to 50.
View > Animation. And, we're done! I hope you've enjoyed this tutorial! Thanks for trying my tut! I hope you enjoyed it!
.


No comments:
Post a Comment