You will also need:
Animation Shop. This is from CNET, so it's a safe download. However, it costs. That changed pretty recently. I don't know why!!
HOWEVER ..... a LOVELY person named solshne (and another named Chris) wrote to let me know that one might find Animation Shop for free at this location. This is an FTP link and I have no idea if it's safe or not. So keep your antivirus handy to scan it after download!
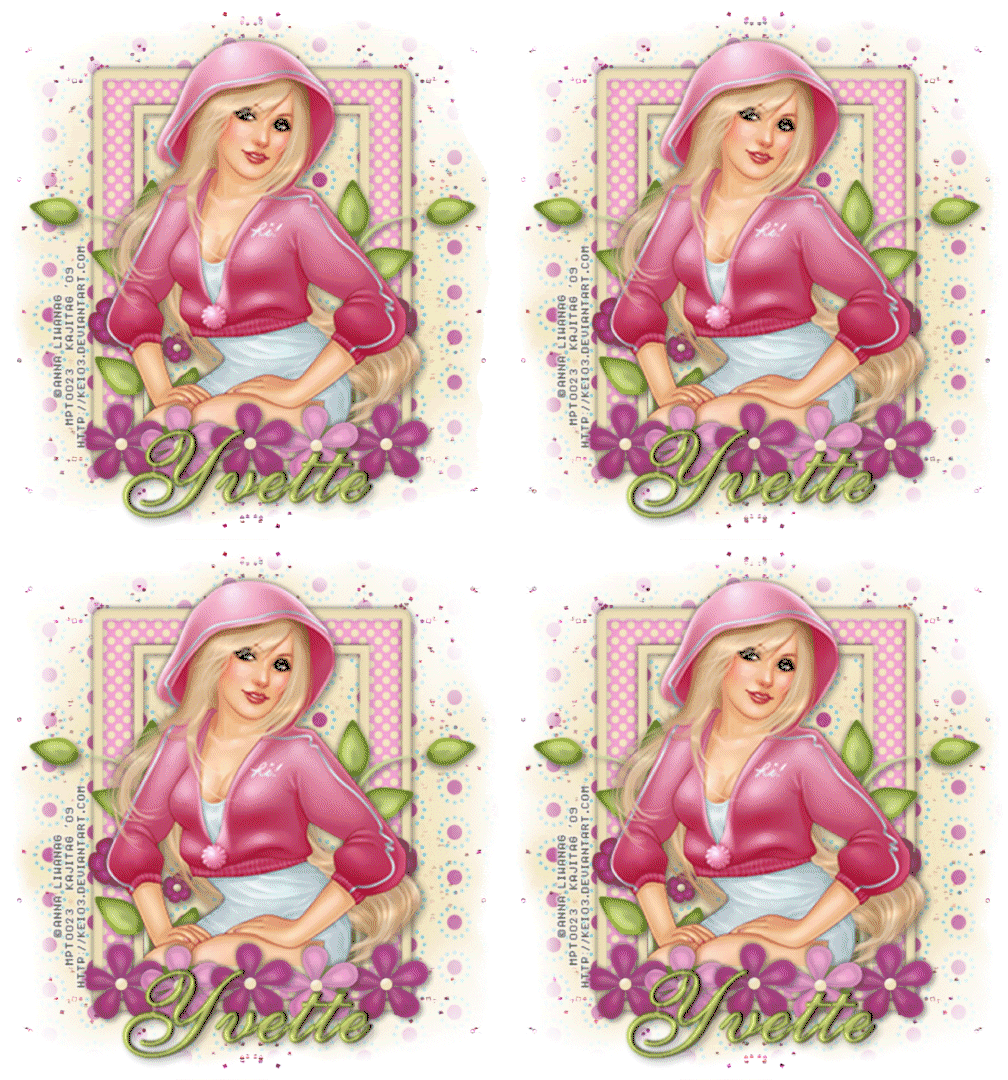
A tube of your choice. I'm using the lovely artwork of Anna Liwanag. You must have a license to use her artwork. You can get that license and art at My PSP Tubes.
The scrap kit is by Yvette, of Essence of Creativity and Misfits Scrapz. This is a FTU kit, called Cute & Girly. Imagine that! LOL! No problem to figure out where I got the name for this tut! Be sure you leave some love for Yvette's new freebie!
Filters: Eye Candy 4000 > Gradient Glow -=- Eye Candy 4000 > HSB Noise
Font: I used Pen Tweaks One SSi.
Supplies: Just the mask, as is almost a normality in all my tuts. I can't get it to actually show up when I click the link, but the download is good. And, also normal, I don't know whose mask this is. If you know who made the dmsk series of masks, let me know and I will give credit where it's due!! Thanks!
Also, please... if you have problems with any download link for supplies, drop me a line via e-mail. Leaving a comment without a way for me to contact you back doesn't help. If you e-mail me, I'll do my best to send you the supplies.
Okay, so let's start this puppy!
Open your mask in PSP and minimize. Alternatively, you can file it away in your mask file for future use!
Open a new canvas, 700 x 750, white.
Open Frame1. Copy and paste as a new layer. Resize 110%.
Add your tube. Resize, position, and drop shadow to your taste.
Highlight your frame layer. Grab your magic wand and click inside the frame.
Selections > Modify > Expand by 1. Selections > Invert.
Highlight your tube layer. Get your eraser brush and erase whatever part of your tube you don't want showing on the bottom or sides of your frame.
Selections > Select None.
Highlight your white background layer.
Open the paper labeled pp1. Resize to 750x750 pixels. Copy and paste as a new layer.
Apply your mask. Delete the mask layer, answer "yes" to the pop-up question, and merge group.
Open flowerbranch2. Resize 65%. Copy and paste as a new layer. Rotate 25° left. Place to the left side of the frame. See my tag for placement reference, if you like. Drop shadow. Duplicate this layer and Image > Mirror. Merge these layers down.
Open flower1. Resize 35%. Copy and paste as a new layer. Place at the bottom of the frame. Drop shadow.
Open flower4. Resize 35%. Copy and paste as a new layer. Place this at the bottom of the frame, as well. Drop shadow. Duplicate flower1 twice, flower 4 once. Arrange down there at the bottom of the frame until they're positioned however you'd like them.
Merge all your flower1 & flower4 layers down.
Open glitterspill2. Copy and paste as a new layer. Position towards the top left area of your canvas. Duplicate this layer and Image > Flip. Merge these two layers down. Duplicate *that* layer and Image > Mirror. Merge those two layers down.
In your layer palette, drag this layer down below your mask layer.
Go back to the top layer and add your name. I used color #cbe28d for the fill and stroke, stroke set at 2.
Effects > Eye Candy 4000 > Gradient Glow of 4-25-100, color #63881e.
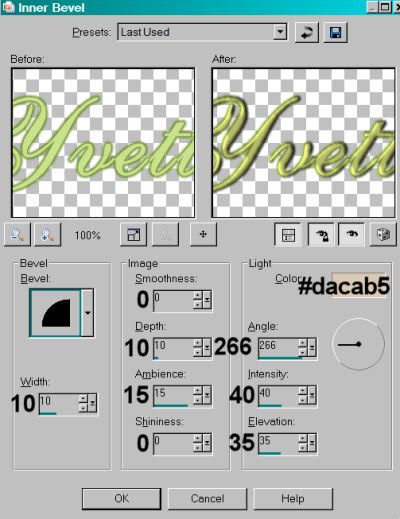
Now, add a bevel as shown below:

Hit okay.
Drop shadow your name.
Resize your canvas to a size with which you are comfortable.
Add your copyright, license information if applicable, and taggers'/watermark.
If you choose not to animate, you're now done, and you can merge your layers and save!
A N I M A T I O N
Highlight your glitterspill2 layer. Duplicate three times, for a total of four glitterspill2 layers.
Highlight your bottom glitterspill2 layer.
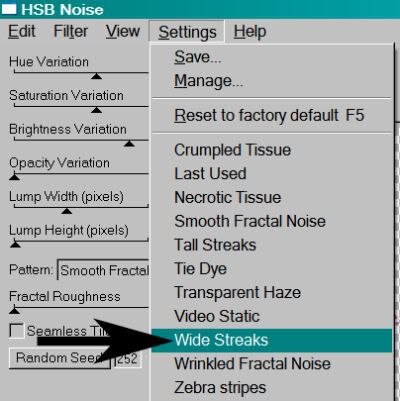
Effects > Eye Candy 4000 > HSB Noise set on the following:

Use default number settings.
Hit okay.
Highlight the next glitterspill2 layer up.
Add HSB Noise again, this time hitting "Random Seed."
Hit okay.
Now, highlight the third glitterspill2 layer. Again, add HSB Noise, again hitting "Random Seed."
Hit okay.
And finally, the top glitterspill2 layer. Add HSB Noise, again hitting "Random Seed."
Hit okay.
Close out the top three glitterspill2 layers, leaving the bottom glitterspill2 layer open.
Edit > Copy Merged.
Open Animation Shop. Right-click on the desktop area and paste as a new animation.
Return to PSP. Close out the bottom glitterspill2 layer and open the next glitterspill2 layer up.
Edit > Copy merged.
Back to Animation Shop. Edit > Paste > After Current Frame.
Return again to PSP. Close out the open glitterspill2 layer and open the next glitterspill2 layer up.
Edit > Copy merged.
Again, back to Animation Shop. Edit > Paste > After Current Frame.
One last time, back to PSP. Close out the open glitterspill2 layer, opening the top glitterspill2 layer.
Edit > Copy Merged.
Back to Animation Shop. Edit > Paste > After Current Frame.
View > Animation.
I didn't change the frame properties on this one, because I liked the "glimmer" look. You can change it if you like.
We're done! I'm happy that you chose my tut!! I hope it was as basic as I think it was! :)
.


No comments:
Post a Comment