You will also need:
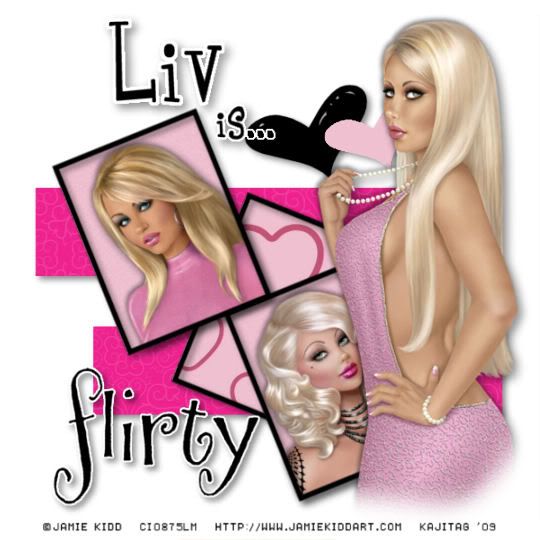
Some tubes of your choice. I'm using the "flirty" (lol) artwork of Jamie Kidd. You must have a license to use her art. You may obtain that license and her art from C.I.L.M.
The scrap kit is by Liv, of Liv Luvs Scraps. This is a FTU kit, which is available at TKO Scraps. This is another store, so you'll have to register to get it, but it is free. The kit is called "Heidi." Be sure to write a quick "thanks" for the freebies!!
Supplies: The template, which I got from Beth at Blissfully Beth. This is Template 100. She's included it with 9 others, so you'll get a file with ten in total. Thank you Beth! Great templates!
Filters: None!
Font: I used Girls Are Weird.
Let's get started.... I'm not too sure how I'm going to explain this. Wish me luck, as I wish the same for you!
Open the template. Window > Duplicate. Close out the original. Delete the copyright layer, which is on top.
Highlight the bluish-purplish background. Add a new raster layer. Flood fill this layer with white. For the time being, close out the white layer you just created. (Need to do this so you can see the white heart.)
Highlight the "top black line" layer.
Grab your magic wand and click on the top black line.
Highlight the "bottom black line" layer. Click your wand on the black block here.
Making sure you're highlighting the "top black line" layer .....
Open PaperPatterenedBrightPink2. Copy and paste as a new layer.
Selections > Invert. Hit delete. Selections > Select none. Delete both black line layers. Drop shadow your pink paper line layers.
Highlight your top frame background. Again, using your magic wand, click inside that rectangle.
Highlight your bottom frame background. Click inside that rectangle as well.
Open PaperTexturedLtPink. Copy and paste as a new layer. Selections > Invert. Hit delete.
While you're there, add your two tubes that you're going to be using in the frames. I rotated mine 25° to the left. Position and drop shadow your tubes.
Highlight the first tube layer and hit delete. Now, highlight the second and hit delete. Selections > Select none.
When I did this, the top frame tube was partially showing up in the bottom frame. If this happens to you as well, then again take your magic wand and click on the bottom frame background. Then highlight the tube that's showing in the bottom (that you DON'T want showing there) and hit delete. Selections > Select none.
I hope I'm explaining this well! Please don't get lost! lol!
Highlight your middle frame background. Click inside that rectangle.
Highlight your "sm white heart" layer. Click inside the heart.
Open PaperHearts. Copy and paste as a new layer. Selections > Invert. Hit delete. Selections > Select none.
Delete all three frame backgrounds and the "sm white heart" layer.
Drop shadow all three of the black frame layers, and both of the heart layers. Oh, and the "flirty" layer, as well!
Delete the bluish-purplish background and open up the white layer you created in the beginning.
Add your "main" tube. Resize, position and drop shadow to your taste.
Go to the top layer and add your name. I used black as the fill and the stroke. Stroke set at 3.
Duplicate your name layer. In your layer palette, drag your duplicate below your original. Stay on that layer.
Grab your magic wand again, and click on each of the letters in the name.
Selections > Modify > Expand by 3.
Flood fill the letters on the duplicate layer with white. Selections > Select none. Merge down those two layers. Drop shadow your name.
I used the same font, but reduced it in size by ½. Then typed out "is...". Duplicated this, just the same way we did for the name. Drag the duplicate below the original. Magic wand, click on each of the letters and dots.
Selections > Modify > Expand by 2.
Flood fill the letters on the duplicate layer with white. Selections > Select none. Merge down those two layers. Drop shadow.
Resize your canvas to a size with which you're comfortable.
Add your copyright, license information if applicable, and taggers'/watermark.
Layers > Merge > and save! We are done!
And there you go! Another finished tag! I *sincerely* hope I was able to put it into words well enough for you! Any problems, drop me a line!! I will then try to rewrite wherever the problems exist. Thanks for trying it!!
.


No comments:
Post a Comment