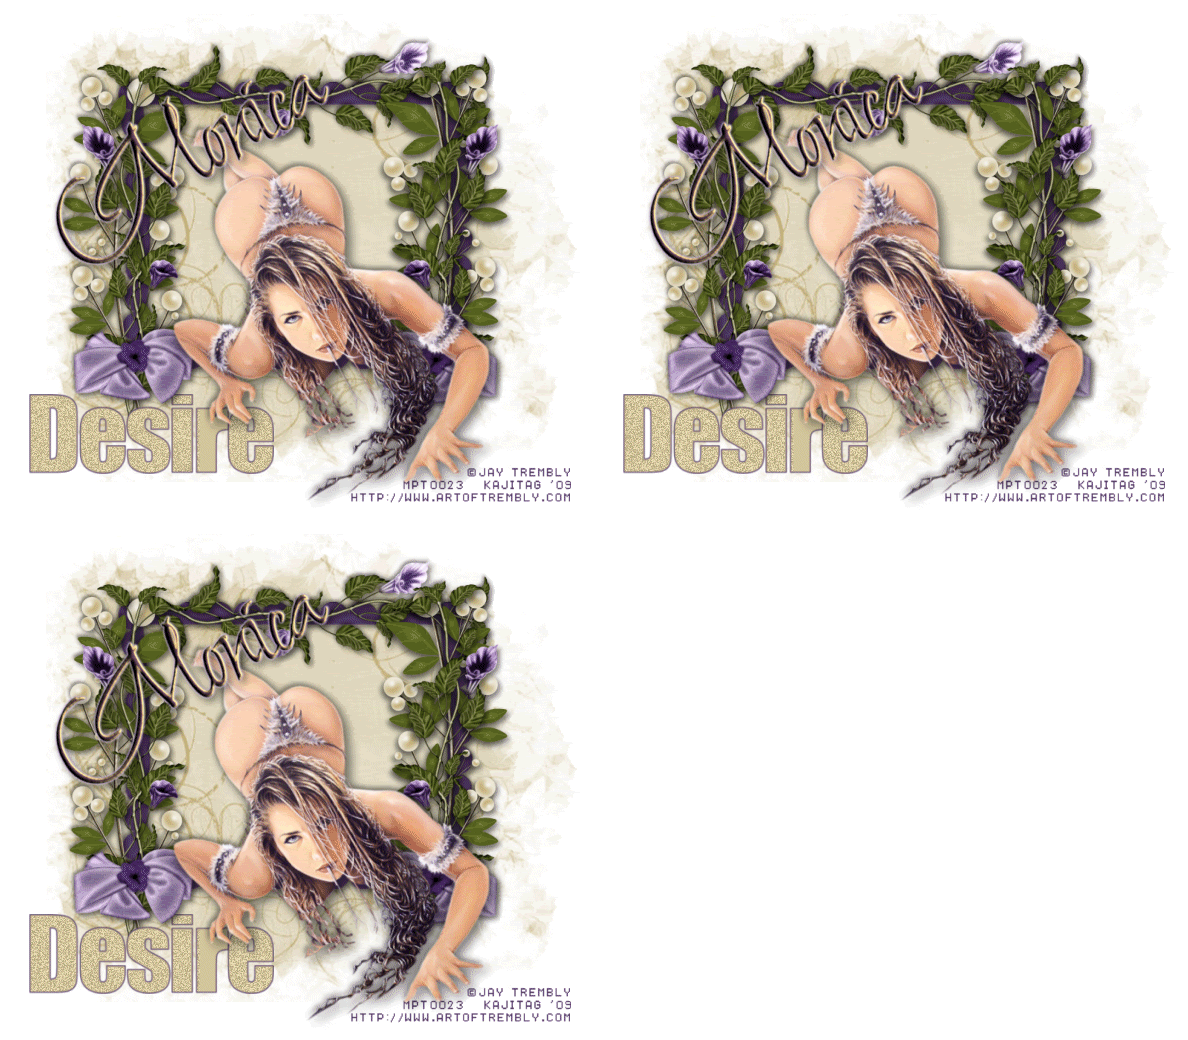
You will also need:
Animation Shop. This is from CNET, so it's a safe download. However, it costs. That changed pretty recently. I don't know why!!
A great person named solshne (and another named Chris) wrote to let me know that one might find Animation Shop for free at this location. This is an FTP link and I have no idea if it's safe or not. So keep your antivirus handy to scan it after download!
A tube of your choice. I'm using the artwork of Jay Trembly. You must have a license to use his artwork. You can get that license and art at C.I.L.M. My tag bears a license from MPT because Jay was with MPT when I bought it. He's since transferred to C.I.L.M.
The scrap kit is by Monica, of Simply Sensational Scraps. This is a FTU kit, called Lilac Dreams. Don't forget to leave some love for the freebie!!
Filters: Eye Candy 4000 > Gradient Glow -=- dsb Flux > Bright Noise
Font: I used Shalimar Swash ROB.
Supplies: The mask and the "word art," here. The mask is by Essex Girl! LOVE her masks! The "word art" was made by me, in colors to coordinate with this tag.
Also, please... if you have problems with any download link for supplies, drop me a line via e-mail. Leaving a comment without a way for me to contact you back doesn't help. If you e-mail me, I'll do my best to send you the supplies.
Okay, so let's go!
Open your supplies in PSP and minimize. Alternatively, you can file them away in your regular PSP files for future use!
Open a new canvas, 800 x 700, white.
Open frame3. Copy and paste as a new layer. Resize 115%. Rotate 90° right.
Add your tube. Resize, position, and drop shadow to your taste. If you're using a tube somewhat like mine, meaning laying down, face-first, I'll just let you know I rotated mine 30° left.
The following steps I didn't need for my particular tube. This is just here in case you need it.
Highlight your frame layer. Grab your magic wand and click inside the frame.
Selections > Modify > Expand by 1. Selections > Invert.
Highlight your tube layer. Get your eraser brush and erase whatever part of your tube you don't want showing on the bottom, top or sides of your frame.
Selections > Select None.
Okay, back to things I did on the tag.
Highlight your white background layer.
Open paper15. Resize to 800x800 pixels. Copy and paste as a new layer.
Apply your mask. Delete the mask layer, answer "yes" to the pop-up question, and merge group.
Resize your mask layer 90%.
Open foliage2. Copy and paste as a new layer. Rotate 90° right. Place on the top of the frame. See my tag for placement reference, if you like. Drop shadow.
Open ornament3. Copy and paste as a new layer. Place at the left side of the frame. Drop shadow. Duplicate this layer and Image > Mirror. Position on the right side of the frame.
Open foliage1. Copy and paste as a new layer. Place this over the ornament layer on the left. Drop shadow. Duplicate this layer and Image > Mirror. Arrange at the sides of your frame until they're positioned however you'd like them.
Open bow2. Resize 65%. Copy and paste as a new layer. Position toward the bottom of the group of foliage & ornament on the left. Drop shadow. Duplicate this layer and Image > Mirror. Position this one as you like it.
Open the "Desire" word art. Copy and paste as a new layer. In your layer palette, drag this below the left bow, sort of covering up the ends of the branches on the bottom of that side of the frame.
Go back to the top layer and add your name. I used color #553b68 for the fill and #d3c59c for the stroke, stroke set at 2.
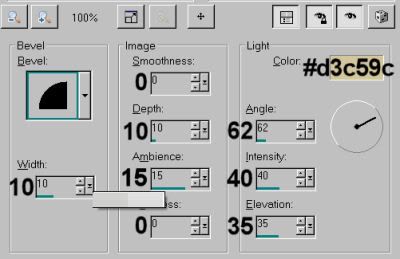
Now, add a bevel as shown below:

Hit okay.
Effects > Eye Candy 4000 > Gradient Glow of 3-25-100, color #c5afd4.
Drop shadow your name.
I rotated the name on the example 30° left, and put it in the upper left corner of the frame.
Resize your canvas to a size with which you are comfortable.
Add your copyright, license information if applicable, and taggers'/watermark.
If you choose not to animate, you're now done, and you can merge your layers and save!
A N I M A T I O N
Highlight your Desire layer. Grab your magic wand and click inside each letter of the word. Don't forget the dot on the "i"!!
Duplicate the Desire layer twice, for a total of three Desire layers.
Highlight your bottom Desire layer.
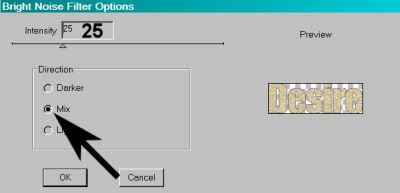
Effects > dsb Flux > Bright Noise set like so:

Hit okay.
Highlight the middle Desire layer.
Add Bright Noise again, this time hitting "mix" once.
Hit okay.
Now, highlight the top Desire 2 layer. Again, add Bright Noise, again hit "mix" once.
Hit okay.
Selections > Select None.
Close out the top two Desire layers, leaving the bottom Desire layer open.
Edit > Copy Merged.
Open Animation Shop. Right-click on the desktop area and paste as a new animation.
Return to PSP. Close out the bottom Desire layer and open the middle Desire layer.
Edit > Copy merged.
Back to Animation Shop. Edit > Paste > After Current Frame.
Return again to PSP. Close out the middle Desire layer and open the top Desire layer.
Edit > Copy merged.
Again, back to Animation Shop. Edit > Paste > After Current Frame.
View > Animation.
And we're done! Thanks so much for coming around!! I've been without my mojo for about 5 days or so. I'm so glad I finally put something together! :) Have a great rest of your day!
.


No comments:
Post a Comment