
You will also need:
A tube of your choice. A sitting tube would work best for this one. I'm using the fun artwork of Rion Vernon at Pinuptoons. You must have a license to use his art. You may obtain that license and his art from C.I.L.M.
The scrap kit is by Tezza, of Tezza's Tagger Scraps. This is a FTU kit, which is called "Feeling Spotty." She's made a tag with the kit, too, which is the first image on that day's blog entry. You can get some ideas from that if you like! I almost did! LOL! Leave lots of love for the freebies!!
Supplies: Just the mask. Again, the same one used below, from Teresa at Boundless Bliss! Thanks again, Teresa!!
Filters: Eye Candy 4000 > Gradient Glow
Font: I used ITC Fat Face Cyrillic.
Let's get to it! This is another quick-n-easy tut!!
Open a new canvas, 750 x 700, white.
Open Bracket1. Resize 130%. Copy and paste as a new layer.
Highlight your white background layer.
Open paper8. Copy and paste as a new layer.
Apply your mask. INVERT TRANSPARENCY!! Delete the mask layer, answer "yes" to the pop-up question, and merge group.
Open shoelace1. Resize 60%. Copy and paste as a new layer. Position it where you'd like it, up-and-down-wise (eek! grammar!) on the bracket layer. Drop shadow the shoelace.
Highlight the Bracket1 layer. Grab your magic wand and click outside the bracket.
Highlight your shoelace layer. Hit delete. Selections > Select None.
Open bead2. Resize 35%. Copy and paste as a new layer. Position right over the center of the bow in the shoelace. Drop shadow your bead.
Drop shadow the bracket layer!
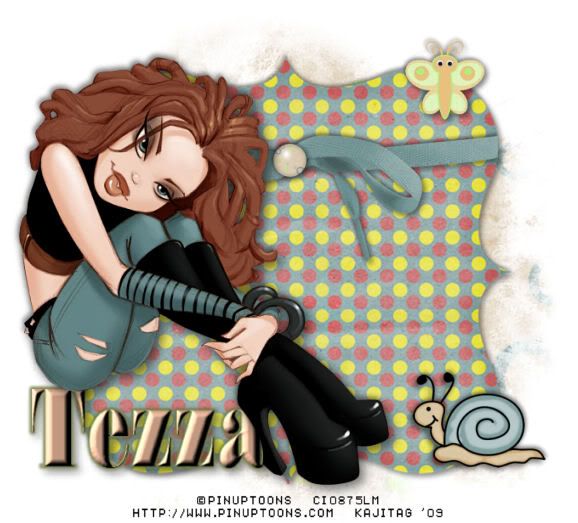
Add your tube. Resize, position, and drop shadow to your taste.
Open bug1. Resize 35%. Copy and paste as a new layer. Position as you'd like it on your tag. Drop shadow your bug1.
Open bug3. Resize 60%. Copy and paste as a new layer. Position this as you'd like as well. Drop shadow this "bug."
Go to the top layer and add your name. I used color #d9c1b1 as the fill and the stroke. Stroke set at 3.
I added the following bevel:
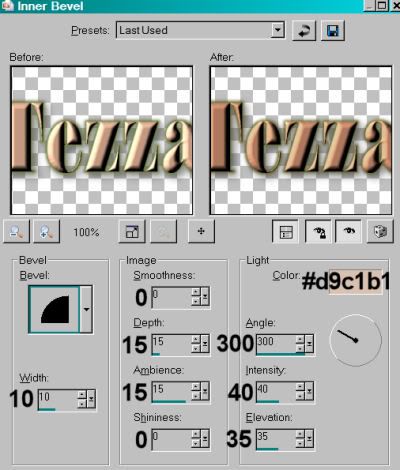
Hit okay.
Add a Gradient Glow, settings at 5-25-100, color #6e7c3f.
Drop shadow your name. Position it so it appears your tube is sitting ... or leaning, whatever pertains to your particular tube... on the name.
Resize your canvas to a size with which you're comfortable.
Add your copyright, license information if applicable, and taggers'/watermark.
Layers > Merge > and save! We are done!
And there you go! Another finished tag! Told you it was quick-n-easy!! I hope you liked this tutorial, and I thank you SO much for choosing to work with it!!
.


Oh wow - I just stumbled across your blog. thankyou so much for using my kit in a tut. It looks great - well done. Ill pop this tag up on my blog for you. Thanks again♥
ReplyDelete