
You will also need:
Animation Shop. This is from CNET, so it's a safe download. However, it costs. That changed pretty recently. I don't know why!!
Alternatively, I had two people point out to me that one might find Animation Shop for free at this location. This is an FTP link and I have no idea if it's safe or not. So keep your antivirus handy to scan it after download!
A tube of your choice. I'm using the artwork of Elizabeth Austin. You must have a license to use her artwork. You can get that license and art at C.I.L.M.
The scrap kit is by Tina, of Tina's Magical Scrap World. This is a FTU kit, called Christmas Wonderland. Be sure to leave lots of love for your freebie!!
Filters: Eye Candy 4000 > Fire
Font: I used Flapper.
Supplies: I'm including the mask and the window. You can find these here. Again, I don't know from whence these came, so if YOU do, let me know and I'll give the proper credit where it's due!!!
Also, please... if you have problems with any download link for supplies, drop me a line via e-mail. Leaving a comment without a way for me to contact you back doesn't help. If you e-mail me, I'll do my best to send you the supplies.
Okay, so let's get this set in stone! lol.
Open your supplies in PSP and minimize. Alternatively, you can file them away to your mask and etc. files for future use!
Open a new canvas, 800 x 700, white.
Open the window I included in the supplies. Resize 85%. Copy and paste as a new layer. Your positioning of this window may change throughout your building of this tag. I know mine did!
Highlight your white background layer.
Open Paper-13. Resize to 800 x 800 pixels. Copy and paste as a new layer.
Apply your mask. Delete the mask layer, answer "yes" to the pop-up question, and merge group.
Add your tube. Resize, position, and drop shadow to your liking.
To crop the bottom of your tube (if you're using a tube that's ¾ length like I am), grab your lasso tool, set on freehand, and set your feather to 20. Draw a "smile" around the bottom of your tube, kinda like so:
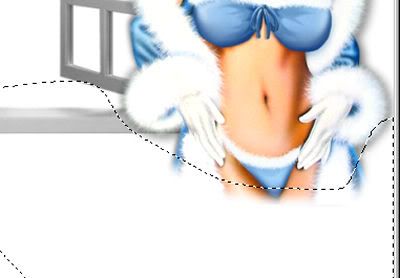
Hit delete a few times, until you have it like you want it. Selections > Select None.
Open Garland1. Copy and paste as a new layer. Drag this layer below your tube layer, but above your window layer.
Grab your pick tool
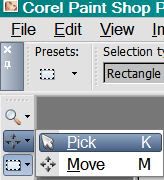
...and squeeze the sides together until it's the same size as your window.
Position your garland at the top of the window. See my example for placement reference, if you like. Give your garland a drop shadow of choice.
Open SnowFlakeChain1. Copy and paste as a new layer. In your layer palette, this layer should be below the garland, but above the window.
Again, grab your pick tool and squeeze the sides together until the element is the proper size for your window. Position at the top of the window. You might want to see my example for placement reference again, if you like. Drop shadow.
Open Candle With Poisettias1. Resize 50%. Copy and paste as a new layer. Position on the sill of the window, close to the middle. In the layer palette, this should be above the SnowFlakeChain, but below the garland. Drop shadow.
Open Sleigh1. Resize 65%. Copy and paste as a new layer. Position on the side opposite your tube. In your layer palette, this should be just above or below the tube. Drop shadow.
Drop shadow your window layer.
Go back to the top layer and add your name. I used color #f9f9e3 for the fill, #4379b2 for the stroke, stroke set at 2.
Add the following bevel:
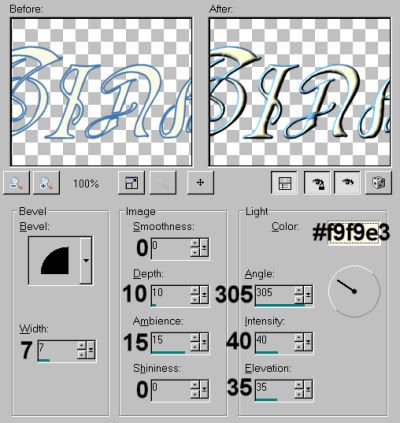
Hit okay.
Drop shadow your name.
Resize your canvas to a size with which you are comfortable.
Add your copyright, license information if applicable, and taggers'/watermark.
If you choose not to animate, you're now done, and you can merge your layers and save!
A N I M A T I O N
Highlight your Candle with Poinsettia1 layer. Duplicate twice, for a total of three candle layers.
Highlight your bottom candle layer.
Grab your lasso tool, set on point-to-point. Make sure the feather is set to 0. Zoom in as much as you need, and draw a selection around each of the three flames.
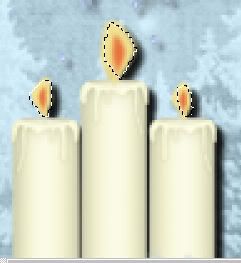
On the bottom layer still,
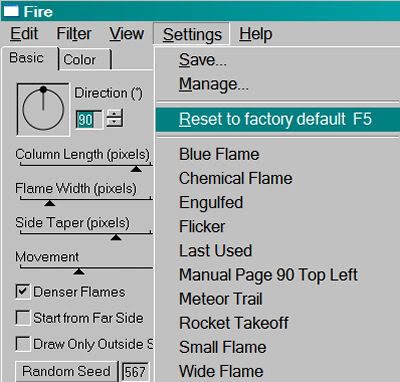
Effects > Eye Candy 4000 > Fire, set with the default settings:
Hit okay.
Highlight the middle candle layer.
Add Fire again, this time hitting "Random Seed" -- watch your window to see what the random seed settings are doing to your flames. You can click that button as many times as you like, until you get an effect you like. Or, just click it once, to make it easy.
Hit okay.
Now, highlight the top candle layer. Again, add Fire, again hitting "Random Seed."
Hit okay.
Close out the top two candle layers, leaving the bottom candle layer open.
Edit > Copy Merged.
Open Animation Shop. Right-click on the desktop area and paste as a new animation.
Return to PSP. Close out the bottom candle layer and open the middle candle layer.
Edit > Copy merged.
Back to Animation Shop. Edit > Paste > After Current Frame.
Return again to PSP. Close out the middle candle layer and open the top candle layer.
Edit > Copy merged.
Again, back to Animation Shop. Edit > Paste > After Current Frame.
Still in Animation Shop, Edit > Select All.
Right-click on the top bar of your animation. Select "Frame Properties" and change that number to 25.
View > Animation.
Whew, we're done! Thanks for being here! I'm going to have to get busy and do lots more tuts!! Happy Holidays!
.


No comments:
Post a Comment