
You will also need:
Animation Shop. This is from CNET, so it's a safe download. However, it costs. That changed pretty recently. I don't know why!!
A great person named solshne (and another named Chris) wrote to let me know that one might find Animation Shop for free at this location. This is an FTP link and I have no idea if it's safe or not. So keep your antivirus handy to scan it after download!
A tube of your choice. I used the artwork of Edward Reed. You must have a license to use his art. You may obtain that license and his art from C.I.L.M. Apparently, they're trying to make things "easier" at CILM by putting all winter and Christmas tubes in a different area. Personally, it seems they've made it more difficult. But here's the link to this particular tube, under winter and Christmas tubes. Hope this helps!!
The scrap kit is by Clarey, from Clarey's Designz. This is a PTU kit, available at Clarey's Designz Digital Scrapbook Store, and is called Winter Bliss.
Supplies: You may find them here. This includes many files, the origins of them all unknown. There will be your snow animation, a gradient, a mask, a background and a snow file. If anyone recognizes from whence they (or one of them) came, please let me know so that I can give proper credit! Thank you!
Also, please, if you have problems with any download link for supplies, drop me a line via e-mail. Leaving a comment without a way for me to contact you back doesn't help. If you e-mail me, I'll send you the supplies.
Filters: Eye Candy 4000 > Gradient Glow
Font: I used Acadian.
Okay, let's do this!
Open your supplies in PSP and minimize. Alternatively, you can file each one with the rest of your PSP files, for future use! File the snow animation to where it will be handy when we get to Animation Shop.
Open a new image, 700 x 750, white.
Open roundframe3. Copy and paste as a new layer.
Grab your pick tool
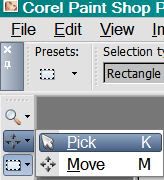
And squish the frame -- maybe even drawing it out a bit wider if you like, until you get something like this:
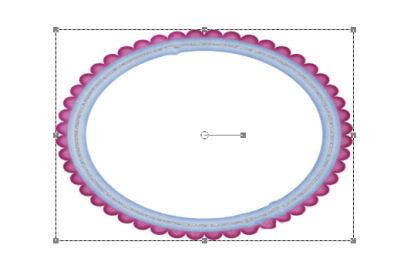
My intent is/was to make it look like an ice skating pond for one! lol.
Once your frame looks good to you, move it toward the bottom of your canvas and...
Grab your magic wand and click inside the frame. Selections > Modify > Expand by 10.
Go to your materials palette and find your silver gradient file. Settings like so:
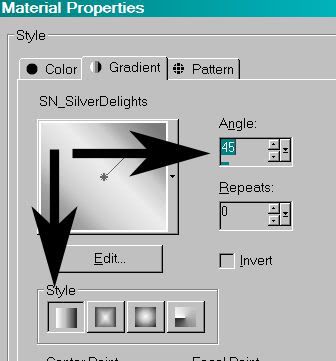
Hit okay.
Grab your flood fill tool and fill the selected area with your gradient. Selections > Select None.
Add your tube. Resize, position and drop shadow to your liking.
Highlight your white background layer.
Open Background.psp from your supplies. Copy and paste as a new layer.
Apply your mask. Delete mask layer, answer "yes" to the pop-up question, and merge group.
Open snowflaketree2. Resize 85%. Copy and paste as a new layer. Position to the right of your canvas. This layer should be below everything but the background layer. Duplicate this layer and Image > Mirror. Position to your liking. Add a small drop shadow to both layers.
Open deesnow. This is a kind-of arduous task, but this is how I did it. Copy and paste deesnow as a new layer. This layer should be below all layers of your little ice skating rink, and above the trees. Give this layer a very small drop shadow. Duplicate this layer as many times as you like, moving them down while making sure the snow doesn't look uniform. Some to the right, some to the left. When you've gone almost all the way down (but NOT all the way down!), stop. Merge all these layers down.
Now, add the deesnow again, this time at the bottom of your canvas, and above the ice skating rink layers. Use the same drop shadow as above. Duplicate *this* instance as many times as you like, still making it look kind of random, until the snow *just* covers the bottom of the skating area. See my example for placement reference. When done with these, merge all these layers down.
Now, on BOTH the layers of deesnow that you've made, apply the mask again. Again, answer "yes" to the pop-up question and merge group.
Open snowdust1. Resize 55%. Copy and paste as a new layer. Drag this layer above all your other layers, but below the tube layer. Position this snowdust so that it appears to be coming from the blades on the ice skate. Use a small drop shadow on this layer. Rotate this layer 35° left.
Duplicate this layer and rotate 65° left. Duplicate the first snowdust layer again, this time rotating 48° left. Merge these layers down.
Drop shadow your frame layer.
Go back to the top layer and add your name. I used color #c06d9e for the fill and the stroke, stroke set at 2.
Add a Gradient Glow of 5 - 25 - 100 in color #dde0e5.
Hit okay.
Add the following bevel:
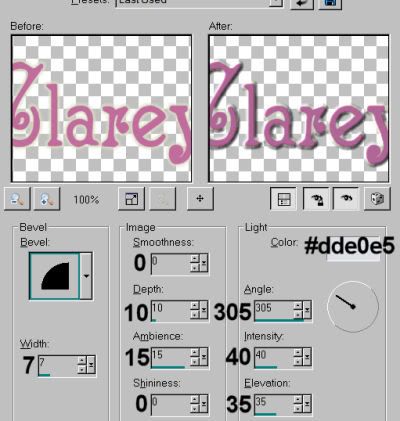
Hit okay.
Drop shadow your name.
Add your copyright, license information if applicable, and taggers'/watermark.
If you choose not to animate, you're done! Merge your layers and save!! Congrats!
A N I M A T I O N
Close the top three layers. This should be your artist info, your name and your tube.
Edit > Copy merged
Open Animation Shop, right-click on the desktop area and paste as a new animation.
Duplicate this frame until you have a total of 10 frames. Move your slider at the bottom back to the first frame.
Locate and open your snow animation. Edit > Select All. Edit > Copy
Return to your animation that you're building and Edit > Select All. Edit > Paste into Selected Frame.
I found placement with this snow very easy. Just don't move until the snow shows up, then release your mouse button.
Go back to PSP. Layers > View > None. Open the top three layers.
Edit > Copy Merged.
Back to Animation Shop. Right-click on the desktop area and paste as a new animation.
Duplicate *this* frame until you have ten. Bring the slider back to the first frame.
Edit > Select All. Edit > Copy
Back to the animation upon which you've put the snow.
Edit > Select All. Edit > Paste Into Selected Frame
Hover your mouse until the rest of your tag is positioned to your liking, then release your mouse button.
View > Animation. Save as .gif and, again! We are done!! Thanks for taking it on! I hope you enjoy your results!
.


No comments:
Post a Comment