

You will also need:
Animation Shop. This is from CNET, so it's a safe download. However, it costs. That changed pretty recently. I don't know why!!
Alternatively, I had two people point out to me that one might find Animation Shop for free at this location. This is an FTP link and I have no idea if it's safe or not. So keep your antivirus handy to scan it after download!
A tube of your choice. I used the artwork of Ted Hammond. You must have a license to use his art. You may obtain that license and his art from C.I.L.M. Here's the link to this particular tube: GG-3 Hope this helps!!
Once again, this beautiful scrap kit is by Sylvie, from Fantasy Moments. This is a FTU kit, called Happy New Year. As always, leave love for the freebies!!
Supplies: I've had a sudden flurry of e-mails about the animation file not working. The only thing I can think of is that it may be a PSP version problem?? I'm now giving the link to the original file, which I had just resized. I thought it'd be easier to include the resized animation but I guess not! If my memory serves, I resized this animation in Animation Shop to a size somewhat like 350x whatever, maintain aspect ration UNchecked.
FWIW, I just tried to re-open the file in AS to check the measurements, and it wouldn't let me open it either! I'm so sorry ladies!! I'll put a note through the tut groups.... Thanks for bringing this to my attention!!
Also, please, if you have problems with any download link for supplies, drop me a line via e-mail. Leaving a comment without a way for me to contact you back doesn't help. If you e-mail me, I'll send you the supplies.
Filters: Eye Candy 4000 > Gradient Glow
Font: I used ALS Script.
Okay, on to the tutorial!
File the animation to where it will be handy when we get to Animation Shop.
Open a new image, 700 x 700, white.
Open the Element-61. Copy and paste as a new layer. Resize 80%.
Add your tube. Resize, position and drop shadow to your liking.
Highlight your white background layer.
Open Paper-5. Copy and paste as a new layer.
Highlight your frame layer.
Grab your magic wand and click inside the frame.
Selections > Modify > Expand by 15.
Selections > Invert
Highlight your paper layer and hit delete. Selections > Select None.
This paper layer isn't going to show at the end, but it's a good thing to have for reference once we get to Animation Shop.
Open Element-17. Resize 35%. Copy and paste as a new layer.
Position this layer at the top of the frame. Duplicate, and put this one at the bottom. (See my example for placement reference, if you like.) Merge these two layers down.
Effects > Eye Candy 4000 > Gradient Glow of 4-25-100 in color #dab44d.
Open Element-35. Resize 35%. Copy and paste as a new layer. Position at the bottom right corner of the frame. Drop shadow.
Open Element-3. Resize 30%. Copy and paste as a new layer. Position at the top right corner of the frame. Drop shadow.
Drop shadow your frame layer.
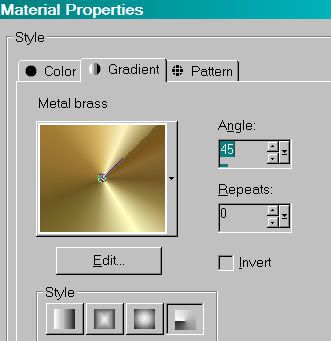
Go back to the top layer and add your name. I used black for the fill and a gradient for the stroke, stroke set at at 2. The gradient I used was called metal-brass, set at a 45° angle and it's a radial gradient.
I added the following bevel:
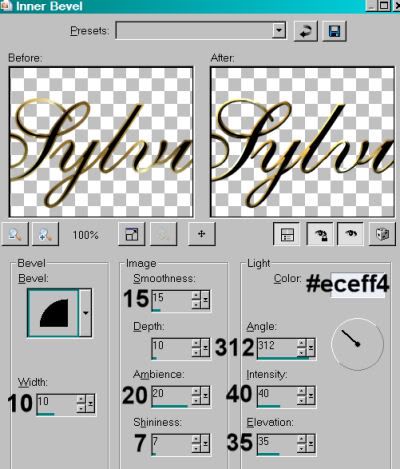
Hit okay.
Drop shadow your name.
Resize your canvas to a size with which you are comfortable.
Add your copyright, license information if applicable, and taggers'/watermark.
If you choose not to animate, that paper we did in the beginning is very useful for you! And you're done! Merge your layers and save!! Congrats!
A N I M A T I O N
Layers > View > None.
Open your bottom two layers. This should be your white background, and your paper layer.
Edit > Copy merged
Open Animation Shop, right-click on the desktop area and paste as a new animation.
Duplicate this frame until you have a total of 15 frames. Move your slider at the bottom back to the first frame.
Locate and open your fireworks animation. Edit > Select All. Edit > Copy
Return to your animation that you're building and Edit > Select All. Edit > Paste into Selected Frame.
I found placement with the fireworks file quite easy. It is immediately positioned into the middle, which is exactly where you want it!
Go back to PSP. Layers > View > All. Close the bottom two layers.
Edit > Copy Merged.
Back to Animation Shop. Right-click on the desktop area and paste as a new animation.
Duplicate *this* frame until you have 15. Bring the slider back to the first frame.
Edit > Select All. Edit > Copy
Back to the animation upon which you've put the fireworks.
Edit > Select All. Edit > Paste Into Selected Frame
Hover your mouse until you have the frame and fireworks lined up correctly, then release your mouse button.
View > Animation. Save as .gif and, again! We are done!!
.


No comments:
Post a Comment