
This is just a guideline, and I know not everyone is going to be using the same tube... so use your imagination as you go!
You will also need:
Animation Shop. This is from now a pay-for product, through Corel. That changed a while ago. I don't know why!!
A tube of your choice. I'm using the wonderful artwork of Anna Liwanag. You must have a license to use her work. You can get that license and art at My PSP Tubes.
The scrap kit is by Hezalin, at Heza Scraps. This is a PTU kit, available at Treasured Scraps, and is called "Violet Love." This kit is currently on sale for a mere $0.35!! Get it while you can!
Filters: No outside filters used in this tutorial.
Font: I used 41.
Supplies: Just the current favorite mask, which you may find here. Once again, it's by the wonderful Becky, who has dropped off the Internet so far as I can see. Thank you, Becky, for all you did for the PSP Community while you were around!
Let's start on this one! It's a bit labor-intensive. I hope I explain it well enough!
Open a new canvas, 700 x 700, white.
Open Ellie 6 (white round frame). Copy and paste as a new layer.
Add your tube. Resize, position, and drop shadow to your taste.
Highlight your frame layer. Grab your magic wand and click inside the frame.
Selections > Modify > Expand by 1. Selections > Invert.
Highlight your tube layer. Grab your eraser brush and erase any part of your tube that you don't want showing outside the bottom/sides of the frame.
Selections > Select none.
Highlight your white background layer.
Open Paper 5. Copy and paste as a new layer.
Apply your mask. Delete mask layer, answer "yes" to the pop-up question, and merge group.
I moved my mask layer a teensy bit to the right. You may not like that. It's up to you!
Open Ellie 3. Copy and paste as a new layer.
I chose to write the word "Love" on the heart area. I used color #d1c1d0 for the fill, color #61385d for the stroke, stroke set on 1.
Position your text so it looks best on the heart area. Give this text a small drop shadow.
Merge this text layer down to your Ellie 3 layer.
I applied the following bevel:

Hit okay.
Resize the Ellie 3 layer by 50%. Position on the left side of the frame, so it looks as though it's attached to the frame. Drop shadow.
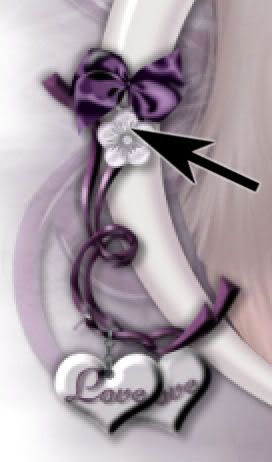
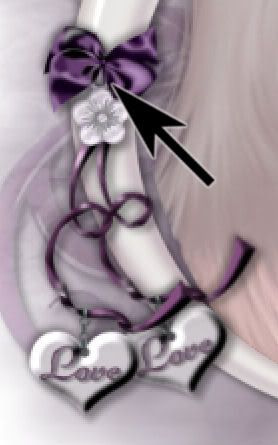
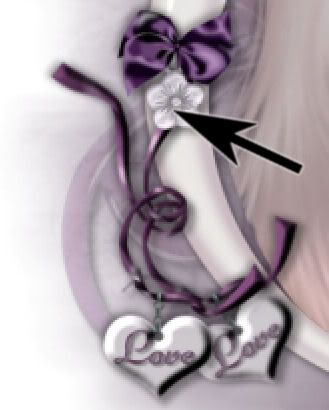
Open Charm. Resize 30%. Copy and paste as a new layer. Position over the top of your Ellie 3 layer. See my example for placement reference. Drop shadow your charm.
Open Bow 4. Resize 20%. Copy and paste as a new layer. Position this over the charm layer. Again, see my example for placement reference. Drop shadow your bow.
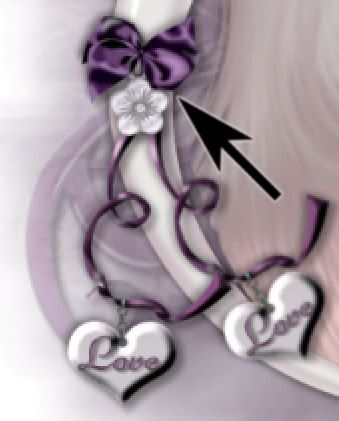
Open Flower 1. Resize 30%. Copy and paste as a new layer. Position this flower on the right side of the frame. Duplicate this layer. Image > Mirror. Position these flowers however you like them best. Drop shadow your flowers.
Open Doodle 2. Copy and paste as a new layer. Duplicate this layer. Image > Mirror. Merge these two layers down. Duplicate that layer. Image > Flip. I found I had to fiddle a bit with the placement of these two layers to get them to a place I liked them. Drop shadow both doodle layers.
Drop shadow your frame.
Go back to the top and add your name. I used the same colors as above: #d1c1d0 as the fill, and #61385d for the stroke. Stroke set at 2.
Drop shadow your name.
Open Flower 2. Resize 50%. Copy and paste as a new layer. I put this flower behind the name. This is not a necessary step, but just something that occurred to me while putting this together. Drop shadow the flower.
Resize your canvas to a size with which you are comfortable.
Add your copyright, license information if applicable, and taggers'/watermark.
If you choose not to animate, you're now done, and you can merge your layers and save!
A N I M A T I O N
Highlight your Ellie 3 layer. Duplicate this layer four times, for a total of five Ellie 3 layers.
I don't know why, but I find that it's easier for me if I position the original layer in the middle. Like so:
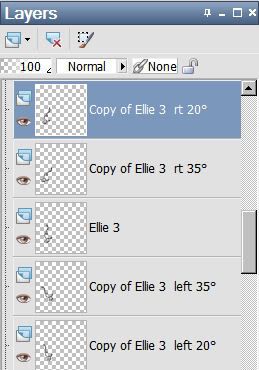
This is just a convenience thing. It's totally up to you how you arrange your layers. Just know that you'll have to keep track of them closely.
Choose one of your copied layers. Rotate 20° left.
You'll notice that this causes the Ellie 3 to go off-center with regard to the point from where it's swinging.
Grab your move tool and move this layer so that the top of the ribbon appears to be coming from the same point of origin as your original Ellie 3 layer.
Highlight another copied Ellie 3 layer. Rotate 35° left.
Again, this throws the "point of origin" off. Move this layer to again, look as though it's coming from the same place.
Highlight a new copied Ellie 3 layer. Rotate 20° right. Repeat your moving of the ribbon until it appears the point of origin is the same.
Highlight your final copied Ellie3 layer. Rotate 35° right. And again, use your move tool to center that point of origin.
I *do* hope I explained that well enough! Let me know if you have trouble. I might be able to help...
Close all but your original Ellie 3 layer.
Edit > Copy merged.
Open Animation Shop, right-click on the desktop area and paste as a new animation.
Return to PSP. Close the original layer and open the 20° left layer.
Edit > Copy merged.
Go back to Animation shop and Edit > Paste > After Current Frame.
Again, return to PSP. Close out the 20° left layer and open the 35° left layer.
Edit > Copy merged.
Go back to Animation shop and Edit > Paste > After Current Frame.
Return again to PSP. Close the 35° left layer and open again the 20° left layer.
Edit > Copy merged.
Go back to Animation shop and Edit > Paste > After Current Frame.
Again, to PSP. Open the original Ellie 3 layer.
Edit > Copy merged.
Go back to Animation shop and Edit > Paste > After Current Frame.
Return to PSP. Close out the original Ellie 3 layer, and open the 20° right layer.
Edit > Copy merged.
Go back to Animation shop and Edit > Paste > After Current Frame.
Once more, go to PSP. Close out the 20° right layer, and open the 35° right layer.
Edit > Copy merged.
Go back to Animation shop and Edit > Paste > After Current Frame.
Finally, return to PSP. Close out the 35° right layer and re-open the 20° right layer.
Edit > Copy merged.
Go back to Animation shop and Edit > Paste > After Current Frame.
You should have 8 frames.
View > Animation to make sure it's all smooth.
Move the slider on the bottom of your animation so that it's set on the first frame.
Edit > Select All.
Right-click on the top bar of your animation and choose "Frame Properties." Change this number to 20.
View > Animation.
Et voila! You are done! Thanks so much for trying my tut! I appreciate you stopping by!
.


No comments:
Post a Comment