
This is just a guideline, and I know not everyone is going to be using the same tube... so use your imagination as you go!
You will also need:
Animation Shop. This is from now a pay-for product, through Corel. That changed a while ago. I don't know why!!
A tube of your choice. I'm using the great artwork of Elias Chatzoudis. You must have a license to use his work. You can get that license and art at My PSP Tubes.
The scrap kit is by Tina, of Tina's Magical Scrap World. This is a PTU kit, available exclusively at Sophisti-Scraps. This kit is called "Sophistication." This kit was used in my previous tutorial, "Seduction," as well. It's also on sale right now (January 11, 2010). The store sale was scheduled to end, but I connected with Tina and I think it's been extended!! Hurry while the gettin's good!! :)
Filters: Eye Candy 4000 > Gradient Glow, Mura's Meister > Copies
Font: I used Brock Script.
Supplies: Just the same Becky mask that I've been using a lot of late! You may find this here. Again, if any of y'all know where Becky's gone, let me know please!! Thank you very much!
Okay, let's do it again!
Open your mask and minimize in PSP. Alternatively, you could save it in with those already in your masks file, for use at a later date!
Open a new canvas, 700 x 700, white.
Open SpecialFlower1. Resize 50%. Copy and paste as a new layer.
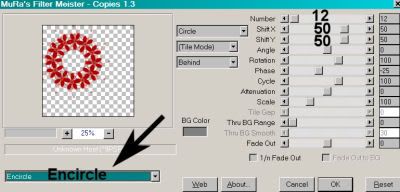
Effects > Plugins > Mura's Meister > Copies with the following settings:
Hit okay.
Open SpecialFlower2. Resize 50%. Copy and paste as a new layer.
Apply Copies to this one as well, same settings.
This should be below the red SpecialFlower1 layer. Position this layer just slightly to one side or the other so that it looks like it's "shadowing" the red one. See my example for placement reference.
Add your tube. Resize, position, and drop shadow to your taste.
Duplicate your tube. Mirror and resize to your liking. Position so the face is in the middle of the circle of RED SpecialFlower1 layer.
Highlight your red SpecialFlower1 layer. Grab your magic wand, click inside the center of the circle.
Selections > Modify > Expand by 15. Selections > Invert.
Highlight your enlarged tube layer, the one that you mirrored. Hit delete.
Selections > Select None.
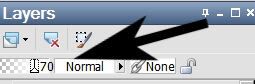
Drag this layer to below both SpecialFlower layers. Lower the opacity to 70.
Drop shadow both SpecialFlower layers.
Highlight your white background layer.
Open Paper4. Copy and paste as a new layer.
Apply your mask. Delete mask layer, answer "yes" to the pop-up question, and merge group.
Open WomansBag1. Resize 40%. Copy and paste as a new layer. Arrange to your liking. Drop shadow.
Open Boots2. Resize 35%. Copy and paste as a new layer. Arrange to your liking. Drop shadow.
Open Bottle2. Resize 40%. Copy and paste as a new layer. Arrange to your liking. I rotated mine 15° left. Drop shadow.
Open Lipstick2. Resize 30%. Copy and paste as a new layer. Arrange to your liking. Drop shadow.
Open Perfume1. Resize 30%. Copy and paste as a new layer. Arrange to your liking. Drop shadow.
Go back to the top and add your name. I used color #d00000 as the fill, black as the stroke, stroke set on 2.
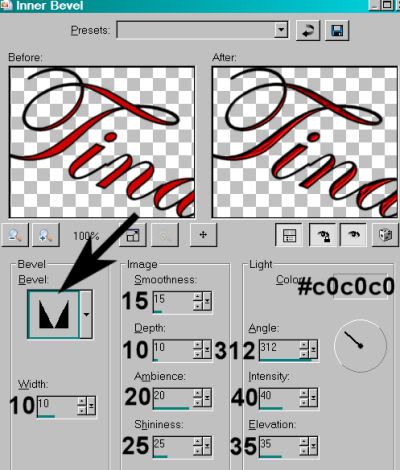
I added the following bevel:
Hit okay.
Effects > Plugins > Eye Candy 4000 > Gradient Glow set at 3-25-100 with color #c0c0c0.
Drop shadow your name.
I rotated mine 20° left. Position as you like.
Resize your canvas to a size with which you are comfortable.
Add your copyright, license information if applicable, and taggers'/watermark.
If you choose not to animate, you're now done, and you can merge your layers and save!
A N I M A T I O N
Highlight your SpecialFlower1 layer. Duplicate this four times, for a total of five SpecialFlower1 layers.
Now highlight the bottom SpecialFlower1 layer.
Adjust > Add/Remove Noise > Add Noise with the following settings:
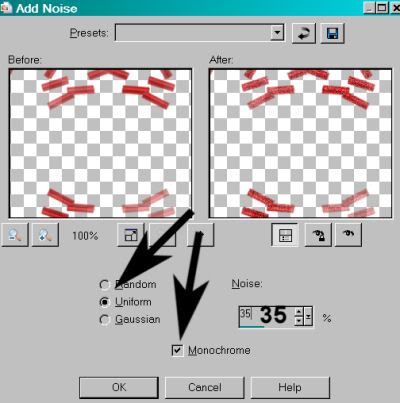
Hit okay.
Highlight the next SpecialFlower1 layer up.
Add Noise again, this time changing the intensity to 40.
Hit okay.
Highlight the next layer up of the SpecialFlower1 layers.
Add Noise again, this time changing the intensity to 45.
Hit okay.
Highlight the next SpecialFlower1 layer. Add Noise once more, this time changing the intensity to 50.
Hit okay.
Highlight the top SpecialFlower1 layer. Add Noise one more time, this time changing the intensity back to 45.
Close out the top four layers of the SpecialFlower1 layers, leaving the bottom layer open.
Edit > Copy Merged.
Open Animation Shop. Right-click on the desktop area and paste as a new animation.
Return to PSP. Close out the bottom SpecialFlower1 layer, and open the next layer up.
Edit > Copy merged.
Back to Animation Shop. Edit > Paste > After Current Frame.
Return again to PSP. Close out the layer you just worked with, and open the next SpecialFlower1 layer up.
Edit > Copy merged.
Again, back to Animation Shop. Edit > Paste > After Current Frame.
Return again to PSP. Now close that SpecialFlower1 layer, and open the next SpecialFlower1 layer up.
Edit > Copy merged.
Return once more to Animation Shop. Edit > Paste > After Current Frame.
Finally, return to PSP, closing the layer you've just worked with and opening the top SpecialFlower1 layer.
Edit > Copy merged.
Last time to Animation Shop. Edit > Paste > After Current Frame.
View > Animation.
You're done! I hope you're happy with your results! And thanks for trying my tutorials!
.


No comments:
Post a Comment