
This is just a guideline, and I know not everyone is going to be using the same tube... so use your imagination as you go! Any similarities between this tut and any others you may see are purely coincidental.
You will also need:
Animation Shop. This is from now a pay-for product, through Corel. That changed a while ago. I don't know why!!
A tube of your choice. I'm using the fantasy artwork of Kathleen Lowe. You must have a license to use her work. You can get that license and art at C.I.L.M.
The scrap kit is by Seachell, at Seachell's Scrapz. This is a FTU kit called "Magical Day." This is a kit she made last year, but it's still a good one! Be sure to leave lots of love for the freebies!
Filters: No outside filters were used in this tutorial!
Font: I used Andrea Cursive SSi.
Supplies: You may find the file here. This file includes the mask, the sky, the grass and the clouds. Wow! The creation! LOL. Just kidding. I honestly don't know where I got these files. They were collected over the years of playing with PSP. If these are yours, or you know who made them, PLEASE let me know so that I may give proper credit. Thank you!
Let's do it to it!!
Open your supplies in PSP and minimize.
Open a new canvas, 800 x 700, white.
Open element9. Resize 85%. Copy and paste as a new layer. Drop shadow.
Add your tube. Resize, position, and drop shadow to your taste.
Highlight your white background layer.
Open the sky, furnished in the supplies. Resize to 800x700. Copy and paste as a new layer.
Open the grass, furnished in the supplies. Colorize slightly to blend with the greenery already present:
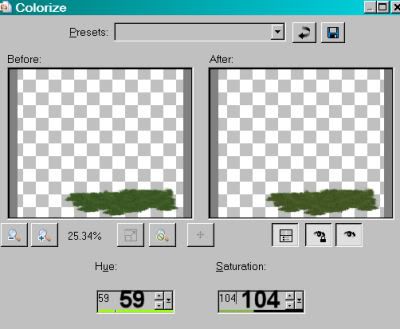
Hit okay.
Position the grass where you'd like it. Duplicate as many times as you like to get the effect that you want. I duplicated and rearranged three times. This is totally up to you. Merge down all your grass layers.
Open the CloudFormation1, furnished in the supplies. Position where you'd like it. Slight drop shadow.
Open element1 (the unicorn). Resize 85%. Copy and paste as a new layer. I mirrored mine. It depends upon where you're putting your pond. :)
Duplicate your unicorn layer. Drag one of these layers to just below the pond layer, the other just above the pond, but below your tube layer. Drop shadow your lowest unicorn.
Highlight your top unicorn layer and draw a rectangular selection around the legs, etc., that overlap the pond. Hit delete. Do this as many times as you need to get the desired effect. Selections > Select None.
Now, we're going to use your mask over and over until you get the shading you desire.
Highlight your sky layer.
Apply your mask. Delete the mask layer, answer "yes" to the pop-up question, and merge group.
Highlight your grass layer.
Apply your mask again, just as above.
If your tube is off to the edge of your canvas like mine was, highlight your tube layer.
Again, apply your mask, delete mask layer, etc.
Highlight your pond layer.
Apply your mask once more, deleting the mask layer and etc.
If this looks good to you, you may quit with the mask. LOL! I actually applied it once more to both the sky and the grass layers. This is totally up to you.
Open element10. Resize 20%. Copy and paste as a new layer. Position where you'd like it. Mine is on the right side of the garden. Drop shadow.
Open element11. Resize 20%. Mirror. Copy and paste as a new layer. Position this one where you'd like it. Drop shadow.
Open element2. Resize 30%. Copy and paste as a new layer. Position to where you'd like it in the garden. Drop shadow. Duplicate this layer and position this one where you'd like it, as well.
Open element3. Resize 30%. Copy and paste as a new layer. Position this one to where you'd like it in the garden. Drop shadow. Duplicate this layer, too, and position in another place in the garden.
Open element5. Copy and paste as a new layer. Position where you think it looks best. Duplicate this layer and Image > Mirror. Position this layer where you think it looks best. Merge these two layers down. In your layer palette, drag this layer to just above the clouds.
Go back to the top and add your name. I used color #80956f as the fill #7c1339 as the stroke, stroke set at 1.5.
I applied the following bevel:
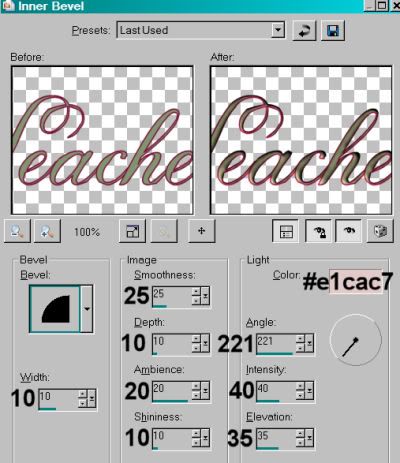
Hit okay.
Drop shadow your name.
Resize your canvas to a size with which you are comfortable.
Add your copyright, license information if applicable, and taggers'/watermark.
If you choose not to animate, you're now done, and you can merge your layers and save!
A N I M A T I O N
Highlight your element5 layer. Duplicate this layer twice, for a total of three element5 layers.
Now highlight your bottom element5 layer.
Adjust > Add/Remove Noise > Add Noise with the following settings:
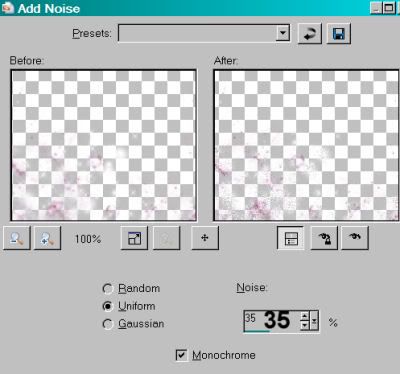
Hit okay.
Highlight your middle element5 layer.
Add Noise again, this time changing the "Noise" setting to 40.
Hit okay.
Highlight your top element5 layer.
Add Noise once more, this time changing the "Noise" setting to 45.
Hi okay.
Close out your top two element5 layers, leaving the bottom element5 layer open.
Edit > Copy Merged.
Open Animation Shop. Right-click on the desktop area and paste as a new animation.
Return to PSP. Close out your bottom element5 layer, and open the middle element5 layer.
Edit > Copy merged.
Back to Animation Shop. Edit > Paste > After Current Frame.
Return again to PSP. Close out your middle element5 layer, and open your top element5 layer.
Edit > Copy merged.
Again, back to Animation Shop. Edit > Paste > After Current Frame.
View > Animation.
Finis!! You're done! Thanks so much for trying one of my tuts! I appreciate you stopping by!
.


I ENJOY YOUR SITE , VERY VERY NICE.. AND FOR SOMEONE MY AGE (77) YOUR TUTORIALS ARE VERY PRECISE AND EASY TO FOLLOW.. BLESSINGS AND CONTINUED SUCCESS/
ReplyDelete