
You will also need:
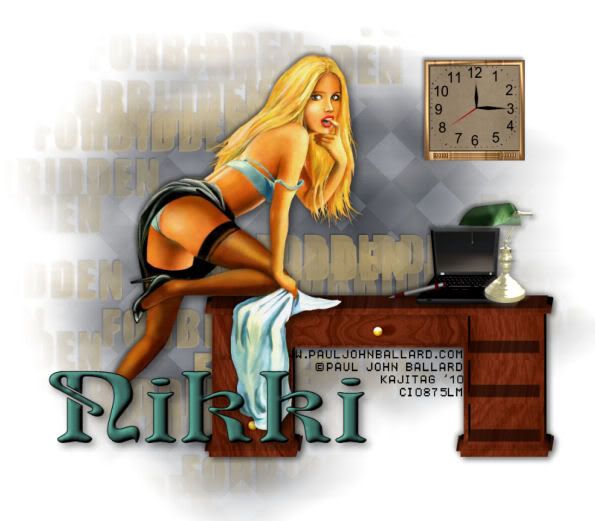
A tube of your choice. A sitting (or crawling LOL) tube would work best for this one. I'm using the artwork of Paul John Ballard. You must have a license to use his art. You may obtain that license and his art from C.I.L.M.
The scrap kit is by Nikki, of Creative Intentionz. This is a FTU kit, which is called "At The Office." Leave lots of love for the freebies!!
Supplies: The mask and the word art file, which you can find here. The mask is one of Becky's, and the word art file was made by me. Dunno where Becky's gone to, so if YOU know, let me know, so I might then be able to link to her!!
Filters: Mura's Meister > Copies. I also used Andromeda > Scatterlight, but it makes such a slight difference, and not the effect I was looking for, that it's just really not necessary.
Font: I used Medusa.
Let's get to it! This is a quick-n-easy tut, with a small twist thrown in!! I've been out of practice for a while again, so quick-n-easy is an accomplishment I can be proud of! :)
Open a new canvas, 800 x 700, white.
Open Desk. Resize 67%. Copy and paste as a new layer. Drop shadow. Arrange so that it will be in a place good for your tube.
Add your tube. Resize, position and drop shadow to your taste.
Highlight your white background layer.
Open paper4. Resize to 800x800 pixels. Copy and paste as a new layer.
Apply your mask. Delete the mask layer, answer "yes" to the pop-up question, and merge group.
I had to move the mask layer a bit to look how I wanted it to look. Go ahead, if you think you should, too!
Open clock1. Copy and paste as a new layer. Position it where you'd like it. Drop shadow the clock.
Open the laptop. Resize 35%. Copy and paste as a new layer. Arrange it on the desk and drop shadow.
Open the office lamp. Resize 60%. I mirrored mine -- you don't have to if it doesn't suit your tag. Position on the desk and drop shadow.
Open pen1. Resize 45%. Copy and paste as a new layer. Position on your desk and drop shadow. I rotated min 15° left.
Highlight your mask layer.
Open the "forbidden" word I supplied. Copy and paste as a new layer.
Effects > Plug-ins > Mura's Meister > Copies with the settings shown below. Notice that I changed some settings that aren't normally changed..... in my experience, anyway:
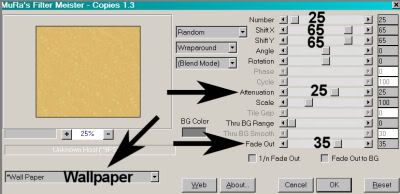
Hit okay.
Apply your mask again. Delete the mask layer, answer "yes" to the pop-up question, and merge group.
Drop shadow this layer with a shadow of about 3 both horizontally and vertically, opacity to your preference (I use 45) and blur of 3.
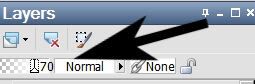
Now, lower the opacity to 70:
Go to the top layer and add your name. I used color #78a199 as the fill and black as the stroke. Stroke set at 1.
I added the following bevel:
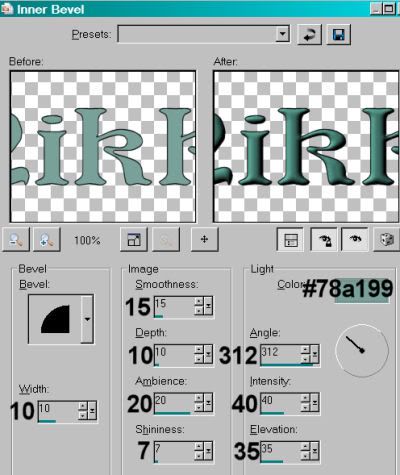
Hit okay.
Drop shadow your name.
Resize your canvas to a size with which you're comfortable.
Add your copyright, license information if applicable, and taggers'/watermark.
Layers > Merge > and save! We are done!
And there you go! Another finished tag! Told you it was quick-n-easy!! I hope you liked this tutorial, and I thank you SO much for choosing to work with it!!
.


No comments:
Post a Comment