
My tutorials are written for those with working knowledge of Paint Shop Pro. This is just a guideline, and I know not everyone is going to be using the same tube... so use your imagination as you go! Any similarities between this tut and any others you may see are purely coincidental.
You will also need:
Animation Shop. This is now a pay-for product, through Corel. That changed a while ago. I don't know why!!
A tube of your choice. I am using the great work of Keith Garvey. You must have a license to use his artwork. You can get that license at My PSP Tubes.
The scrap kit is by Steph, of Digital Art by Steph. This is a FTU kit called simply "St. Patrick's Day Freebie." Leave Steph some thanks and love for sharing her work with us!! Don't forget!!
Filters: VM Natural > Sparkle, Eye Candy 4000 > Gradient Glow
Font: I used AlsaceLorraine.
Supplies: Again, just the mask, which you can find here. Scroll down the page, it is the third mask down. Left click on the image. When it opens, right click, then save as. As you can see, this mask is by Monti, of Monti's Pixel Playground. Thanks, Monti, for sharing your great work with all of us!!
This tutorial came together by hit-and-miss. Some of it (which you will recognize when you get there) happened by accident, as I tried things and then sometimes forgot to delete them if I decided against them. So bear with me, please!
Open your mask and minimize in PSP. Alternatively, you could file it away with the rest of your PSP mask files, for use at a future date!
Open a new canvas, 800 x 700, white.
Open frm5. Resize 30%. Copy and paste as a new layer. I needed to move this one down a bit. It will depend upon the tube you use.
Add your tube. Resize and position to your taste.
Duplicate your tube layer. Have one tube above and one below the frame layer. Drop shadow the tube layer that is below your frame.
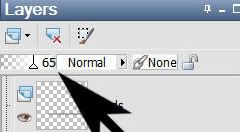
Highlight the top tube layer. Temporarily reduce the opacity on this layer, so you can see the shamrocks below.
[This screen capture was done for a prior tutorial. I'm just using it now to help y'all locate the opacity thingamajiggy. lol Truth is, I lowered mine to the 40s when doing this one.]
Now, this was very tricky for me. It took me a lot of time and patience, and I STILL didn't get it quite right. Perhaps it would be much easier if I'd used a different tube. What I was trying to do was to get the extended arm to appear as if it were coming from the midst of the shamrocks included with the frame.
Grab your lasso tool, set on point-to-point. Carefully -- zoom in a bunch if it will help, it did for me -- draw selections around the shamrocks that you want to be showing. Hit delete. Continue doing this until you are satisfied with the results. I would bring the opacity back up, take a look, then lower the opacity and try, try again. So, if you're using the same tube and want the same effect, it could be a laborious process.
When satisfied, return the opacity to 100°. Drop shadow your frame layer.
Highlight your white background layer.
Open ppr1. Resize to 800x700 pixels. Copy and paste as a new layer.
Apply your mask. INVERT TRANSPARENCY IS CHECKED! Delete your mask layer, answer "yes" to the pop-up question, and merge group. Resize your mask layer 105%.
Open the rowanberry. Resize 25%. Copy and paste as a new layer. Position so the berries will be coming out from behind the top right corner of your frame. Duplicate this layer and Image > Mirror. Arrange the duplicated layer so the berries will be coming from behind the upper left corner of the frame. See my example for placement reference, if you like. Merge these two layers down. Drop shadow. In your layer palette, drag this layer below your mask layer.
Open frm3. Resize 23%. Copy and paste as a new layer. In your layer palette, this should be below your bottom tube layer, above the mask layer.
Highlight your main frame (frm5) layer.
Grab your selection tool, set on rectangle, and draw a square selection around the inner portion of the frame (not inside the frame, but around the frame itself....)
Highlight your frm3 layer. Hit delete. Selections > Select None.
Yes, that was the mistake. I discovered that I liked the extra shamrocks around, so I just left the frm3 layer there and deleted the parts I didn't want!
Open bow7. Resize 20%. Copy and paste as a new layer. Position over the bottom right corner of the frame. See my example for placement reference. Drop shadow.
Go back to your top layer and add your name. I used color #d55f53 as the fill AND stroke, stroke set at 1.5.
Effects > Plugins > Eye Candy 4000 > Gradient Glow set at 5-25-100, color #285b1e.
I applied the following bevel:
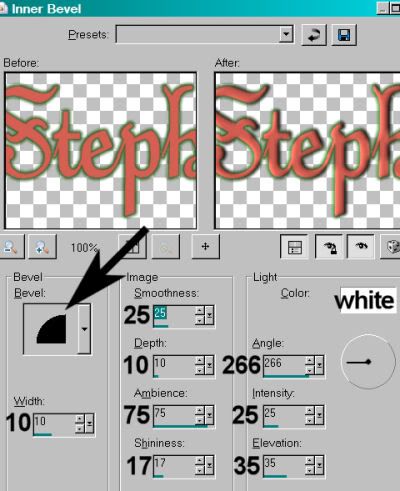
Hit okay.
Add Gradient Glow once more, this time set at 3-0-100, color is white.
Drop shadow your name. Arrange your name as you'd like it. I rotated mine 30° left.
Resize your canvas to a size with which you are comfortable.
Add your copyright, license information if applicable, and taggers'/watermark.
If you choose not to animate, you're now done, and you can merge your layers and save!
A N I M A T I O N
Highlight your rowanberry layer. Duplicate this layer twice, for a total of three rowanberry layers.
Highlight your bottom rowanberry layer.
I suspect this next filter does not re-adjust itself back to any default settings between uses. This first setting could just be what I last used, I don't know. So I'm not sure if it's important which settings your start with first. lol.
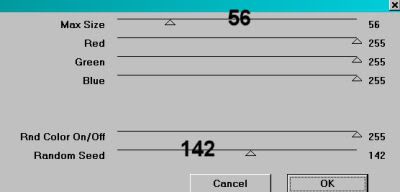
Effects > Plug-ins > VM Natural > Sparkle with the following settings:
Hit okay.
Highlight your middle rowanberry layer.
Add Sparkle again, this time moving your "size" and "random" seed settings to something different. You can watch your choices in the preview window as you change your sliders in this filter. Just keep moving the slider settings until you like what you see.
Hit okay.
Highlight the top rowanberry layer.
Add Sparkle once more, again moving the "size" and "random seed" settings to something different.
Hit okay.
Now, with Sparkle, I always (yes, always) go back and repeat on all three layers, so I'll get more sparkle. So go back to the bottom and start all over again, applying Sparkle to all three layers and changing the settings as you go.
Close out your top two rowanberry layers, leaving the bottom rowanberry layer open.
Edit > Copy Merged.
Open Animation Shop. Right-click on the desktop area and paste as a new animation.
Return to PSP. Close out your bottom rowanberry layer, and open the middle layer.
Edit > Copy merged.
Back to Animation Shop. Edit > Paste > After Current Frame.
Return again to PSP. Close out the middle rowanberry layer, and open the top rowanberry layer.
Edit > Copy merged.
Again, back to Animation Shop. Edit > Paste > After Current Frame.
Edit > Select All.
Right click on the top bar of your animation, and choose "Frame Properties." Change this number to 35.
View > Animation.
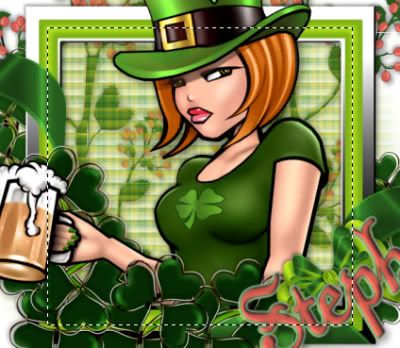
Another tag, done in time for St. Paddy's Day! Thanks for choosing to do one of my tuts! Leave a "shout out" if you're feeling talky! Have a GREAT rest of your day!!!
.


No comments:
Post a Comment