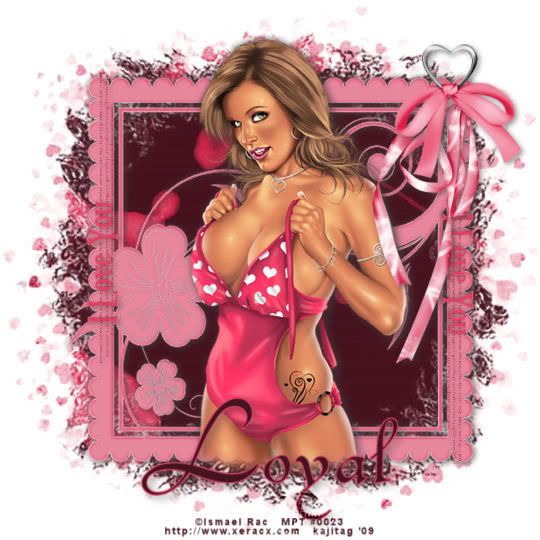
You will also need:
Tube of your choice. I've chosen to use the SUPER artwork of Ismael Rac. You must have a license to use his work. You may purchase that license at My PSP Tubes.
Scrap kit is by Loyal of A Dash of Whimsical Creations. The kit I'm using is PTU and called Cupid Caught!. If it helps defray costs at all, I'm posting another tut using the same kit today. So you get two for the price of one scrap kit. And it's on sale right this moment for $1.65 at Treasured Scraps. Not bad! Be sure to catch the sale!
No filters used in this tut! Quick and dirty again!
Font: I used Bramble
Supplies: Two masks -- Heart-burst, and mask 020. I have the first one repeated under different names in my mask folder. I don't know where I got either of these masks. If one or both are yours, please let me know so you can get credit! Get the masks here.
Okay, back to it! Again, I colorized my papers and elements to go with the tube. You may not need to do that. Whatever is your choice.
Open your masks and minimze in PSP. Alternatively, load masks into your PSP masks file.
Open a new image, 700 x 700, white.
Open Papers_002. Copy and paste as new layer. Colorize if desired.
Apply heart-burst mask. Right click on mask layer in palette, delete. Answer "yes" to the pop-up question. Merge group.
Open Papers_005. Copy and paste as new layer. Colorize if desired.
Apply mask 020. Delete and merge as above.
Open Elements_033. Copy and paste as new layer. Resize and colorize to taste. Drop shadow.
Add your tube of choice. Drop shadow.
Open Elements_018. Copy and paste. Position on the top right corner of the frame-like element. Colorize if desired and drop shadow.
Open Elements_024. Repeat the steps above.
Open Elements_017. Copy and paste as new layer. Colorize if needed and Image > Rotate > Left 90%. Place as desired. Duplicate and mirror. Place as desired. Drop shadow your word art if you like.
Go to your tube layer. If it's a cut-off tube on the bottom like mine is, try grabbing your lasso tool, with feather set on 17. Freehand, not point-to-point. Go ahead and do a quick curve toward the bottom of your tube, with the curve pointing downward. Draw the lasso to the bottom of the layer and meet back at the beginning if your curve. Delete. Selections > Select none. Voila!
Add your name, your copyright and license info (if license info is applicable). Add your tagger's or watermark so you can take credit for what you've created.
Merge your layers and save as desired! Like I said, quick & dirty!
Thanks again for stopping by and trying out a tut or two. Please don't hesitate to Drop me a line if there are any questions or comments.
.


No comments:
Post a Comment