
This is just a guideline, and I know not everyone may not beusing the same tube... so use your imagination as you go! Any similarities between this tut and any others you may see are purely coincidental.
You will also need:
Animation Shop. This is from CNET, so it's a safe download. However, it costs. That changed pretty recently. I don't know why!!
A tube of your choice. I used the cute-n-sexy artwork of Dominic Marco. You must have a license to use his art. You may obtain that license and his art from C.I.L.M.
The scrap kit is by Cora, from Pimp'd Designz 4 Taggers. This is a FTU kit, called Carefree. PLEASE leave some love and appreciation to Cora for the freebie!! She used to do them a lot more. I'd like to see her do that again!
Supplies: I'm supplying the mask, about which I know nothing except that I love it! If it's yours, let me know so that I may give you props!! I'm also supplying the animated butterflies. Another file picked up along the way, no idea who made it. I've revised it a bit for this tutorial. If these butterflies are yours, then YOU let me know, too! I'd like to give credit where it's due! Thank you ladies, whomever you are! You can get these files here!
Royalty-free stock photo came from iStock.
Filters: Mura's Meister > Copies, Eye Candy 4000 > Gradient Glow
Font: I used Neville Script.
Okay, let's get this started! This is a pretty "fiddly" tag. There's a lot of this-n-that going on. Please bear with me!
Open the mask in PSP and minimize. Alternatively, you can file it with the rest of your PSP masks, for future use! File the butterflies animation to where it will be handy when we get to Animation Shop.
Open a new image, 750 x 700, white.
Open stitching-01 (frame). Copy and paste as a new layer.
Add your tube. Resize, position and drop shadow to your liking.
Figure out how you may be aligning these two parts of your tag. I wanted my frame and tube to be on opposite sides of the canvas. You may want something different.
Open flower-04. Resize 37%. Copy and paste as a new layer.
Effects > Plug-ins > Mura's Meister > Copies with the following settings:
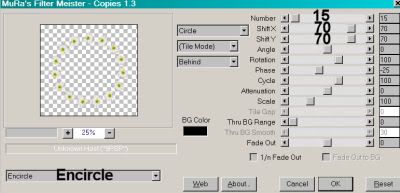
Hit okay.
Move this circle of flowers over so that it is directly over the frame. The frame is quite erratic, so it's not going to be perfect. As a matter of fact, the flower isn't perfect, either! Go figure with Mother Nature!
Drop shadow the flowers.
Open greens-02. Resize 37%. Copy and paste as a new layer.
Effects > Plug-ins > Mura's Meister > Copies with the following settings:
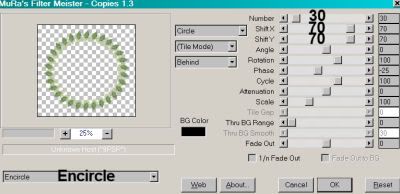
Hit okay.
In your layer palette, this layer should be below the flowers layer and above the frame layer. In other words, in the middle. LOL!
Drop shadow the circle of greens.
You'll notice that now, there's a circle of stems sticking out under your flowers. To rid yourself of these will take zooming in and selecting a circle around the greens, so....
Grab your lasso tool, set on point-to-point, and carefully draw a circle around the frame layers. You don't have to be *real* picky on this part.
It's not REAL easy to see, but here's how mine turned out:
Highlight your greens layer. Hit delete. Selections > Select None.
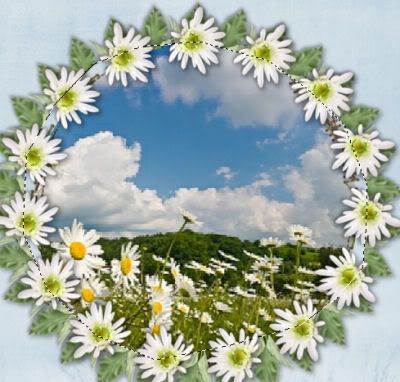
Now, find yourself a photo that you'd like to use with whatever theme or concept you've imagined for your tag.
Copy and paste your photo as a new layer. Mine was wide but not tall enough, so I resized it a bit until it would all fit into the circle. Position the photo so the part that you want will be showing from within the frames.
In your layer palette, this photo layer should be below all the other layers, just above the white background layer.
This is almost a repeat, but a bit different due to how erratic the "stitching-01" frame layer is.
Grab your lasso tool, set on point-to-point, and carefully draw a circle around the "stitching-01" frame layer. You can see as you go how erratic this is as a frame, so choose wisely as you go!
When done, be sure you're on the photo layer.
Selections > Invert. Hit delete. Selection > Select None.
Whew! Glad that part's done!
Highlight the white background layer.
Open pp-02. Resize to 750x700 pixels. Copy and paste as a new layer.
Now, I colorized mine, to have it blend more easily with the photo I'd chosen. The settings I used were:
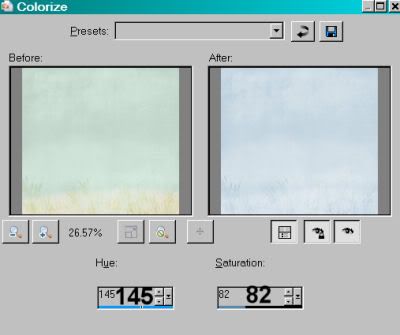
Hit okay.
Open grass. Copy and paste as a new layer. For my purposes, I wanted the grass in the foreground, so I put this as the top layer. In order to have it blend well with the rest of the tag, I colorized it with the following settings:
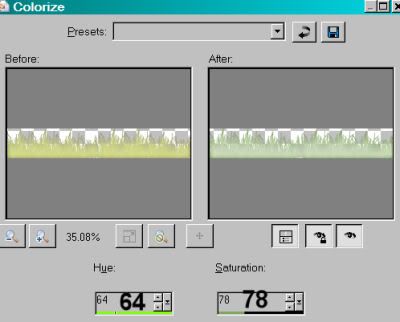
I took that color from the leaves in the "greens-02" layer. Hit okay, if you're following me...
Duplicate your grass layer, and place each layer to the sides, so it covers the entire width of the tag. You'll find there is a darker area at the corner of the new layer. Grab you select tool, set on rectangle, and draw a little rectangle around that darker area. Hit delete. Selections > Select None. Merge these two layers down.
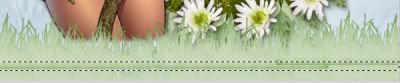
Now, I wanted the grass to cover a larger (higher) area on the bottom, so I duplicated that grass layer a couple of times and positioned them a bit higher, one after the other. If you do this as well, you'll notice that the bottom of each layer is darker, as well. Do the same thing you did before with your rectangular selection tool and hit delete, then select none. Like so:
Another thing I found different in this tag is that it looked better (IMO) if I put the newer layers of grass, in the layer palette, below the first one. When you're done duplicating and positioning your grass layers, merge them all down to one layer.
Highlight your pp-02 layer.
Apply your mask. Delete the mask layer, answer "yes" to the pop-up question, and merge group.
Highlight your grass layer.
Apply your mask again. Delete the mask layer, answer "yes" to the pop-up question, and merge group.
I found I liked the color better on both of these layers when I duplicated them. I duplicated the masked grass layer about three times, and merged them down. I then duplicated the paper layer twice. This is up to you!
Go to your top layer to add your name. I used color #f5d284 for the fill and stroke, stroke set at 2.
Effects > Plug-ins > Eye Candy 4000 > Gradient Glow set at 5-25-100, color #67804c.
I added the following bevel:
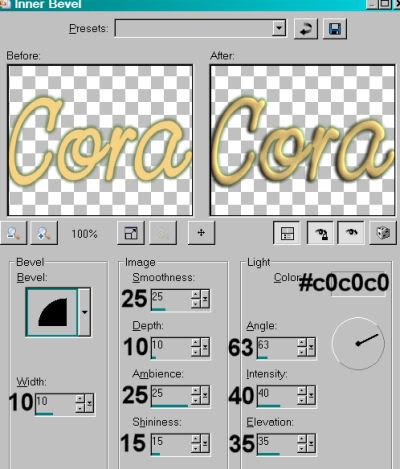
Hit okay.
Drop shadow your name.
I rotated the name 25° left.
Add your copyright, license information if applicable, and taggers'/watermark.
If you choose not to animate, you're done! Merge your layers and save!! Congrats!
A N I M A T I O N
Edit > Copy merged
Open Animation Shop, right-click on the desktop area and paste as a new animation.
Duplicate this frame until you have a total of 8 frames. Move your slider at the bottom back to the first frame.
Locate and open your butterflies animation. Edit > Select All. Edit > Copy
Return to your animation that you're building and Edit > Select All. Edit > Paste into Selected Frame.
Hover your mouse over the area you would like your butterflies to be. Release the mouse button.
Edit > Select All.
Right-click on the top bar of your tag and choose "Frame Properties." Change this number to 23.
Animation > Resize Animation. Resize your tag to a size with which you are comfortable.
View > Animation. Save as .gif and, again! We are done!! Thanks for taking it on! I hope you enjoy your results!
.


No comments:
Post a Comment