

This is just a guideline, and I know not everyone is going to be using the same tube... so use your imagination as you go! Any similarities between this tut and any others you may see are purely coincidental.
You will also need:
Animation Shop. This is from now a pay-for product, through Corel. That changed a while ago. I don't know why!!
Four tubes of your choice by the same artist. I'm using the art of Paul John Ballard. You will need a license to use his art. That license & art may be found at C.I.L.M.
The scrap kit is by the very talented Bel Vidotti. This is a FTU kit, but it is a FULL SIZED kit, as opposed to being tagger sized. This means a bigger download, but I love, Love, LOVE this kit, so I endured the larger files because I wanted it so much! The kit is called Lust. It is not in English, but she offers a translation tool at the top, if you need it. Thank you, Bel, for coming back to life and offering this BEAUTIFUL kit! Ladies, leave your love!!
Filters: Eye Candy 4000 > Gradient Glow, Eye Candy > 4000 > HSB Noise
Font: I used Alexandra Script.
Supplies: Two masks, which may be found here. One of the masks we'll be using was created by Vix! Thank you, Vix, for everything you've done over the years for the PSP community! The other mask was created by SophisticatSimone. Thanks go to you, too, Simone, for your contributions to us PSP people! How about that, people? I knew who made them and credited them on BOTH items! HOORAY!!
Let's do it to it!!
Open your masks in PSP and minimize. Alternatively, you can save them to your PSP mask files, for use at a later date!
Open a new canvas, 800 x 700, white.
Start with your main tube. Resize, position, and drop shadow to your taste.
Open element 40. Resize 18%. Copy and paste as a new layer. Arrange your tube and triple frame the way you'd like them.
Highlight your white background layer.
Open papers01. Resize to 800x700 pixels. Copy and paste as a new layer. Twice. You should have two layers of this paper.
Go to the bottom layer of the paper.
Apply the SophisticatSimone-Mask15. Delete mask layer, answer "yes" to the pop-up question and merge group.
Highlight your top layer of the paper.
Apply the Vix-Mask_Valentine13. Delete mask layer, answer "yes" to the pop-up question and merge group.
Open your tubes that you intend to be in the frames. Resize as needed.
Highlight the tripleframe layer. Grab your magic wand and click the opening of one of the frames. Selections > Modify > Expand by 10. Selections > Invert.
Place your first tube into your first frame. This layer should be below the triple frame layer. Hit delete. Selections > Select None. Drop shadow this tube.
Repeat the above with the other two frames.
Drop shadow the triple frame.
Open element01. Resize 13%. Copy and paste as a new layer. Position over the loop above the triple frame. Drop shadow.
Open element23. Resize 50%. Copy and paste as a new layer. In your layer palette, drag this below your tube layers. Rotate 20° right. Drop shadow.
Open element14. Resize 15%. Copy and paste as a new layer. I rotated mine 20° left. Position the butterfly where you'd like it. Drop shadow. Duplicate this layer and Image > Mirror. Position where you'd like.
The following may not pertain to you. It depends upon your main tube. This is about getting the string around her finger.
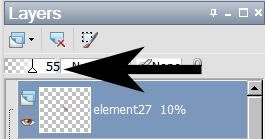
Open element27. Resize 10%. Copy and paste as a new layer. Position as though the string is wrapped around the finger.
Reduce the opacity on this layer to 55.
Grab your lasso tool, set on point-to-point. Zoom in on the hand area and draw a selection around the part of the string that is over the finger.
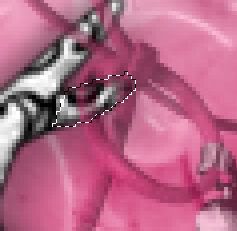
Hit delete. Selections > Select None.
Bring the opacity on this layer back up to 100. Drop shadow.
Go back to the top and add your name. I used color #913359 as the fill, black as the stroke, stroke set on 2.
I added the following bevel:
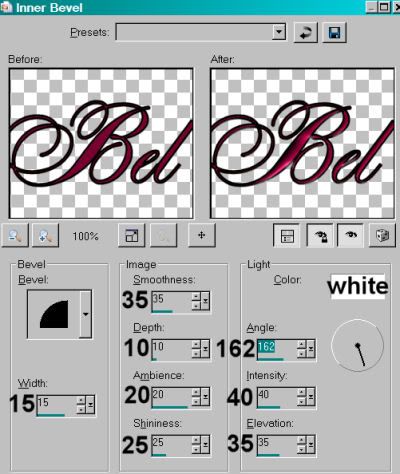
Hit okay.
Effects > Eye Candy 4000 > Gradient Glow set on 4-0-100, color #e7b2c7.
Drop shadow your name. Arrange your name as you'd like it.
Resize your canvas to a size with which you are comfortable.
Add your copyright, license information if applicable, and taggers'/watermark.
If you choose not to animate, you're now done, and you can merge your layers and save!
A N I M A T I O N
Highlight your papers01 layer that gave you the scattered hearts. This should be the one on top. Duplicate this layer twice, for a total of three scattered hearts layers.
Now highlight your bottom scattered hearts layer.
Effects > Plug-ins > Eye Candy 4000 > HSB Noise with the following settings:

Hit okay.
Highlight your middle scattered hearts layer.
Add HSB Noise again, this time clicking on "Random Seed."
Hit okay.
Highlight your top scattered hearts layer.
Add HSB Noise once more, clicking "Random Seed" again.
Close out your top two scattered hearts layers, leaving the bottom layer open.
Edit > Copy Merged.
Open Animation Shop. Right-click on the desktop area and paste as a new animation.
Return to PSP. Close out your bottom scattered hearts layer, and open the middle layer.
Edit > Copy merged.
Back to Animation Shop. Edit > Paste > After Current Frame.
Return again to PSP. Close out your middle scattered hearts layer, and open your top scattered hearts layer.
Edit > Copy merged.
Again, back to Animation Shop. Edit > Paste > After Current Frame.
Edit > Select All.
Right-click on the top bar of your animation. Choose "Frame Properties." Change this number to 27.
View > Animation.
Et, voila! Another completed tag! I hope you enjoyed this one. Thank you so much for stopping by! Leave a shout out if you're so inclined! :)
.


No comments:
Post a Comment