

This is just a guideline, and I know not everyone is going to be using the same tube... so use your imagination as you go! Any similarities between this tut and any others you may see are purely coincidental.
You will also need:
Animation Shop. This is from now a pay-for product, through Corel. That changed a while ago. I don't know why!!
A tube of your choice. I'm using the great artwork of Dominic Marco. You will need a license to use his art. That license & art may be found at C.I.L.M. I used a laying down, or leaning back (or both lol) tube. This might work the best for you. I started with tubes in the frame, and ended up liking this better.
The scrap kit is by the very smart and talented Clarey. This is a PTU kit, available through her shop, Clarey's Designz. The kit is called Love Is In The Air. Pick it up for your Valentine's Day tags! She's included a LOT!!
Filters: Eye Candy 4000 > Gradient Glow, Alien Skin Eye Candy 5 > Textures > Texture Noise
I was looking for a different filter to use, and all I ended up doing was finding version 5's HSB Noise-like filter! Go figure!
Font: I used Love.
Supplies: NO outside supplies used in this tutorial!
Let's get it on, so to speak!! LOL!!
Open a new canvas, 750 x 700, white.
Open heartframe. Copy and paste as a new layer.
Open heartofhearts2. Copy and paste as a new layer. In your layer palette, drag this below the frame layer. Using your move tool, move it around so it's kinda-sorta lined up with the heart of the frame. (See my example for placement reference, if you like.)
Effects > Plug-Ins > Eye Candy 4000 > Gradient Glow set at 4-0-100, color #f9e9ea.
Drop shadow the heartofhearts layer.
Add your tube. Resize, position, and drop shadow to your taste.
Open champagne. Resize 50%. Copy and paste as a new layer. Position where you'd like it. Drop shadow.
Open balloons-sh. Resize 65%. Copy and paste as a new layer. Position this so the bow is just right over the little curlycue part of the heartframe (upper right -- see my example for placement reference). I did not drop shadow the balloon layer... made them too dark IMO. You may certainly drop shadow if you'd like to!
Open cupcake. Resize 25%. Copy and paste as a new layer. Position this where you'd like it. Drop shadow.
Open engagementring. Resize 40%. Copy and paste as a new layer. Position where you'd like it. Drop shadow.
Open loveletter-front. Resize 30%. Copy and paste as a new layer. Rotate 35° right. Tuck it in or around your collection of goodies. Drop shadow.
This next part will depend upon the tube you've chosen. I'm putting the rose into her hand.
Open rose. Resize 30%. Image > Mirror. Copy and paste as a new layer.
Effects > Plug-ins > Eye Candy 4000 > Gradient Glow, this time set at 3-0-100, same color we used previously. Drop shadow the rose.
Now, if your tube has a hand that looks like it could be holding something, position the rose over the hand as you'd like it to be positioned.
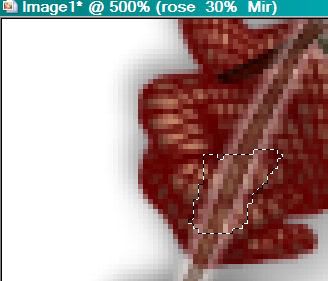
Zoom in a LOT on your canvas. I was at 500%.
Lower the opacity on your rose layer to 59 or thereabouts.
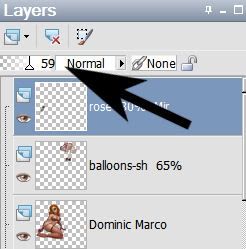
This way, you can see the hand through the rose and know what you're doing!!
Grab your lasso tool, set on point-to-point, and draw a selection around the portion of the rose you don't want showing. The example below isn't a good example. LOL. I realized after getting that screen shot that I didn't get all her fingers. I had to go back again to get the whole area.
Hit delete. Raise the opacity of the rose back up to 100, zoom out and see how it looks!!
The following will be easiest if you do it on the top layer.
Open scatteredhearts3. Copy and paste as a new layer. Move it so the top hearts are in the upper left corner of your canvas. Duplicate this layer and Image > Mirror. Duplicate *this* layer and rotate 45° left. Using your move tool, move this layer so that the top hearts are in the middle. Merge these three layers down. Duplicate again. Image > Flip. Merge these two layers down.
In your layer palette, drag this layer down below the heartofhearts2 layer.
Go back to the top and add your name. I used color #7e2a2b as the fill AND stroke, stroke set at 2.
Effects > Plug-ins > Eye Candy 4000 > Gradient Glow set on 4-0-100, color #d49592.
Drop shadow your name. Arrange your name as you'd like it.
Open wordstamp10. Resize 55%. Copy and paste as a new layer. Position where you'd like it. See my example for placement reference. Drop shadow the wordstamp10 layer.
Resize your canvas to a size with which you are comfortable.
Add your copyright, license information if applicable, and taggers'/watermark.
If you choose not to animate, you're now done, and you can merge your layers and save!
A N I M A T I O N
Highlight your scatteredhearts3 layer. Duplicate this layer three times, for a total of four scatteredhearts3 layers.
Now highlight your bottom scatteredhearts3 layer.
Effects > Plug-ins > Alien Skin Eye Candy 5: Textures > Texture Noise with the following settings:

Hit okay.
Highlight the next scatteredhearts3 layer up.
Add Texture Noise again, this time clicking on "Random Seed."
Hit okay.
Highlight the next scatteredhearts3 layer up.
Add Texture Noise once more, clicking "Random Seed" again.
Highlight your top scatteredhearts3 layer.
Add Texture Noise one last time, and yes, click on "Random Seed."
Close out your top three scatteredhearts3 layers, leaving the bottom layer open.
Edit > Copy Merged.
Open Animation Shop. Right-click on the desktop area and paste as a new animation.
Return to PSP. Close out your bottom scatteredhearts3 layer, and open the next layer up.
Edit > Copy merged.
Back to Animation Shop. Edit > Paste > After Current Frame.
Return again to PSP. Close out the prior scatteredhearts3 layer, and open the next scatteredhearts3 layer up.
Edit > Copy merged.
Again, back to Animation Shop. Edit > Paste > After Current Frame.
One last time, back to PSP. Close out the prior scatteredhearts3 layer and open the top layer.
Edit > Copy merged.
Finally, back to Animation Shop. Edit > Paste > After Current Frame.
In Animation Shop, go Edit > Select All.
Right-click on the top bar of your animation. Choose "Frame Properties." Change this number to 27.
View > Animation.
There you go! Another completed tag! I hope you enjoyed it. I'd love to see your results! Or to hear from you in my shout box! Thank you for doing my tut, and have a lovely rest of your day!
.


No comments:
Post a Comment