
You will also need:
Animation Shop. This is from CNET, so it's a safe download. However, it costs. That changed pretty recently. I don't know why!!
HOWEVER ..... a LOVELY person named solshne (and another named Chris) wrote to let me know that one might find Animation Shop for free at this location. This is an FTP link and I have no idea if it's safe or not. So keep your antivirus handy to scan it after download!
[NOTE: The animation on this tag depends upon the use of this particular tube. Otherwise, you could find a "witches' brew" type pot to add to yours and add the same effect. But do note that this animation starts with the brew already showing in the tube I've chosen to use.]
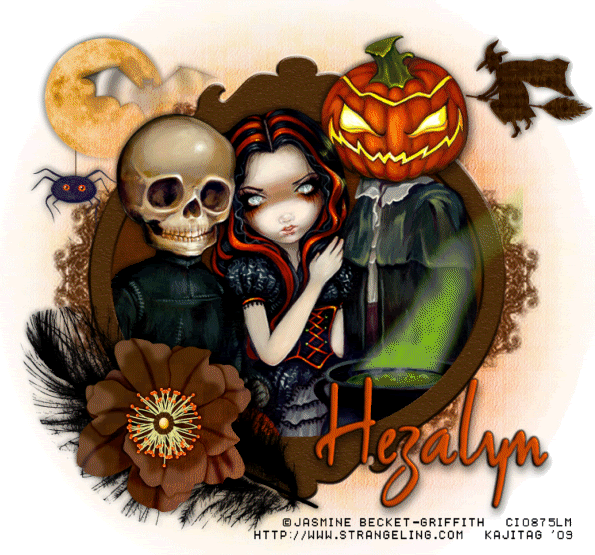
A tube of your choice. I'm using the great artwork of Jasmine Becket-Griffith. You must have a license to use her artwork. You can get that license and art at C.I.L.M.
The scrap kit is by Heza of Heza Scraps and Tags. This is a PTU kit. The kit is available from Treasured Scraps. It's called "Hallowsweet."
Filters: Eye Candy 4000 > Smoke
Font: I used Amethyst Script.
Supplies: Just the two masks. I don't know where I got either of them, but they're what I used. Please let me know if they are yours, so that I might give proper credit where it's due!
The spider I used is by Jasmine Becket-Griffith, from a different tube. So that is not included in with the supplies nor the scrap kit. You might be able to find one from elsewhere, if you really want to use one. I will include steps for the spider in the tutorial. If you find you're not using one, just skip over that part.
Let's get this started....
Open your masks in PSP and minimize. Alternatively, you could file them where your PSP masks are filed for use in the future.
Open a new canvas, 750 x 700, white.
Open Frame2. Copy and paste as a new layer.
Add your tube. Resize, position, and drop shadow to your taste.
Highlight your frame layer. Grab your magic wand, and click inside the center of the frame. Selections > Modify > Expand by 1. Selections > Invert.
Highlight your tube layer. Grab your eraser brush and erase any of the tube that overhangs the bottom of the frame.
Selections > Select none.
Highlight your white background layer.
Open paper1. Copy and paste as a new layer.
Using your pick tool,
drag out the sides of the paper until it just covers your canvas.
Apply Mask 001. Delete mask layer, answer "yes" to the pop-up question and merge group. Rotate mask layer 90° either way.
Highlight your white background layer again.
Open paper4. Copy and paste as a new layer. Again, using your pick tool, stretch the paper out until it just fills the canvas.
Apply the Edge Oval Mask. Delete the mask layer, answer "yes" to the pop-up question and merge group.
Go back to the top layer.
Open Moon from the scrap kit. Resize 35%. Copy and paste as a new layer. Pick where you'd like your moon to be positioned. Drop shadow the moon. In your layer palette, drag it down to below the mask layers.
Open the spider. Copy and paste as a new layer. Position under the moon, kinda flirting with scaring the daylights out of your tube. LOL. Drop shadow. In your layer palette, this should be your top layer.
Using your pen tool, line set on solid, stroke 2, draw a line between the bottom of the moon and the spider. Drop shadow this line. In your layer palette, drag it down below the moon layer.
Open Bat2. Resize 35%. Copy and paste as a new layer. Position wherever you'd like it. I wanted mine by the moon. See my tag for placement reference. Drop shadow your bat, and drag this to just above the moon layer.
Open feather2. Copy and paste as a new layer. Image > Mirror. Place on the bottom left area of the frame. Drop shadow your feather.
Open Flower 7. Resize 50%. Copy and paste as a new layer. Position and arrange on top of the feather. Drop shadow your flower.
Open the witch. Resize 40%. Copy and paste as a new layer. Image > Mirror. I chose to position mine opposite the moon. See my example for placement reference if you like. Drop shadow your witch.
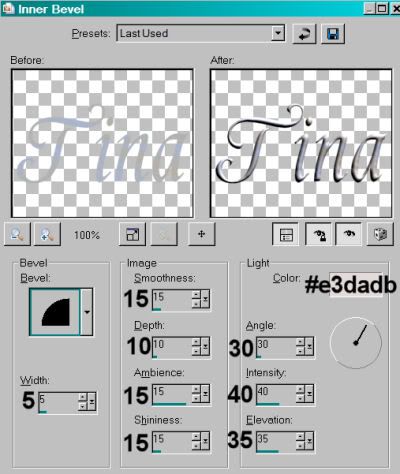
Go back to the top layer and add your name. I used color #d24e07 for the fill and stroke, stroke set at 2. Add a bevel if you like. (I'm using an old screen shot here from a different tutorial, but it's the same bevel!)
Hit okay.
Drop shadow your name.
Resize your canvas to a size with which you are comfortable.
Add your copyright, license information if applicable, and taggers'/watermark.
If you choose not to animate, you're now done, and you can merge your layers and save!
A N I M A T I O N
Highlight your tube layer.
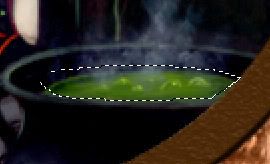
Grab your lasso tool, set on point-to-point. Zoom in on your pot of brew. lol. What is it called? Oh yes, the cauldron. Zoom in on the contents of the cauldron. Draw a selection around the contents of the cauldron.
Duplicate this layer three times, for a total of four tube layers.
Highlight your bottom tube layer.
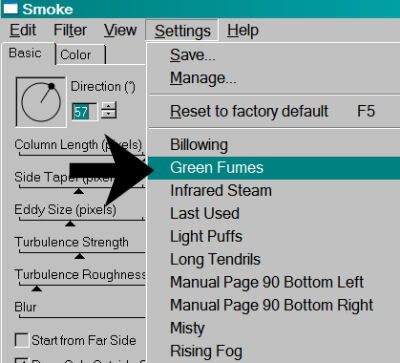
Effects > Eye Candy 4000 > Smoke with the following setting:
Hit okay.
Highlight the next tube layer up.
Add Smoke > Green Fumes again, this time hitting "Random Seed" once.
Hit okay.
Now, open the third tube layer. Add more Smoke > Green Fumes, again hitting "Random Seed."
Hit okay.
And finally, the top tube layer. Add Smoke > Green Fumes, hitting "Random Seed."
Hit okay.
Selections > Select None.
Close out the top three tube layers, leaving the bottom tube layer open.
Edit > Copy Merged.
Open Animation Shop. Right-click on the desktop area and paste as a new animation.
Return to PSP. Close out the bottom tube layer and open the next tube layer.
Edit > Copy merged.
Back to Animation Shop. Edit > Paste > After Current Frame.
Return again to PSP. Close out the open tube layer and open the next layer up.
Edit > Copy merged.
Again, back to Animation Shop. Edit > Paste > After Current Frame.
One last time, back to PSP. Close out the open tube layer and open the top.
Edit > Copy Merged.
Back to Animation Shop. Edit > Paste > After Current Frame.
Edit > Select All.
Right-click on the top bar of your animation, and choose "Frame Properties."
Change this number to 17.
View > Animation.
Here we are, done with another! I hope you enjoyed this tutorial, and I thank you for stopping by!!
.


No comments:
Post a Comment