
You will also need:
A tube of your choice. I'm using the artwork of Jennifer Janesko. You must have a license to use her art. You may obtain that license and her art from C.I.L.M.
The scrap kit is by Ali, of Designs by Ali. This is a FTU kit titled "My Quiet Space." Be sure to leave Ali some love for posting freebies for us!!
Supplies: Just the two masks. I don't know where I got these, but if you do, or if the person who made them sees them, let me know and I'll give you credit!
Filters: Eye Candy 4000 > Gradient Glow (on the name only)
Font: I used Fanciful Condensed.
Okay, let's try this! This kit is FULL of great elements to use, so there will be a lot of steps, but it's an easy to do tutorial!
Open your masks in PSP and minimize. Alternatively, you could file them in with the rest of your PSP masks for use at a later date. Totally up to you!
Open a new canvas, 800 x 700, white.
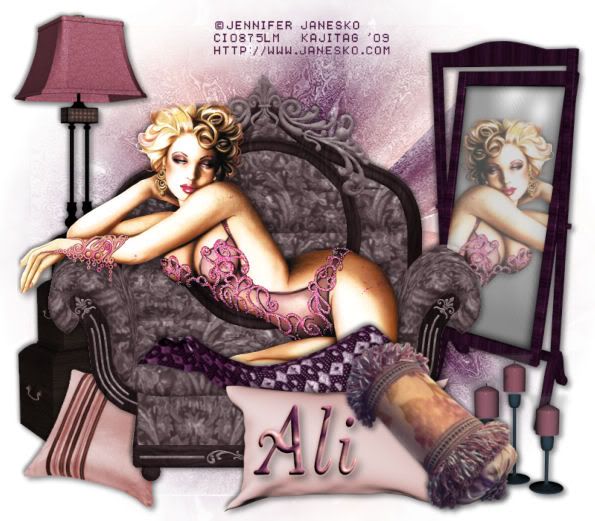
Open Chair2. Copy and paste as a new layer. Position as you like. You'll note I used a tube that just seems like it was made for this chair. Hopefully you have the same one, or one like it!
Add your tube. Resize, position and drop shadow to your liking.
If you are using the same tube, I did the lasso thing with feather on 17 to soften the cropped off legs and hair. (Grab the lasso tool, set on add/shift, feather at 17, and draw curves over the legs and hair a bit.... leg curve should look like a smile of sorts, the hair one, the opposite. Here is an example of what I mean, but it's from a different tutorial. Just want to make sure you get what I'm saying:
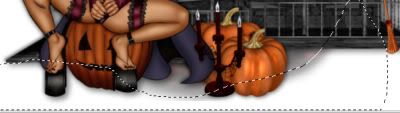
Something like that, okay? When all are drawn, make sure you're on the tube layer and hit delete a couple times until you like what you see. Selections > Select None.)
Open Standing Mirror3. Resize 65%. Copy and paste as a new layer. I mirrored my mirror. LOL. Position where you'd like it to be. Drop shadow. In the layer palette, this one is below the chair.
Highlight your tube layer.
Now, using your selection tool set on rectangle, (make sure feather is set to zero!) draw a selection around the top of the body of your tube. Edit > Copy. Edit > Paste as a new layer. Selections > Select none. Image > Mirror.
Position this copy of your tube so that it appears to be a reflection of the main scene. I had a lot of over-hang on this one. So if you do too, lower the opacity on your mirrored tube to 57. Take your lasso tool, set on point-to-point, and draw selections along the inside edges of the mirror and around the portions of your tube that don't belong. Hit delete. Selections > Select none. Leave the opacity at 57 -- it looks more like a reflection, IMO, that way.
Bravo! I hope I explained that well enough for you!
Open Nesting Boxes1. Resize 50%. Copy and paste as a new layer. Position, again, to one side or the other, dragging this layer, too, below the chair. Drop shadow.
Open Lamp2. Resize 50%. Copy and paste as a new layer. Position so it looks as if it's sitting on the nested boxes. Drop shadow.
Open Quilt1. Resize 35%. Copy and paste as a new layer. Rotate 45° right. Place so that it looks a bit like it might be covering the legs. It doesn't have to be perfect, as we have pillows and cushions coming!! Aha!! Drop shadow the quilt.
Open Pillow3. Resize 45%. Copy and paste as a new layer. Position somewhere in front of the chair and tube. Drop shadow. Note my example for placement reference on all of this, if you like.
Open Cushion10. Resize 35%. Copy and paste as a new layer. Same rotation as before, 45° right. Put it so it looks as best you can like a "normal" pile of pillows in the house. LOL! I wish I had this room!! Drop shadow.
Open Cushion12. Resize 75%. Copy and paste as a new layer. Position in front of the nesting boxes but behind the chair. Drop shadow.
Open Candle2. Resize 35%. Copy and paste as a new layer. Position as you'd like it... mine is just in front of the mirror, behind the pillow and cushions. Drop shadow your candles.
Highlight your white background.
Add a new raster layer.
Now, we're going to form a gradient. Go to your materials palette and on the stroke, use color #521d48. Now change your fill color to #e5aaa5.
Click on your foreground (stroke) color and choose Gradient. Then Foreground-Background Gradient and use these settings:
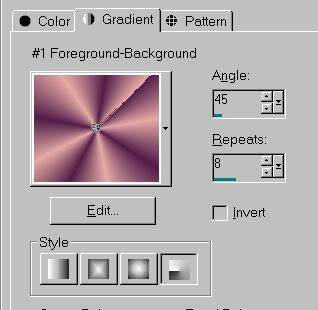
Note we're using the radial gradient style, the fourth button under the color. Angle 45, repeats 8.
Hit okay.
Your materials palette should now look somewhat like this:
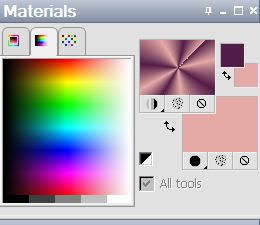
Flood fill your new raster layer with this gradient.
Apply the LAD_Frosted mask. Delete mask layer, answering "yes" to the pop-up question, and merge group.
Now apply the Edge Oval mask. Delete that mask layer, answer "yes" to the pop-up question, and merge group again.
There! Looks a bit more cohesive now!
Go to the top layer and add your name. I used the same gradient as the fill, no stroke. Since Ali's name is so short, it was easy to postion upon the pillow. I did this tag for myself as well, and it wouldn't fit, so it positioned it to the left of that. Up to you!!
I added a bevel:
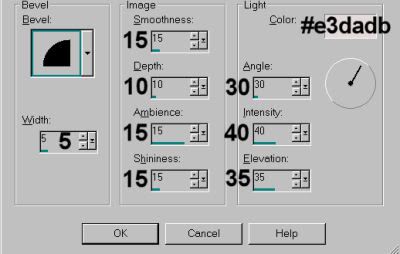
Hit okay.
Add a Gradient Glow, 3-0-100, Under the color tab click on "medium," and use color #e5aaa5. Hit okay. Drop shadow your name.
Resize your canvas to a size with which you're comfortable.
Add your copyright, license information if applicable, and taggers'/watermark.
Layers > Merge > and save! We are done!
There, we're done! I really do hope I explained myself well enough for you on this one. Let me know if you have any questions... Thanks for deciding upon this tutorial!! Have a grrrrrreat day!
.


No comments:
Post a Comment