
You will also need:
Animation Shop. This is from CNET, so it's a safe download. However, it costs. That changed pretty recently. I don't know why!!
HOWEVER ..... a LOVELY person named solshne (and another named Chris) wrote to let me know that one might find Animation Shop for free at this location. This is an FTP link and I have no idea if it's safe or not. So keep your antivirus handy to scan it after download!
Squirlz Water Reflection. That can be found here. This one is TOTALLY different. I do have a plethora of screen shots to help you through. I do hope I explain this so that it's easily understood!
A tube of your choice. I'm using the amazing artwork of Zindy S.D. Neilsen. You must have a license to use her artwork. You can get that license and art at Zindy's own site. You may notice that my info says My PSP Tubes. When I got this particular tube, she was with them. That's why I've done it that way. That's where I got the tube!
The scrap kit is by Doris of Scraps Dimensions. This is a FTU kit called Night Passion. I was SO happy to find a black and white kit! I love to do black and white tags!!
Filters: Eye Candy 4000 > Gradient Glow
Font: I used Alexandra Script.
Supplies: None! I figured Squirlz is quite enough!
Okay, so start this puppy!
Open a new canvas, 800 x 700, white.
Open Romantic Skyline 2. Resize 150%. Copy and paste as a new layer.
Open Frame 1. Resize 85%. Copy and paste as a new layer.
Add your tube. Resize, position and drop shadow to your taste. With the tube I used, I didn't have any overlap on the bottom of the frame, so I didn't need to erase anything. I'm skipping that step here. If you need to know how to do that, go to the next tutorial and it will be there, right after "Add your tube."
Open Lillies. Resize 50%. Copy and paste as a new layer. Rotate 60° left. Resize again 110%. Position at the bottom left of the frame. Drop shadow.
Open Lillies again, resizing 50%. Copy and paste as a new layer. Rotate 60° left. Position at the bottom left, grouping it somewhat with the first layer of lillies. Drop shadow.
Open Bow 4. Resize 35%. Copy and paste as a new layer. Rotate 90° left. Position over your lillies as though they're wrapped in the bow. Drop shadow.
Open old clock. Resize 40%. Copy and paste as a new layer. Position as you like. I chose to put mine in the top left corner of the frame. See my example for placement reference, if you like. Drop shadow.
Open Romantic Moon. Resize 40%. Copy and paste as a new layer. I positioned mine in the top right corner of the frame, then in the layer palette, dragged it down below the frame layer. Drop shadow the moon.
Go back to the top layer and add your name. I used color #dbdbdb for the fill and the stroke, stroke set at 2.
Add a Gradient Glow of 3-0-100, color black.
I then added a bevel, set as below:
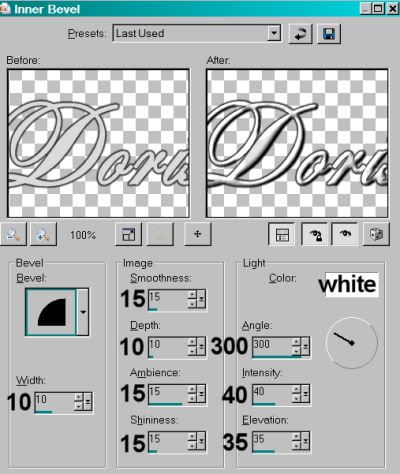
Hit okay.
Drop shadow your name.
I then rotated mine 30° left, and positioned it in the bottom right corner of the frame.
I chose, in this particular instance, to drag the name below the bow. It's up to you.
Resize your canvas to a size with which you are comfortable.
Add your copyright, license information if applicable, and taggers'/watermark.
If you choose not to animate, you're now done, and you can merge your layers and save! Just a note: The animation on this tag entails a lot of steps. If you choose not to do it, you're not really missing out on a LOT, but it does add to it, IMHO.
A N I M A T I O N
Layers > View > None
Open white background layer, and the romantic skyline layer.
Layers > Merge > Visible
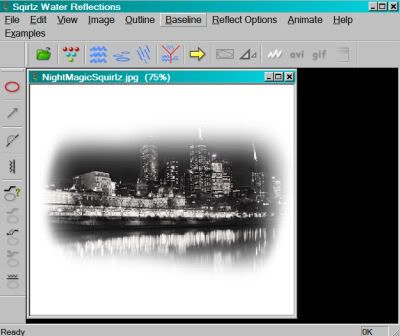
Save this as a .jpg to somewhere you'll be able to find it easily. I named mine "Night Magic Squirlz." It's up to you.
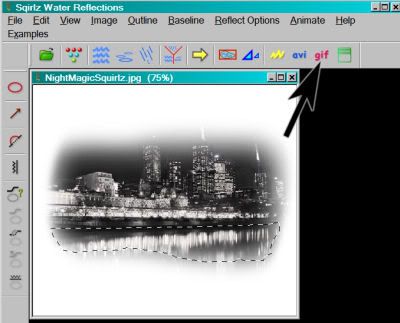
Open up Squirlz. File > Open > Find the file you just saved. You should have something like this:
Click on the red circle button to the top left
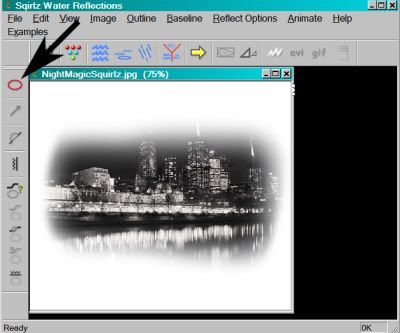
You now have a plus-sign cursor. This is used to draw an outline around the body of water you want to move. Press down the cursor as you outline the water reflection in the romantic skyline image.
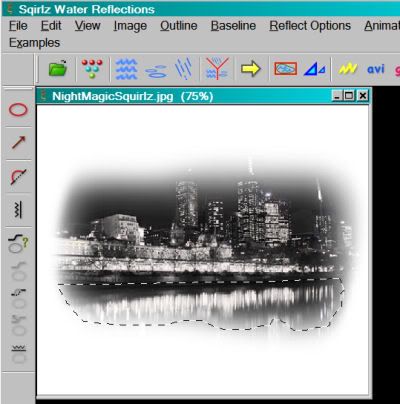
I did my best to follow the bottom of the water line in the image. I liked the blur, but Squirlz doesn't let that stay.
Now, click on the button on the top that looks kinda like bowling pins or something.... lol
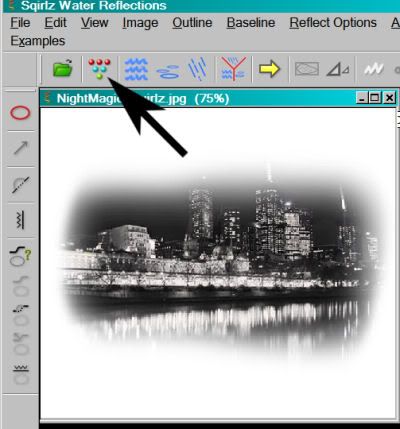
Change the number to 10.
Now, click on the button right next to that.
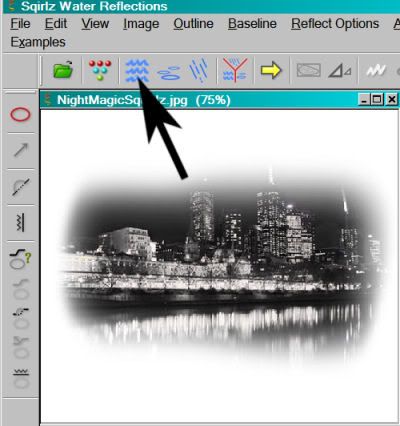
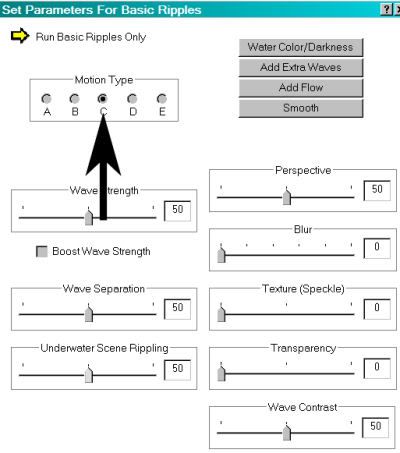
Choose "C," all other settings on the default.
Your animation should be running. To close it, just click on the X in the top right corner of the frame, and the animated image will close, leaving you with the original.
Click on the button that says gif.
Again, name it something you'll be able to easily find from Animation Shop.
Now you're seeing a running guy while the animation saves. lol.
Open Animation Shop and then open the animation you just saved. It should have 10 frames. Make sure the slider at the bottom is placed at the first frame.
Go to PSP. Layers > View > All.
Close out the white background layer and the romantic skyline layer.
Edit > Copy merged.
Go to Animation Shop, right-click on the desktop area and paste as a new animation.
Duplicate your frames until you have a total of 10. Move the slider on the bottom back to the first frame.
Edit > Select All. Edit > Copy
Move to your Squirlz animation and Edit > Select All. Edit > Paste Into Selected Frame.
Edit > Select All again.
Right-click on the top bar of your animation, choose "Frame Properties," and change the number to 25.
View > Animation
And we're done! I hope you like your creation! And I hope I explained it well enough!! Thanks for using my tutorial!
.


No comments:
Post a Comment