
You will also need:
Animation Shop. This is from CNET, so it's a safe download.
[NOTE: There IS animation here, but it is SO subtle, it's almost not seeable, if that's a word. lol. So it would definitely be great to not animate, as well. Won't make that much difference. This is especially true if you're not using a tube with a beaded necklace.]
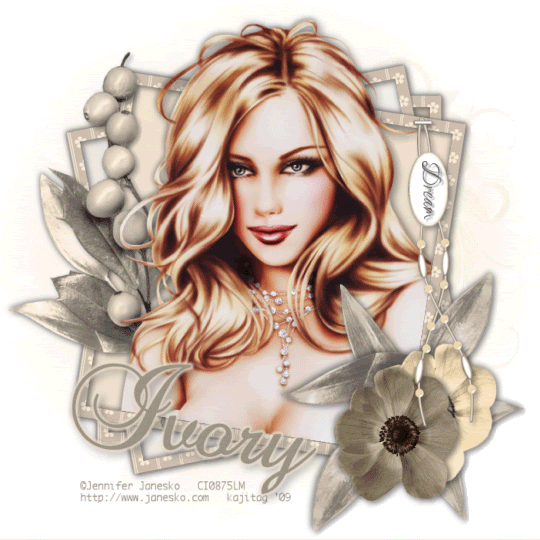
A tube your choice. I'm using the gorgeous artwork of Jennifer Janesko. You must have a license to use her work. You may purchase that license at CILM.
Scrap kit is by Ivory, of Ivorys Designz. It's a PTU kit, is available at Scrap Heaven Boutique, and is called Au Naturelle. I guess I'm in another one of my "soft pastels" kinda moods....
Filters: dsb Flux > Bright Noise & Eye Candy 4000 > Gradient Glow (for the name only)
Font: I used Brock Script
Supplies: The mask, which is again by Butterfly Flutterby, and the word art from where I do not know. Let me know if it's yours, and I'll give you proper credit! You can get these supplies
here.
Okay! Let's party... lol!!
Open your supplies in PSP and minimize. Alternatively, you could load your mask into your PSP masks file. This way, you'd have it to use later on....
Open a new image, 700 x 700, white.
Open paper14. Copy and paste as a new layer.
Open frame2. Copy and paste as a new layer.
Add your tube. Resize, position and drop shadow to your taste.
Highlight your frame layer. Grab your magic wand and click inside the main area of the frame. Also, click inside any of the other, much smaller areas of the frame that your tube may be overlapping. Selections > Modify > Expand by 1. Selections > Invert.
Highlight your tube layer. Grab your eraser brush and erase any of your tube that you don't want overlapping the frame areas you clicked. Selections > Select none.
Open paper5. Copy and paste as a new layer. Drag this layer below your frame layer.
Highlight your frame layer again. Click inside the main portion of the frame. Selections > Modify > Expand by 7. Selections > Invert.
Highlight the paper5 layer. Hit delete. Selections > Select none.
Now, highlight your frame layer again. Click inside the "next layer down" areas of the frame, if you get my drift. The top and bottom corners that appear to be layers of the frame below the main portion. Selections > Modify > Expand by 7. Selections > Invert.
Open another paper. I chose paper15. Copy and paste as a new layer. Drag this below your paper5 layer. Hit delete. Selections > Select none.
Again, highlight your frame layer. Now, click inside the areas of the bottom-looking layer of the frame. Selections > Modify > Expand by 7. Selections > Invert.
Open yet another paper. I chose paper4. Copy and paste as a new layer. Drag this layer down below your last paper layer. Hit delete. Selections > Select none.
Okay, we're done with that! lol! Drop shadow your frame.
Open fern3. Resize 75%. Copy and paste as a new layer. Image > Mirror. Drag this layer below your tube. Position to the left of your tube. See my tag for placement reference. Drop shadow.
Open berries2. Copy and paste as a new layer. Rotate left 45°. Drag this layer above your fern3 layer. Position to your liking. Drop shadow.
Open flower2. Resize 35%. Copy and paste as a new layer. Position as you like. I placed mine in the bottom right-hand corner area of the frame. See my tag for placement reference. Drop shadow.
Open flower1. Resize 35%. Copy and paste as a new layer. Position this next to your flower2 layer. Drop shadow.
Open fern2. Resize 75%. Copy and paste as a new layer. Drag this layer below your flower layers. Duplicate this layer. Image > Mirror. Image > Flip. Move so that this layer is clustered with the other fern and the flowers. Again, see my tag for placement reference. Merge these two layers down. Drop shadow.
Open beadstring2. Resize 75%. Copy and paste as a new layer. Position so the staple appears to be attached to the frame. See my tag for placement refrence. Drop shadow.
Now, this is where the word art I supplied comes in. I chose the word "Dream" from the saying on the top right. I know it's small. I used my lasso tool set on point-to-point and drew a selection carefully around the word "dream," then Edit > Copied and pasted onto the canvas of my tag. I then rotated right 90° and moved it so that it sat on the tag in the beadstring layer.
Adjust > Brightness and Contrast > Brightness/Contrast with settings at 100 and 0. Adjust > Hue and Saturation > Colorize with color #9a9083. Small drop shadow.
Highlight your first paper layer. I used paper14.
Apply your mask. Delete the mask layer, answer "yes" to the pop-up question, and merge group.
Add your name. I again used color #9a9083 for the fill AND the stroke, stroke set at 2. I then added Eye Candy 4000 > Gradient Glow with settings at 5 - 0 - 100, color #eee1ce and preset of "medium."
Drop shadow your name.
Add your copyright, license information if applicable, and taggers'/watermark.
If you want to animate, it's best if you do this next part before resizing your tag. At this point, you can just merge and save, if you choose not to animate!!
Highlight your tube layer. Take your magic wand, mode on Add(shift) and click verrrry carefully in each bead of the necklace. I found there was one particular bead that didn't work.
Duplicate your tube layer twice, for a total of three tube layers.
Still on the bottom tube layer...
Effects > Plugins > dsb Flux > Bright Noise, intensity set on 30. Click on "mix" once.
Hit okay.
Highlight the middle tube layer. Again, apply Bright Noise, this time clicking on "mix" twice.
Hit okay.
Highlight the top tube layer. Apply Bright Noise again, clicking "mix" three times.
Hit okay.
Close out the top two tube layers, leaving the bottom tube layer open.
Selections > Select none.
Resize your tag to a size with which you're most accustomed.
A N I M A T I O N
Edit > Copy merged
Open Animation Shop, right-click on the desktop area, and paste as a new animation.
Return to PSP. Close out the bottom tube layer, and open the middle tube layer.
Edit > Copy merged.
Return to Animation Shop and Edit > Paste > After Current Frame.
Back to PSP. Close out the middle tube layer and open the top tube layer.
Edit > Copy merged.
And, back to Animation Shop. Edit > Paste > After Current Frame.
View > Animation. Et, voila! We are done! I hope you've enjoyed this tutorial! Thanks for stopping by!
.


No comments:
Post a Comment