
You will also need:
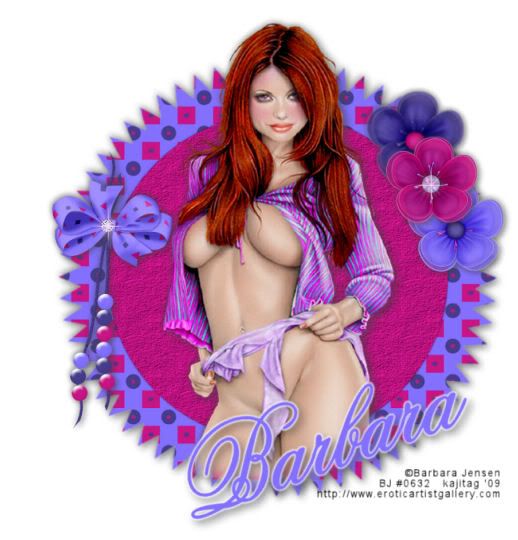
A tube of your choice. I'm using the erotic artwork of Barbara Jensen. You must have a license to use her work. You may purchase that license at Barbara's web site.
Scrap kit is by Ivory's Designz. It's a PTU kit, available at Paradise 4 Scrappers, and is called Funky Town. This is a full-sized (scrappers') kit. I was trying to find a kit that would work with the colors on the tube, and Ivory's Designz apparently is not offering a taggers' version. Lots of resizing!
Filters: Eye Candy 4000 > Gradient Glow
Font: I used Flemish Script BT
Supplies: The supplies are little, and don't make THAT much of a difference on the tag. However, they DO make a difference. Two diamonds and a pink sparkle, here!
Let's play!!
Open your supplies in PSP and minimize.
Open a new image, 700 x 700, white.
Open spiky pad 1. Resize 35%. Copy and paste as a new layer. Drop shadow.
Add your tube. Resize, position and drop shadow to taste.
Open beadstring 1. Resize 20% Copy and paste as a new layer. Position where you'd like it. I chose the left side of the "spiky pad." Drop shadow your beads.
Open bow 3. Resize 7 %. Copy and paste as a new layer. Position where the strings cross over one another in the beadstring. Drop shadow your bow.
Open Diamond Small from your supplies. Copy and paste as a new layer. Position over the center of the bow.
Open SparklePink from your supplies. Resize the sparkle layer 35%. Copy and paste as a new layer. Position this over the diamond you just placed on the bow.
Open flower 5. Resize 11%. Copy and paste as a new layer. Position wherever you'd like. I chose the right side of the spiky pad, toward the top. See my tag for reference purposes. Drop shadow the flower.
Open flower 4. Resize 11%. Copy and paste as a new layer. Position next to the first flower, however you'd like. We are building a cluster. Drop shadow this flower.
Open flower 3. Resize 11%. Copy and paste as a new layer. I chose to have this be the top, middle flower in the cluster. Drop shadow this flower.
Open SparkleDiamond from your supplies. Resize 25%. Copy and paste as a new layer. Position this over the middle of the top, middle flower you just placed on your canvas.
Open SparklePink again. Resize 35%. Copy and paste as a new layer. Position over the SparkleDiamond you placed on your middle flower.
Add your name. I used color #8370fe as the fill AND the stroke, stroke set at 2.
Effects > Plugins > Eye Candy 4000 > Gradient Glow set at 3 - 25 - 100, color white, preset of medium.
Drop shadow your name.
Add your copyright, license information if applicable and taggers'/watermark.
Crop away any excess white space. Resize your tag to the size of your choice. At this point merge your layers and save, and you're done! I hope you've enjoyed this tutorial! Thanks for stopping by!
.


No comments:
Post a Comment