
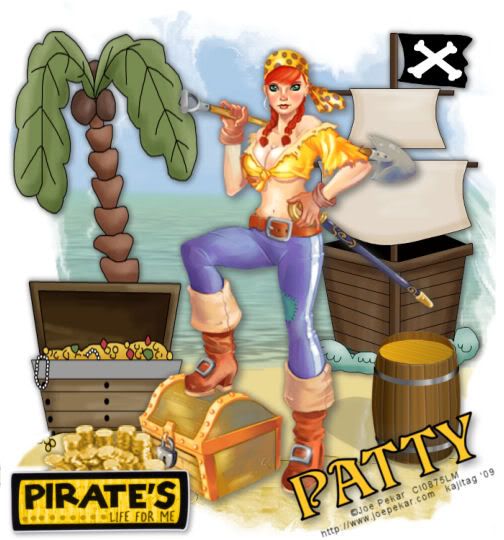
You will also need:
A tube of your choice. I'm using the artwork of Joe Pekar. You must have a license to use his work. You may purchase that license at CILM.
Scrap kit is by Patty of Honored Scraps. It's a PTU kit, available at Treasured Scraps or Terminally Unique Designs. It's called simply Argh. It's on a good sale right now, so get it while the getting's good!
Filters: No outside filters used in this tut!
Font: I used ParaisoSSK
Supplies: More supplies than ever in this one. The beach background is from Lottie. Thanks, Lottie! I don't know where I got the balance of the supplies, so if any of them are yours, please let me know so that I might credit you properly! You can find the supplies here.
Let's play!!
Open your supplies in PSP and minimize. You may file the mask in your PSP mask files if you wish, for use at a later date.
Open a new image, 700 x 750, white.
Open the BeachBackground. Copy and paste as a new layer. Grab your pick tool, and stretch it up to the top, and then down to the bottom.
Add your tube. Resize, position and drop shadow to taste.
Open sand-beach. Copy and paste as a new layer. Position it at the bottom of the sand area (this gives it texture). You can't really see it on my tag because of the mask we're going to be using, but just position it down there on one side or the other. Duplicate, and Image > Mirror. Duplicate again and put this sort-of in the center. This is not an exact science. Just so you think it looks okay. Merge these layers down.
Open teasure chest island. Copy and paste as a new layer. Position where you'd like it and drop shadow. I used the pick tool again, to stretch this. I wanted it to be taller!! In the layer palette, drag this layer below the sand layers you just made. Once it's situated where you want it, drop shadow the tree and chest.
Take your lasso tool, set on point-to-point, and draw a selection around the portion of the sand on the "treasure chest island" area.
Adjust > Hue and Saturation > Colorize with the following settings:
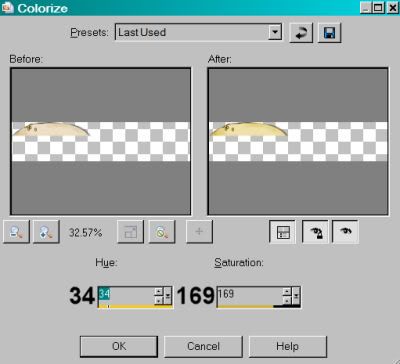
Selections > Select none.
Now highlight your sand layer you've just made. Colorize that with the same settings. Trying to get everything to match, here!! lol.
Open pirate ship. Copy and paste as a new layer. Position this to the opposite side of your tree, to balance the tag out nicely. This layer should be above the sand layers you made. Just barely touching the sand. See my tag for reference purposes. Drop shadow your pirate ship.
Get your lasso tool again, set on point-to-point, and draw carefully around the edges of the water area of the pirate ship.
Adjust > Hue and Saturation > Colorize with the following settings:
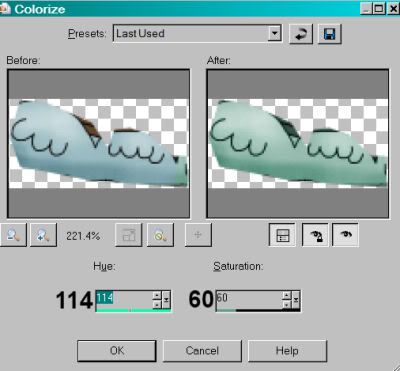
Selections > Select none.
Open barrel. Resize 50%. Image > Mirror. Copy and paste as a new layer. For some reason, there is a perspective shadow on this element. Go ahead and position this as you like and add your own drop shadow, as well.
Open the chestncoins from the supplies. Highlight raster 4. Copy and paste as a new layer. Position your coins where you like. Drop shadow.
Highlight your beachbackground layer. Apply your mask. Delete mask layer, answer "yes" to the pop-up question and merge group.
Highlight your sand-beach layer. Apply your mask again. Delete the mask layer, answer "yes" to the pop-up question and merge group.
Open the pirate's life for me element. Resize 50%. Copy and paste as a new layer. Position it where you'd like it. I chose the bottom left corner. See my tag for reference purposes. Drop shadow.
Add your name. I used color #ffc72a as the fill. Stroke set at 3, color black.
Drop shadow your name.
Add your copyright, license information if applicable and taggers'/watermark.
Resize your tag to the size of your choice. At this point merge your layers and save, and you're done! I hope you've enjoyed this tutorial! Thanks for stopping by!
.


No comments:
Post a Comment