You will also need:
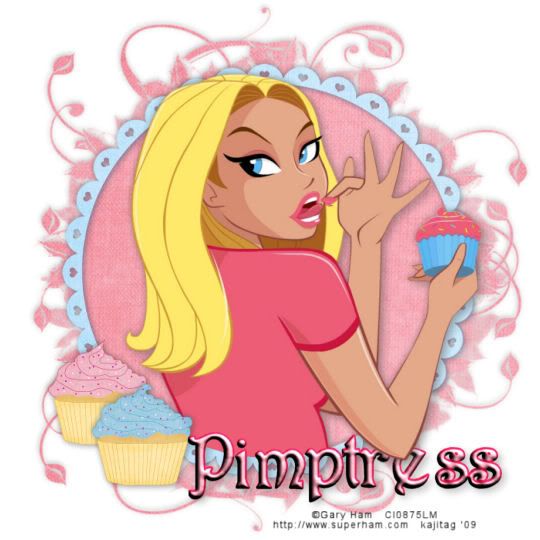
A tube your choice. I'm using the fun artwork of Gary Ham. You must have a license to use his work. You may purchase that license at CILM.
Scrap kit is by Pimptress, of Pimp'd Tag Scraps. It's a PTU kit, available through Paradise 4 Scrappers, and is called A Royal Tea Party. Remember, Paradise 4 Scrappers is having their awesome Easter sale!!
Filters: No outside filters were used in this tut!
Font: I used JessamineScriptSSK
Supplies: Just the mask, which I got from Blendid Style YEARS ago. It appears she is no longer offering her masks. You can get the mask here.
Let's create!! This is another quick-n-easy tut!
Open a new image, 700 x 700, white.
Open frame-02. Copy and paste as a new layer. I colorized mine to go with my tube. That's up to you.
Add your tube. Resize, position, and drop shadow to your taste.
Highlight your frame layer. Click inside the frame with your magic wand. Selections > Modify > Expand by 1. Selections > Invert
Highlight your tube layer. Grab your eraser brush and erase any of your tube that is overlapping the bottom and/or sides of your frame. Do not deselect!
Highlight your white background layer.
Open pp02. (Of course, you may either use a different paper, if you're using a tube with different colors, or colorize the paper as I did.) Copy and paste as a new layer.
Hit delete again. Selections > Select none.
Highlight the white background layer again. Add a new raster layer. Selections > Select All.
Again, open pp02. Copy and paste INTO SELECTION. Selections > Select none.
Apply your mask. Delete your mask layer, answer "yes" to the pop-up question, and merge group.
Give your mask layer a soft drop shadow. Drop shadow your frame.
Open cupcake-01. Resize 25%. Copy and paste as a new layer, positioning as you like. You may reference my tag for placement. Drop shadow your cupcake.
Open cupcake-03. Resize 25%. Copy and paste as a new layer. Place this one close to the first one. Again, see my tag for placement reference. Drop shadow this cupcake.
Add your name. I used color #f6a3b1 for the fill. Stroke of 2, color #c71640.
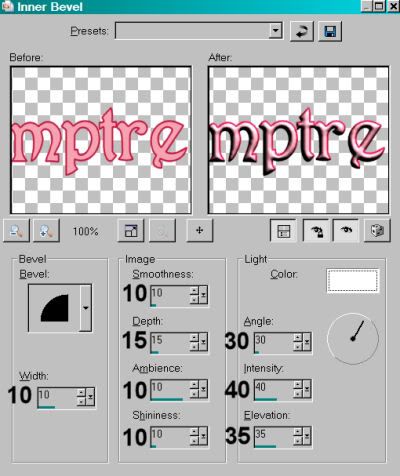
I added an inner bevel, with the following settings:

Hit okay.
Drop shadow your name.
Add your copyright, license information if applicable and taggers'/watermark.
Resize your tag to the size of your choice. Now, just merge your layers, and save! Et, voila! Told you it was quick-n-easy!! Thanks for stopping by!
.


No comments:
Post a Comment