
You will also need:
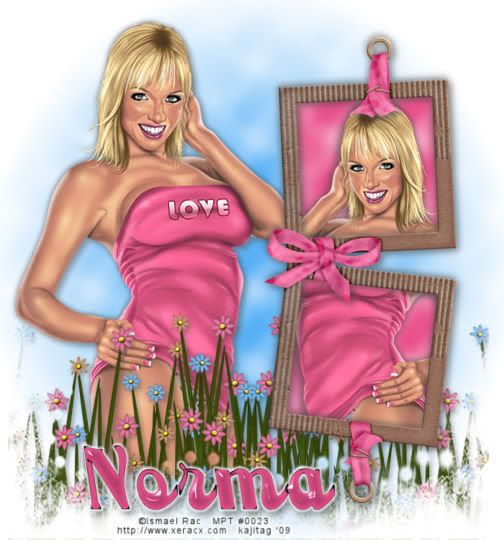
A tube your choice. I'm using the fantastic art of Ismael Rac. You must have a license to use his work. You may purchase that license at My PSP Tubes.
Scrap kit is by Norma, of Swheat Creations. It's a PTU kit, available through Paradise 4 Scrappers, and is called Summer Dreams. (The preview says "Summer Breeze" but everywhere else it's called "Summer Dreams.") This kit, and more, are also available through Norma's "Krafy Kreations" club. You can find out about this here.
Filters: Eye Candy 3.1 > Glass, Eye Candy 4000 > Gradient Glow
Font: I used Backhand Script.
Supplies: I used two masks. Again, I don't recall from where I got these, so if you find they are yours, please let me know so that I can properly give you credit! One of them is the 20-20 mask, which was extremely popular a few years back. A shame I can't credit the person who made it. :( Anyway, you can find them both here.
Let's create!! This is another easy tut!
Open a new image, 700 x 750, white.
Open Frame3. Resize 75%. Copy and paste as a new layer. Position to one side.
Add the first copy of your tube. Resize, position, and drop shadow to your taste. In the layer palette, drag this below your frame layer.
Highlight your frame layer. Click inside both frames with your magic wand. Selections > Modify > Expand by 7. Selections > Invert
Highlight your tube layer. Hit delete. DO NOT DESELECT!!
Highlight your white background layer.
Open Bkg4a. (Of course, you may use a different paper, if you're using a tube with different colors.) Copy and paste as a new layer.
Adjust > Blur > Gaussian Blur set on 7.
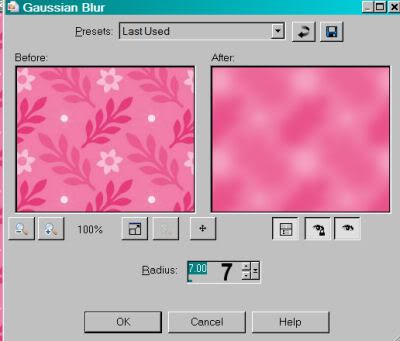
Hit okay. Hit delete again. Selections > Select none.
Open GrassNFlowers. Resize 65%. Copy and paste as a new layer. Position this so that the edge of the grass 'n flowers is on the edge of your canvas -- one side or the other, it doesn't matter. Also right ON the bottom. See my tag for placement reference. Duplicate this layer. Image > Mirror. Position this onto the other edge of your canvas. Merge these two layers down. Drop shadow.
Add your tube again, mirrored. Resize, position, and drop shadow. If it's a ¾ tube as mine was, you can soften the bottom edge by grabbing your lasso tool, set on freehand, feather set to 17. Draw a "smile" curve at the bottom of your tube. Hit delete. Selections > Select none. This isn't mandatory, as you will now, in your layer palette, be dragging your main tube below your grass layer. It's up to you!
Highlight your white background layer.
Open Bkg1a. Copy and paste as a new layer. Adjust > Blur > Gaussian Blur, same setting.
Apply your 20-20 mask. Delete mask layer, answer "yes" to the pop-up question, and merge group.
Highlight your GrassNFlowers layer. Apply your 2127ET mask. Delete the mask layer, answer "yes" to the pop-up question, and merge group.
You'll notice some of the grass 'n flowers right on the very edge of your canvas. Grab your selection tool, set on rectangle, feather of 5. Draw a very long and thin rectangle at the edges, both sides and the bottom. Hit delete. Selections > Select none.
Drop shadow your frame.
Add your name. I used color #e9528b for the fill. Stroke of 2, color black.
Effects > Plugins > Eye Candy 3.1 > Glass with the following settings:
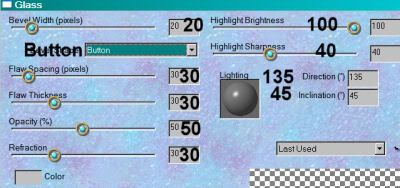
This is small, so it's all the default settings, except choose the preset of "Button."
Effects > Plugins > Eye Candy 4000 > Gradient Glow of 5 - 0 - 100, color white. Drop shadow your name.
Add your copyright, license information if applicable and taggers'/watermark.
Resize your tag to the size of your choice. Now, just merge your layers, and save! Et, voila! I hope you've enjoyed this tutorial! Thanks for stopping by!
.


No comments:
Post a Comment