

You will also need:
A tube of your choice. I'm again using the glamorous artwork of Jennifer Janesko. You must have a license to use her work. You may purchase that license at CILM.
Scrap kit is by Michelle, of Candy Kisses Designz. It's a PTU kit, available at Scrap Heaven Boutique, and is called A Victorian Love Affair. This kit is available in both taggers' and scrappers' sizes.
Filters: No outside filters used in this tut!
Font: I used Romanesque
Supplies: No outside supplies used in this tut, either! Whee!
Let's do it!!
Open a new image, 750 x 700, white.
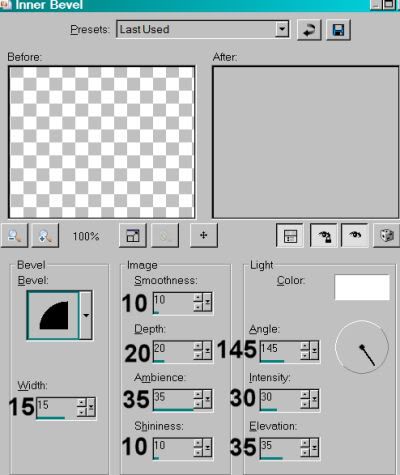
Open red lace frame. Copy and paste as a new layer. I added a bevel to the frame with the following settings:
Add your tube. Resize, position and drop shadow to taste.
Highlight your frame layer. Grab your magic wand and click inside the frame. Selections > Modify > Expand by 1. Selections > Invert.
Highlight your tube layer. Grab your eraser brush and erase any portion of your tube that is overlapping the bottom of the frame.
Selections > Invert. Selections > Modify > Expand by 4.
Add a new raster layer. Drag this layer below your frame and tube layers. Fill with a color of your choice. I used a gold metal gradient. See tag for reference purposes. Select none.
Open red swag. Copy and paste as a new layer. In the layer palette, drag this layer down below the tube, but above the frame layers. Position as you like it. See my tag for reference. Drop shadow the red swag layer.
Open black clip. Copy and paste as a new layer. This layer should be below the tube and above the flood filled layer. Drop shadow the black clip.
Open mask (it's an element in the kit lol). Resize 45%. Copy and paste as a new layer. I positioned mine on the top left corner of the red swag. See tag for reference. Drop shadow your mask.
Open red rose. Rotate right 90°, ALL LAYERS CHECKED! Resize 50%. Adjust > Brightness and Contrast > Brightness/Contrast with the following settings:
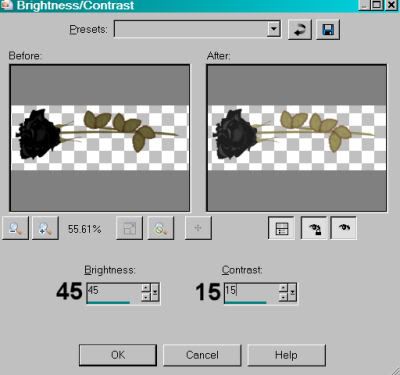
Hit okay.
Position this rose where you would like it. I have mine in the bottom left corner of the frame. See my tag for reference purposes. Drop shadow this rose.
Open black rose. Again, rotate right 90°, ALL LAYERS CHECKED. Resize 50%. Adjust the brightness and contrast again, same settings. Position this rose closer to the center of the frame. See my tag for reference. It's just next to the red rose, actually. Drop shadow your black rose.
Merge down the red rose and black rose layers. Duplicate this layer. Image > Mirror.
Position your roses along the bottom edge of the frame. In the middle, there will be an overly large amount of leaves, so while you're still on your new roses layer, grab your selection tool, set on rectangle, and draw a selection around the middle of the roses' greenery. Hit delete. Selections > Select none.
Open butterfly2. Resize 50%. Copy and paste as a new layer. Position above the center of the greenery of the roses. Drop shadow your butterfly.
Add your name. I used color #792013 as the fill, stroke set at 1.5, color #d6bb3a. I added the same inner bevel that we used for the frame, above. Drop shadow your name.
Add your copyright, license information if applicable and taggers'/watermark.
Resize your tag to the size of your choice. At this point merge your layers and save, and you're done! I hope you've enjoyed this tutorial! Thanks for stopping by!
.


No comments:
Post a Comment