
You will also need:
Tube of your choice. I've chosen to use the awesome artwork of Dave Nestler. You must have a license to use his work. You may purchase that license at CILM.
Animation Shop - at this time, I'm not sure where you can get this program, if you don't already have it. You may, however, save the tut as a static (non-animated) image if you like.
Scrap kit is by Yvette at Misfits Scrapz. This one is an awesome FTU, taggers' sized kit called Bling A Ling. Now, don't forget to let Yvette know how grateful you are for her sharing her work with the PSP comminity!!
Filter: DSB Flux > Bright Noise
[NOTE: There is animation in this tag, but it's very subtle. And we're animating two separate areas on the tag, so the writing down of the steps was a bit confusing. I hope you can follow, I really do! So, anyway, you can choose to animate or not. Totally up to you.]
Font: I used MC Crate Outline
The mask used is by Monti, of Monti's Pixel Playground. Click on "Masks" in the left side column and then it's the fourth one down. Thank you, Monti, for sharing your resources with us!
Let's start!!
Open your mask in PSP and minimize, or alternatively, load it in your mask file.
Open a new image, 700 x 650, white.
Open Paper3. Copy and paste as new layer.
Apply your mask. Delete mask layer, answering "yes" to the pop-up question, and merge group.
Open Paper12. Copy and paste as new layer.
Open Frame3. Copy and paste as new layer.
Adjust > Brightness and Contrast > Brightness/Contrast with the following settings:
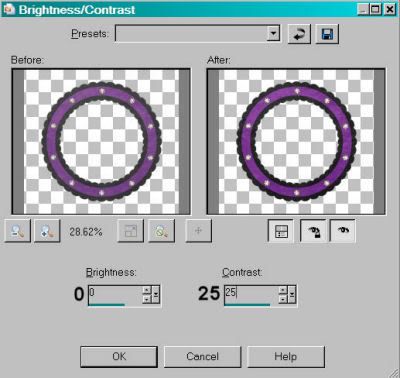
Hit okay. This brightens it up a bit.
Grab your magic wand and click in the middle of the frame.
Selections > Modify > Expand 10 Selections > Invert
Highlight your paper layer and hit delete. Selections > Select none.
Add your tube of choice. Drop shadow your tube. If you want it to "emerge" from the frame like mine, then highlight your frame layer and again click inside with your magic wand. Selections > Invert.
Grab your eraser brush and erase any of your tube that is hanging down below the border of the frame. Selections > Select none.
Open BlingSwirl. Copy and paste as new layer. I usually do this on the top layer, so I can see what I'm working with. Position it to the top right of the frame, overlapping to your liking. Duplicate this layer and Image > Mirror. Merge down these two layers and duplicate. Image > Flip. It won't line up exactly, so move the bottom one up until there appears to be no overlap. Merge these two layers down.
Move this layer down below the paper layer and above the mask layer.
Duplicate the BlingSwirl layer twice for a total of two layers. X out the top two layers and leave them alone for now.
Open SafetyPinWithCharms. Copy and paste as new layer, above the frame. I put mine low. Drop shadow. If placing like mine, erase the area that goes over the gem in the frame.
Add your name. I used black as the stroke color, and typed it out. If you're using a similar font, then grab your magic wand and click inside all parts of every layer. (Make sure before you start that your magic wand is set on "add" mode.)
Selections > Modify > Expand by 1
Add new raster layer. Flood fill with #823c97.
Inner Bevel with the following settings:
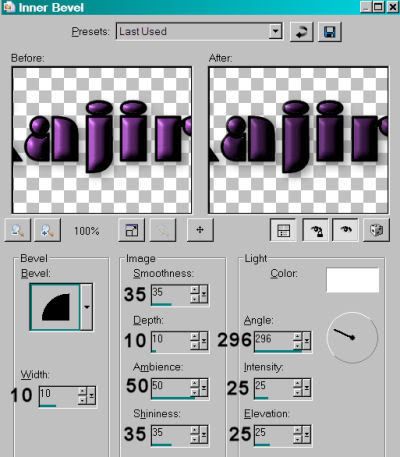
Then merge the flood-fill layer down with the outline layer. Drop shadow your name.
Add your copyright, your license number if applicable, and your tagger's/water mark.
Resize to your favorite size.
Now, on to the animation!
A N I M A T I O N
Duplicate your frame layer twice for a total of three layers.
Grab your lasso, point-to-point, and draw a selection around all the gems on the frame, one by one. X out the top two layers and leave the bottom one open and highlighted.
We are going to animate both the frame and the BlingSwirl layers at the same time.
While on the bottom frame layer,
Effects > Plugins > DSB Flux > Bright Noise, Intensity at 45 and "mix" clicked. Okay.
Go back to your BlingSwirl layers. Make sure the top two are X'd out and the bottom one is highlighted.
Do the same with this one. Effects > Plugins > DSB Flux > Bright Noise, Intensity at 45 and "mix" clicked. Okay.
X out of the bottom BlingSwirl layer. Open and highlight the middle one.
Effects > Plugins > DSB Flux > Bright Noise, click "mix" a couple of times. Okay.
Go to your BlingSwirl layers, X out the bottom, opening and highlighting the middle.
Again, Effects > Plugins > DSB Flux > Bright Noise, click "mix" a couple of times. Okay.
X out of the middle layer. Open and highlight the top BlingSwirl layer.
Once more, Effects > Plugins > DSB Flux > Bright Noise, click "mix" 3 or 4 times. Okay.
Do the same with the top layer of your frame.
Selections > Select none.
Now X out of the top layer and open the bottom of both the BlingSwirl layer and your frame layer.
Edit > Copy merged
Open Animation Shop. Right click on the desktop area and paste as new animation.
Come back to PSP and X out of the bottom layers for both your BlingSwirl and your frame. Open the middle ones for both.
Edit > Copy merged
Back to Animation Shop. Edit > Paste > After current frame.
And again, back to PSP and X out of the middle layers for both sets. Open the top layers of both and
Edit > Copy merged
Go to Animation Shop and Edit > Paste > After current frame.
View > Animation. The effect, as I said, is *very* subtle, but it's there. Lots of confusion for a little bling, but hey, it's fun!
Save as .gif and there we are, done! Thanks for trying my tut!! And have a great weekend!
.


No comments:
Post a Comment