
You will also need:
Tube of your choice. I'm using the great artwork of Deacon Black. You must have a license to use his work. You may purchase that license at CILM. (The link to his web site is not working. I have an inquiry in to CILM to see what's up with that, as they still have the old link up, too.) UPDATE!! I just got a return e-mail from Kelly at CILM. Here's what she said:
To:
Subject: Re: Deacon Black Web Site?
From: "CILM Customer Help"
Date: Mon, 23 Feb 2009 16:34:29 -0700
Hi Kajira :)
Just use www.cilm.com for Deacons web addy :))
Have a wonderful day!!!
Kelly :o)
So, there ya' go. An official word that Deacon Black's URL has changed!! You heard it here first!
Animation Shop - at this time, I'm not sure where you can get this program, if you don't already have it. You may, however, save the tut as a static (non-animated) image if you like.
Scrap kit by Patty of Honored Scraps. It is a PTU kit, available at Treasured Scraps and called Twilight. And it's on sale!!
Filters: Eye Candy 4000 > Gradient Glow
Font: I used JackieO
Supplies: The mask, sg_macrame-hexagon, which you can find here.
Let's go for it!
Open a new image, 700 x 650, white.
Open Paper5. Resize to 700 x 700. Copy and paste as new layer.
Apply your mask. Delete the mask layer, answer "yes" to the pop-up question and merge group.
Open the DecoHeart. Copy and paste as a new layer. Rotate left 25°. Resize by 110%.
Open Heart Template. Copy and paste as a new layer. Resize by 75%. Position so that the DecoHeart and the Heart Template are well-balanced. See my tag for reference.
Grab your magic wand and click inside the Heart Template. Selections > Modify > Expand by 7. Selections > Invert.
Open Paper5 again. Copy and paste as new layer, under the Heart Template layer. Hit delete. Selections > Select none.
Lower the opacity on the new Paper5 layer to 75.
Drop shadow the Heart Template.
Add your tube. Position and drop shadow to your liking.
Open FlowerSwag. Copy and paste as a new layer. Resize 75%. Drop shadow.
Add your name. I used color #a8a4da. I added an inner bevel, settings below:
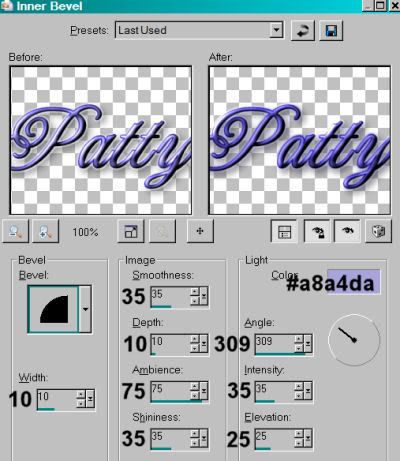
Hit okay.
Effects > Plugins > Eye Candy 4000 > Gradient Glow with the settings 3 - 25 - 100 with a color of #221974. Apply a second Gradient Glow, this time in white. Drop shadow.
Add your copyright, license information if applicable and taggers'/watermark.
Resize your tag to suit your taste. You can save here if you choose not to animate. Otherwise, here we go!
A N I M A T I O N
Highlight your DecoHeart layer. Edit > Copy
Open Animation Shop. Right-click on the desktop area and paste as new animation.
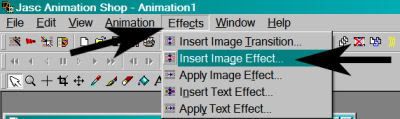
Effects > Insert Image Effect
Choose "Noise" with the settings below:
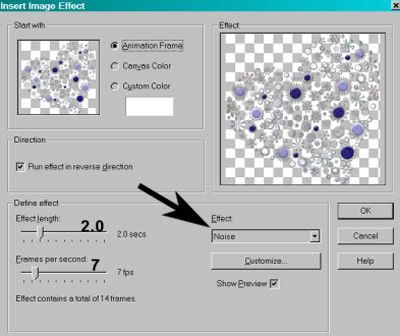
Hit okay. You should now have 15 frames. Move the slider at the bottom of your animation to the first frame.
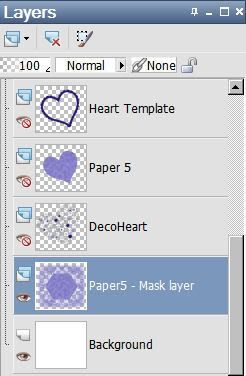
Return to PSP. Layers > View > None
Open the bottom two layers. It should look like this:
Edit > Copy merged
Return to Animation Shop, right-click the desktop area and paste as a new animation.
Duplicate this until you have 15 frames. Move the slider on this back to frame 1.
Go back to your DecoHeart animation. Edit > Select All. Edit > Copy
Return to your background and mask layer animation. Edit > Select All. Edit > Paste > Into Selected Frame. Position as you want it, and release your mouse button.
Return again to PSP. Close out the bottom two layers and open all the layers above it. Probably easiest to go Layers > View > All, then close out the bottom two layers.
Edit > Copy merged
Back again to Animation Shop. Right-click on the desktop area and paste as a new animation.
Duplicate this until you have 15 frames. Move the slider on this animation to the first frame.
Edit > Select All, Edit > Copy
Move back to your DecoHeart animation. Edit > Select All, Edit > Paste Into Selected Frame
Again, position as you want it, then release your mouse button.
And look at that, you're done! View > Animation Save as .gif and I hope you had fun!
This creates a rather big file, but I wanted to experiment with the effects today, so there you have it!
.


No comments:
Post a Comment