
You will also need:
Four tubes of choice, from the same artist. It'd be best, IMHO, to have three face shots and one laying down, or resembling the "main" tube I used. I'm using the erotic artwork of Barbara Jensen. You must have a license to use her work. You may purchase that license at Barbara's Web site.
Animation Shop - at this time, I'm not sure where you can get this program, if you don't already have it. You may, however, save the tut as a static (non-animated) image if you like.
Scrap kit by Pimptress of Pimp'd Tag Scraps. This one is a FTU kit, simply called B&W Freebie. I *LOVE LOVE LOVE* black and white tags, so when I saw she'd offered this freebie, I jumped on it! Leave her some love for the freebie kit!!!
Filters: Mura's Meister > Copies
Font: I used ChaseCallasSH
Three files in my supplies. This includes the mask and two sparklies that I used on the wreath of flowers on the tag. The mask is once again a product of Essex Girl! Thanks once again, for the use of your wicked masks!
Let's begin!!
Open your mask in PSP and minimize, or load it into your PSP masks folder. Open the two sparklies and put them wherever you put things in anticipation of using them in an animation.
Open a new image, 700 x 650, white.
Open Frame. Copy and paste as a new layer. Bring this down toward the bottom of your tag. See my tag for reference purposes.
Choose a tube to be in the left-hand frame. Copy and paste it as a new layer, below the frame layer, and position it as you'd like it to be.
Highlight your frame layer. Grab the magic wand and click inside the left-hand frame. Selections > Modify > Expand by 5. Selections > Invert
Highlight your tube layer. Hit delete. Selection > Select none. Drop shadow your tube as you like.
Do this same process for the middle and right-hand frames.
Open sequin-flower. Resize 68%.
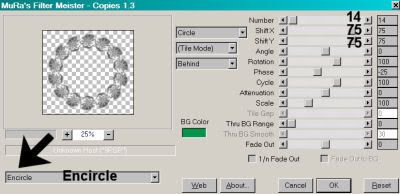
Effects > Plugins > Mura's Meister > Copies. Use the settings below. I apologize for the size of the screen shot. Basically, it's the Encircle preset with the top number at 14, the following two numbers at 75, and everything else as is.
Hit okay.
Highlight your background layer. Add a new raster layer. Selections > Select all.
Open pp04. Copy and paste INTO SELECTION. Selections > Select none.
Apply your mask. Delete your mask layer, answer "yes" to the pop-up question, and merge group.
Add your main tube. Position and drop shadow.
Okay, here is where it got tricky for me. LOL.
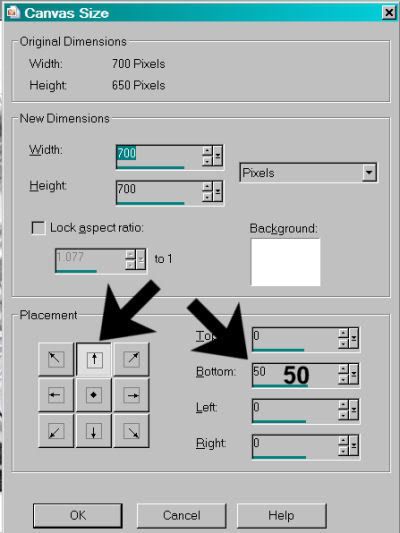
Open ribbon-wrap. Resize 65%. Apply to the frame. See my tag for reference. I wanted to do this, but I didn't have enough room at the bottom of my tag. So I highlighted my background layer once more and Image > Canvas Size:
Flood fill your background with white.
Use your pick tool to squeeze this ribbon-wrap vertically and stretch it horizontally so it will fit the frame.
But it doesn't fit the frame, does it? I highlighted the frame layer and used the pick tool to drag the bottom of the frame down enough so that the ribbon-wrap would fit the frame and not blot out the images in the frame.
I hope that was clear!! Any problems, drop me a line!!
Add your name. I used a white fill with a black stroke, stroke set at 1. I then applied the following inner bevel:
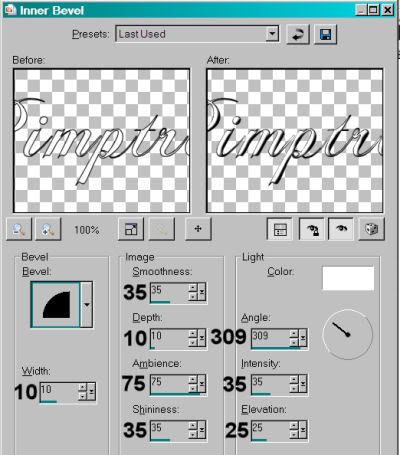
Hit okay. Drop shadow your name.
Add your copyright, license information if applicable, and taggers'/watermark.
Resize your tag to taste. You may quit and save now as is, if you choose not to animate. Those of you animating, keep on going!
A N I M A T I O N
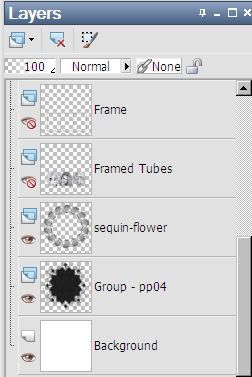
Layers > View None
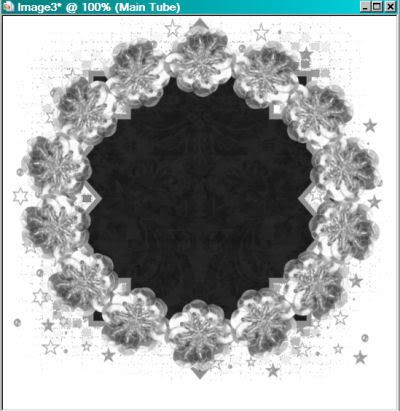
Open your bottom three layers. It should look something like this:
For a result like this:
Copy > Merged
Open Animation Shop, right-click on the desktop area and paste as a new animation.
Duplicate this frame for a total of 16 frames. Move your slider at the bottom of your animation to the first frame.
Open up the sparkly named "subtle."
Edit > Select All, Edit > Copy
Go back to your canvas and Edit > Select All, Edit > Paste > Into Selected Frame
Position this in the center of one of the flowers in the circle, and release your mouse button. You're going to do this 14 times, to get the centers of all the flowers to sparkle subtly. Just Edit > Paste > Into Selected Frame over and over 'til you get them all.
Now open the sparkly named "silver." You'll note this only has eight frames.
Edit > Select All, Edit > Copy.
Highlight the 8th frame.
Edit > Paste > After Current Frame. You should now have 16 frames. Move the slider over to the first frame.
Edit > Select All, Edit > Copy
Return to your main canvas and again, Edit > Select All, Edit > Paste Into Selected Frame.
And again, do this 14 times so all the flowers are covered.
All done? Great! Go back to PSP and Layers > View > All. Close out the bottom three layers and Edit > Copy merged
Return to Animation Shop. Right-click on the desktop area and paste as a new animation. Like before, duplicate this frame so you have a total of 16 frames. Move the slider over to the first frame.
Edit > Select All, Edit > Copy
Return to your main canvas and Edit > Paste > Into Selected Frame
Position this to your liking, then release the mouse button.
View > Animation. Et, voila! We're done! I hope you enjoyed this tut! If you have any questions, please don't hesitate to drop me a line!! Have a great day!
.


No comments:
Post a Comment