You will also need:
Tube of your choice. I've chosen to use the beautiful artwork of Olivia. You need a license to use her work. You can purchase the license and tubes at CILM.
The scrap kit used is by Crystal of Scrap It Sassy. The kit I'm using is PTU and called Wild West. They're having a sale!!! Crystal also has a freebie add-on mini kit available on her blog, here.
No filters used in this tut! Can you believe it? LOL.
Font: I used Handtooled
Supplies: Just the mask, scrap-flower-mask_jrh. I don't know who made this mask. It's just one of the many I've picked up along the way. If you made this mask, please contact me so I can either take it down and re-do the tut, or so that I can give you proper credit!
Okay, let's do it!
Open your mask and minimize in PSP, or load it into your PSP masks file.
Open new image, 700 x 650, white.
Open 06paper. Copy and paste as new layer.
Apply your mask. Delete your mask layer, answer "yes" to the pop-up question, and merge group.
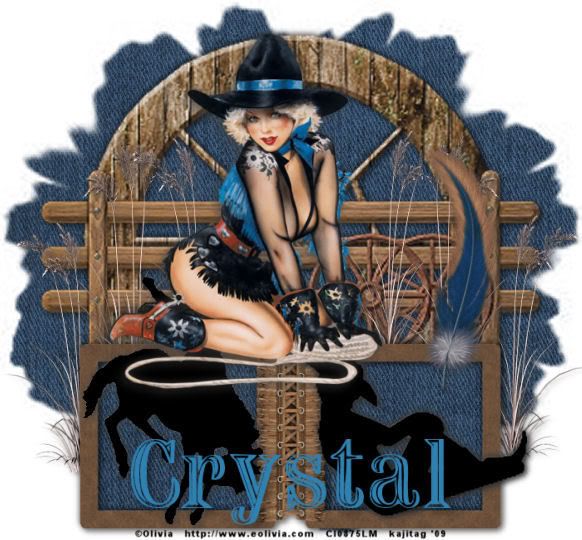
Open frame6. Resize 75%. Copy and paste as new layer. Bring down to the center bottom of your canvas.
Open 06paper again. Copy and paste as a new layer, below your frame layer.
Highlight your frame6 layer. Grab your magic wand tool and click inside each of the frames.
Highlight your 06paper layer. Selections > Modify > Expand by 5. Selections > Invert. Hit delete. Selections > Select none.
Open "cowboy sitting." These silhouettes are a wee bit raggedly, so I did the following:
Selections > Select All > Float > Defloat. Flood fill with black. Selections > Select none.
Resize by 110%. Copy and paste so that it appears to be leaning against the side of the right-hand frame. Drop shadow.
Open "bucking horse." Again, Selections > Select All > Float > Defloat. Flood fill with black. Selections > Select none.
Copy and paste onto your canvas as new layer and fit this silhouette over the left-hand frame. Drop shadow.
Add your tube of choice. Position and re-size if you need to. Drop shadow your tube.
Open dried grass 2. Arrange below the frame, toward the right side of the frame. Just a bit hidden behind the 06paper layer and frame. Duplicate this layer and Image > Mirror. Position so that it looks good to you. Merge these two layers down and drop shadow.
Open dried grass 1. Copy and paste as a new layer onto your canvas. Position this on the left side, toward the middle from the first dried grass layer and positioned a bit higher. See my tag for reference. Duplicate this layer and Image > Mirror. Merge these two layers down and drop shadow.
Open dried grass 2 again. Copy and paste as a new layer and position more toward the middle and a teensy bit higher than the last grass you worked with. Duplicate this layer and Image > Mirror. Merge these two layers down and drop shadow.
This isn't necessary, but I do this to clean up my layer palette: Merge down all three grass layers.
Open fence. Resize 200%. Adjust > Sharpness > Sharpen. Copy and paste as new layer, under the grass layers and almost totally above the frame layers. See my tag for reference. Drop shadow.
Open wooden wheel. Resize by 200%. Copy and paste as new layer, just above your mask layer. Drop shadow.
Open feather. Copy and paste as new layer, above the frame layer. Position as you wish. See my tag for reference -- it's just to the right of the tube. Drop shadow.
Add your name. I used color #2e81b1. Drop shadow.
Add your copyright, license information if applicable, and taggers'/watermark.
Save in your file type of choice, and we're done! I hope you enjoyed this tut, and surely appreciate you trying it out! Drop me a line or leave a comment if you have any questions (or comments!).
.


This one is also gorgeous Kajira! Thank you so very much for making my kits look great hun! Love what you are doing with them!
ReplyDeleteHugs!
Crystal