

You will also need:
Tube of your choice. I've chosen to use the fantastic artwork of Deacon Black. You must have a license to use his work. You may purchase that license at CILM.
Scrap kit is by Miss Foxy of Scrap it Sassy. The kit I'm using is PTU and called Casual Sophistication.
Filter: Eye Candy 4000 Gradient Glow
Font: I used A & S Snapper Script
Supplies: I'm using a mask I picked up along the way. I tried to look up "Xen Mask" and found out that Linux has something of that name, but I didn't find the original artist who made the mask. If it is yours, please let me know so that I can give you credit!
Mask is Xen Mask 27. You can find it here.
Okay, let's start!
Open your mask and minimize in PSP, or load it into your mask file.
Open a new file, 700 x 650, white.
Open Paper6. Copy and paste as new layer.
Apply your mask. Delete the mask layer in the layer palette. Answer "yes" to the pop-up question and merge group. Apply a soft drop shadow to your mask.
Open Leaves2. Resize by 60%. Copy and paste onto canvas as new layer. Place on left side of your canvas. Duplicate this layer and Image > Mirror. There'll be a lot of that in this tut! :) Merge down these layers together. Drop shadow.
Open Flower2. Resize by 75%. Place on the right side of your canvas, over the stem of the leaves. Duplicate this layer and Image > Mirror. Merge down these two layers and drop shadow.
Open Tied Ribbon2. Resize by 75%. Position at the bottom of your canvas, behind the flowers layer. If there is anything hanging out from behind the flowers, your your selection tool on rectangle and clear them out. Drop shadow your ribbon.
Open Bows1. Use your selection tool, this time set at point-to-point, and select the top bow. Copy and paste onto your canvas. Resize by 50%. Go Adjust > Brightness and Contrast > Brightness/Contrast with the following settings:
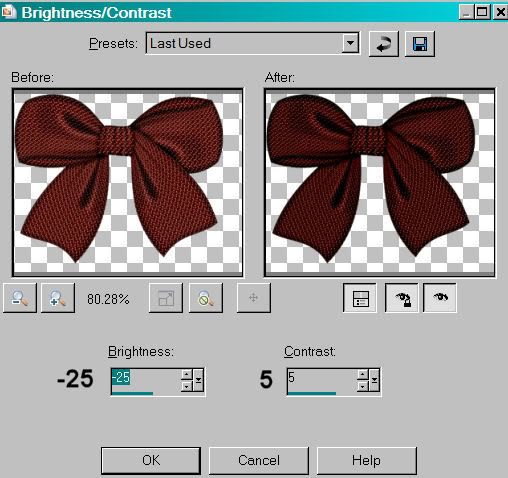
This darkens the color a bit. Position the bow so it is over the leaves on either side. Duplicate this layer and Image > Mirror. Merge these two layers down and drop shadow.
Open Beads3. Resize by 75%, twice. Rotate right by 90°, ALL LAYERS CHECKED! Copy and paste onto your canvas, below the leaves, on the right hand side of your tag. Rotate left by 10° ALL LAYERS UNCHECKED! lol. Duplicate this layer and again, Image > Mirror. Merge these two layers down and drop shadow.
Add your tube of choice. Drop shadow. I arranged mine so it appears it's behind the ribbon, but the hand is in the foreground.
Add your name. If you're using a similar (or the same) font and would like it to be beveled like mine, use the following settings:
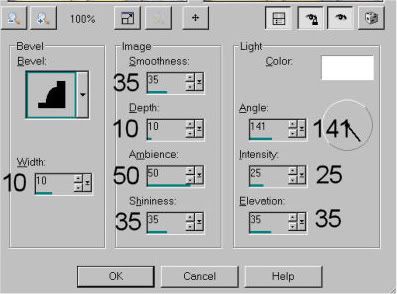
Eye Candy 4000 Gradient Glow settings of 3-0-100. I used color #bd5d85, set on the diffuse setting. Drop shadow your name.
Add your copyright, license # if applicable, and tagger's/watermark.
Save your work and VOILA! We're done! I hope you enjoyed this tut and were able to understand it clearly.
.


No comments:
Post a Comment