
You will also need:
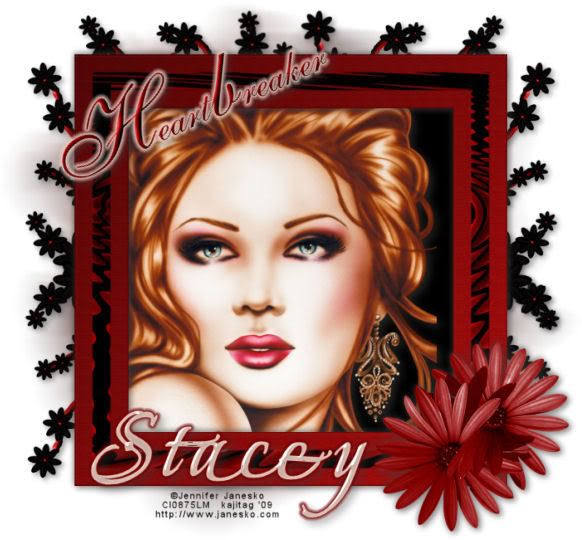
Tube of your choice. I've chosen to use the gorgeous artwork of Jennifer Janesko. You must have a license to use her art. You may purchase that license at CILM.
Scrap kit is by Stacey of Treasured Scraps. The kit I'm using is PTU and called Broken Hearted. There is the taggers' size and the scrappers' size.
Filters: Eye Candy 4000 Gradient Glow, Eye Candy 3.1 Glass
Font: I used Beau Rivage Two
Mask: Becky_Mask023, which you can find here.
Okay, let's start!
Open your mask in PSP and minimize, or load it into your PSP masks file and use it that way.
Open new image, 700 x 650, white.
Open Paper6. Copy and paste as new layer.
Apply your mask. Delete mask layer, answer "yes" to pop-up question, and merge group.
Open Paper9. Copy and paste as new layer.
Open Frame. Resize 65%. Copy and paste as new layer.
Grab your magic wand. Click inside your frame and Selections > Modify > Expand by 10.
Highlight your Paper9 layer. Delete.
Add your tube of choice. Drop shadow. Drop this below the frame.
Drop shadow frame.
Open FlowerBranch. Resize 50%. Copy and paste as new layer. Again, I usually do this on the top layer, so I can see what I'm working with. Position branch so it will show some branches poking out from under the frame on the top right corner. Duplicate branch. Image > Mirror. Merge down these two branch layers together, and duplicate that. Image > Flip.
Using your selection tool, crop out any that sticks out on the bottom of your frame. Merge the branch layers down together and drag this layer down below the frame, tube, and paper layers, but above the mask layer.
You will note some gaps at the top of your frame. I again copied & pasted my already-resized original branch and rotated it left 45%. Position it so that the gap is filled. Drag this layer down to above the other branch layer and merge down. Drop shadow all the branches.
I hope you followed that okay!!
Open DoubleFlower. Resize 30%. Copy and paste as new layer. Move to bottom right corner of your frame. If your particular tube is oriented to the right, then Image > Mirror and move it to the bottom left of the frame.
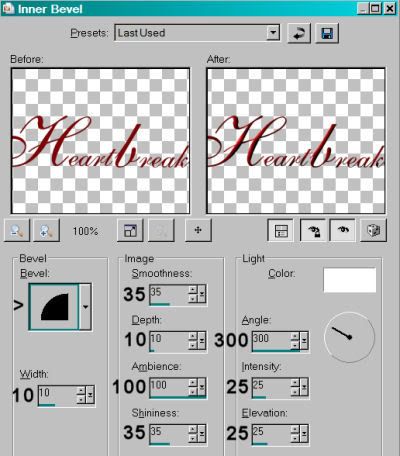
Open Heartbreaker word art. Resize 40%. Copy and paste as new layer. Add inner bevel with the settings below:
Add Eye Candy 4000 Gradient Glow of 5 - 0 - 100 with a color of #efd1c6.
Drop shadow your word art.
Rotate left 25°. Position to your liking. Again, if your tube is oriented to the right, then rotate your word art right 25% and position.
Add your name. I again used color #efd1c6. I then used Eye Candy 3.1 Glass with default settings, color on #c0c0c0. Then Eye Candy 4000 Gradient Glow, same settings, but color #750000. Drop shadow.
Add your copyright, license information if applicable, and tagger's/watermark.
Save your work, and we're done! Easy!! Thanks for stopping by. Leave me some love if you're feeling it. Or, more creative criticism would be great, too!
.


No comments:
Post a Comment