
You will also need:
Four or five tubes of your choice, by the same artist. I've chosen to use the cute & sexy artwork of Dominic Marco. You must have a license to use his work. You may purchase that license at CILM.
Animation Shop - at this time, I'm not sure where you can get this program, if you don't already have it. You may, however, save the tut as a static (non-animated) image if you like.
Scrap kit (FTU!!) is by Yvette, of Essence of Creativity. Again, it's a FTU kit called Girlz Rock. The tut above is done with the same kit. Leave Yvette some kind thanks if you download her free kit! They're fewer and farther between as time goes on, so I really appreciate them!
Filters: Eye Candy 4000 Gradient Glow
Font: I used Carmencita
Supplies: The mask, sensations mask 20. You can find this here. I don't know where I got this mask. If it is yours, or if you know whose it is, please let me know so that I may give correct credit.
Okay, let's go for it!! :)
Open your mask in PSP and minimize, or load it into your PSP masks file.
Open new image, 700 x 700, white.
Open Frame1. Copy and paste as new layer.
Open your first tube. Copy and paste as new layer, below the frame layer. Situate your tube the way you want it to look, then get your magic wand, highlight the frame layer and click inside whatever part of the frame you are using. Selections > Modify > Expand by 5. Selections > Invert. Highlight your tube layer. Hit delete. Selections > Select none. Drop shadow your tube.
Do these same steps for each of the three remaining sections of your frame.
I merged all my tube layers down, just to tidy up my layer palette. It's not necessary for you to do this, unless it makes things easier for you.
Open your "main" tube of choice. Copy and paste to the side of the frame. In my case, I needed to move my frame and tube layers to the left a bit, so I did that. Then they all fit just right! Drop shadow your "main" tube.
Open Wrap1. Resize 60%. Copy and paste below your "main" tube layer and above your frame layer. Position as you want it. I moved it to the right, as it disappears under your "main" tube. Drop shadow your Wrap1 layer.
Highlight your background layer. Add a new raster layer. Selections > Select All.
Open Paper16. Copy and paste INTO SELECTION. Selections > Select None.
Apply your sensations mask 20. Delete your mask layer. Answer "yes" to the pop-up question, and merge group.
This comes out in the middle, and since we've moved our frame layers, the mask layer may need to be moved too, to get it to look right.
Duplicate your mask layer. Resize 115%. Position higher and to the left, centering the main portion of the mask behind your frames and tubes layers. Highlight your frame layer. Grab your magic wand and click inside all four "windows" of your frame layer. Selections > Modify > Expand by 5. Selections > Invert. Highlight the duplicated & resized mask layer and hit delete. Selections > Select none.
Add your name. I used color #c030a3. Add Eye Candy 4000 Gradient Glow, set at 3 - 0 - 100, color white. Drop shadow your name.
Add your copyright, license information if applicable, and taggers'/watermark.
Resize your tag to your taste.
You may now save if you'd rather not animate. If you'd like the glitter to glitter (LOL), onward!
A N I M A T I O N
Copy your frame layer twice for a total of three layers.
Highlight the bottom frame layer, and Adjust > Add/Remove Noise > Add Noise with the following settings:
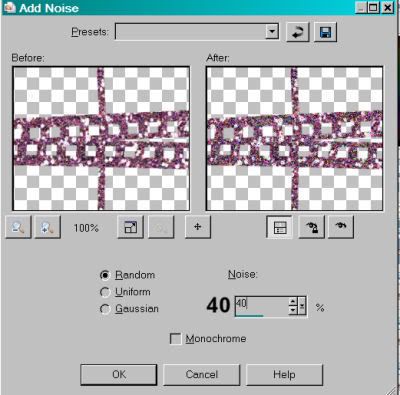
Hit okay.
Highlight the middle frame layer and apply the noise again, only change the setting to 45. Hit okay.
Now highlight the top frame layer and apply the noise again, with the setting changed to 50. Hit okay.
Close out the top two frame layers, leaving the bottom frame layer open
Edit > Copy merged
Open Animation Shop. Right-click on the desktop area and paste as new animation.
Back to PSP. Close out the bottom frame layer and open the middle frame layer.
Edit > Copy merged
Going back to Animation Shop, Edit > Paste > After current frame
Return again to PSP. Close out the middle frame layer and open the top.
Edit > Copy merged
And return again to Animation Shop and Edit > Paste > After current frame.
View > Animation
Save as .gif and we're done! I hope you enjoyed this tut! Stay tuned for the next one, using the same kit!
.


No comments:
Post a Comment