

You will also need:
Tube of your choice. I've chosen to use the fantastic artwork of Brian Rood. You must have a license to use his work. You may purchase that license at CILM.
Animation Shop - at this time, I'm not sure where you can get this program, if you don't already have it. You may, however, save the tut as a static (non-animated) image if you like.
Scrap kit (FTU!!) is by Yvette, of Essence of Creativity. Again, it's a FTU kit called Girlz Rock. The tut below is done with the same kit. Leave Yvette some kind thanks if you download her free kit!
Filters: Eye Candy 4000 Gradient Glow
Font: I used Inscription LET
Supplies: The mask, sg_star-grungeframe1. You can find this here. The mask was made by Essex Girl. She has a LOT of wonderful masks there to choose from, so take a look! Thank you, Essex Girl, for sharing your talent with the PSP community!
Okay, let's go for it!! :)
Open your mask in PSP and minimize, or load it into your PSP masks file.
Open new image, 700 x 700, white.
Open Flower1. Resize 200%. Adjust > Sharpness > Sharpen. Copy and paste as new layer. Resize again, 115%. Drop shadow.
Open Brad3. Resize 200%. Adjust > Sharpness > Sharpen. Copy and paste as new layer. Resize agaiin, 110%. Drop shadow.
I colorized the writing on the brad I chose, and this is how:
Grab your magic wand and click inside the main portion of your brad. Selections > Invert. I then colorized, using the following settings:
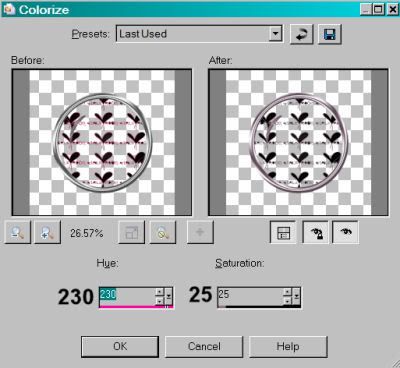
Hit okay.
Add your tube. Position and drop shadow.
Highlight your background layer. Add new raster layer. Selections > Select All.
Open Paper15. Copy and paste INTO SELECTION. Selections > Select None.
Apply your sg_star-grungeframe1 mask. Delete your mask layer. Answer "yes" to the pop-up question and merge group.
Open your GlitterSplat2.
For *mine*, I turned this into a tube within PSP and scattered the splats that way. To do this, go
File > Export > Picture Tube >
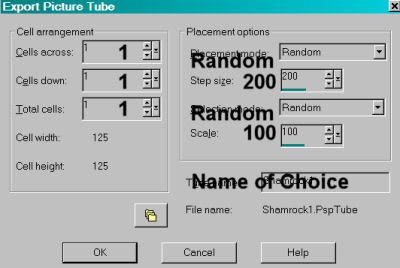
[NOTE: This screen shot is taken from a previous tutorial in which I created a picture tube. Just do the steps and name it what you want, if you're choosing to do this.]
Hit okay.
I then used the Picture Tube tool to scatter the Glittersplats randomly. If I didn't like the positioning, I'd undo, then redo, until I found the right configuration for my taste. I dragged this layer below the mask layer.
Add your name. I used color #a65f88. Add Eye Candy 4000 Gradient Glow with the settings on 3 - 0 - 100, color white. Drop shadow your name.
Add your copyright, license information if applicable, and taggers'/watermark.
Resize your tag to taste. You may now save and you're done, if you choose not to animate. Again, if you want the glitter to glitter, keep going!
A N I M A T I O N
Duplicate your GlitterSplat2 layer twice, for a total of three layers.
Highlight your bottom GlitterSplat2 layer. Adjust > Add/Remove Noise > Add Noise with the settings as follows:
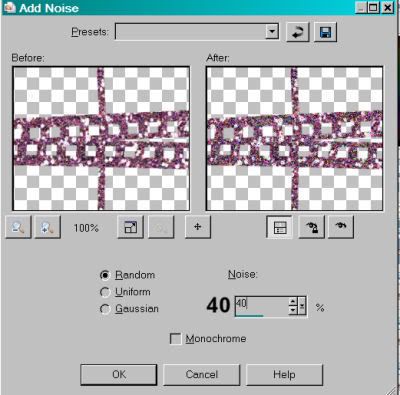
Hit okay.
Highlight your middle GlitterSplat2 layer and again apply noise, with the setting at 45. Hit okay.
Highlight your top GlitterSplat2 layer and apply noise, with the setting at 50. Hit okay.
Close out the top two GlitterSplat2 layers, leaving the bottom one open
Edit > Copy Merged
Open Animation Shop, right-click on the desktop area, and paste as a new animation.
Return to PSP. Close out the bottom GlitterSplat2 layer and open the middle one.
Edit > Copy merged
Return to Animation Shop and Edit > Paste > After current frame
Back again to PSP. Close out the middle GlitterSplat2 layer and open the top one.
Edit > Copy merged
Back to Animation Shop and Edit > Paste > After current frame.
Et, voila! We're done! View > Animation and save as .gif!! Thanks for stopping by and trying my tut!!
.


No comments:
Post a Comment