
You will also need:
Four tubes of your choice by the same artist. I'm again using the fantastic artwork of Jennifer Janesko. You must have a license to use her work. You may purchase that license at CILM.
Animation Shop - at this time, I'm not sure where you can get this program, if you don't already have it. You may, however, save the tut as a static (non-animated) image if you like.
Scrap kit by Pimptress of Paradise 4 Scrappers. It is a PTU kit, called Emerald Sky. I have written another tut, to be posted right above this one, with the same kit.
Filters: Eye Candy 4000 > Gradient Glow, VM Natural > Sparkle
Font: I used QTLinostroke Regular
Supplies: Two masks and my word art, available
here. These masks are by Kels, and I have picked them up along the way. I don't know Kels, and would love to give her a link, if she'll let me know where she is!
Let's begin!
Open a new image, 700 x 700, white.
Add a new raster layer. Selections > Select All
Open pp10. Copy and paste INTO SELECTION. Selections > Select None
Apply your mask: 58MaskkelsWWA. Delete your mask layer, answer "yes" to the pop-up question, and merge group.
Add a new raster layer. Selections > Select All
Open pp02. Copy and paste INTO SELECTION. Selections > Select None
Apply your mask: 27MaskkelsWWA. Delete your mask layer, answer "yes" to the pop-up question, and merge group.
Open stamp-frame-01. Copy and paste as a new layer. Move toward the bottom of your tag a bit. See my example for reference purposes.
Choose one of your tubes. Copy and paste as a new layer, beneath the frame layer. Position as you like it, resizing if necessary.
Highlight your frame layer.
Grab your magic wand and click inside the frame you're working with. Selections > Modify > Expand by 5. Selections > Invert.
Highlight your tube layer. Hit delete. Selections > Select None. Drop shadow your tube.
Repeat this procedure for the other two tubes you're using for your frame.
Drop shadow your frame.
Add your "main" tube. Resize, positon and drop shadow as necessary.
Now, the word art!
Highlight "SHE." Selections > Select All > Float > Defloat
Open pp02. Copy and paste as new layer. Selections > Invert. Hit delete. Merge this layer down with the original SHE layer.
Do the same thing with "BEAUTY."
Highlight "NIGHT." Selections > Select All > Float > Defloat
Open pp01. Copy and paste as new layer. Selections > Invert. Hit delete. Merge this layer down with the original "NIGHT" layer.
I put a gradient glow on all the main words. Settings of 5 - 0 - 100. For the two words in light blue, the color was #535e62. I also used this gradient glow with #535e62 for the words "like the." For "NIGHT," color #bfd7de.
Edit > Copy merged.
Edit > Paste as new layer. Resize, position and drop shadow the word art.
Add your name. I used color #535e62 for the fill, #bfd7de for the stroke, stroke width 2. I then added the gradient glow, same settings as above, color white. Drop shadow your name.
Add your copyright, license information if applicable, and taggers'/watermark.
Resize your tag as desired. You may save now if you choose to not animate.
A N I M A T I O N
Copy your first mask layer. The darker one, right above your white background. Copy it twice for a total of three layers.
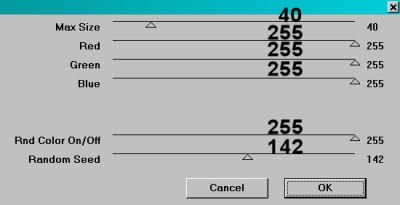
Highlight the original layer and go Effects > Plugins > VM Natural > Sparkle with the settings below:
Hit okay.
Highlight the middle mask layer and apply Sparkle again, this time sliding the Random Seed slider to a different number. Hit okay.
Highlight the top mask layer and apply Sparkle yet again, and again slide the Random Seed slider to a different number.
Now, as I say in all the tuts I do with this filter, I always go back over the three layers and repeat the Sparkle with different settings. I do this for more sparkles. You may choose not to, it's up to you.
Close out the top two layers of sparkle. Leave the bottom layer open.
Edit > Copy merged
Open Animation Shop. Right-click on the desktop area and paste as a new animation.
Return to PSP. Close out the bottom layer of sparkle and open the middle layer.
Edit > Copy merged
Returning to Animation Shop, Edit > Paste > After Current Frame
Back to PSP again! Close out of the middle sparkle layer and open the top layer.
Edit > Copy merged
Back to Animation Shop. Edit > Paste > After Current Frame
Edit > Select All
Right-click on the top bar of your animation and choose "Frame Properties." Change this number to 35.
Save as .gif and you're done! I hope you enjoyed this tut! I'll be doing another with this same kit soon! Stay tuned....
.


No comments:
Post a Comment