
You will also need:
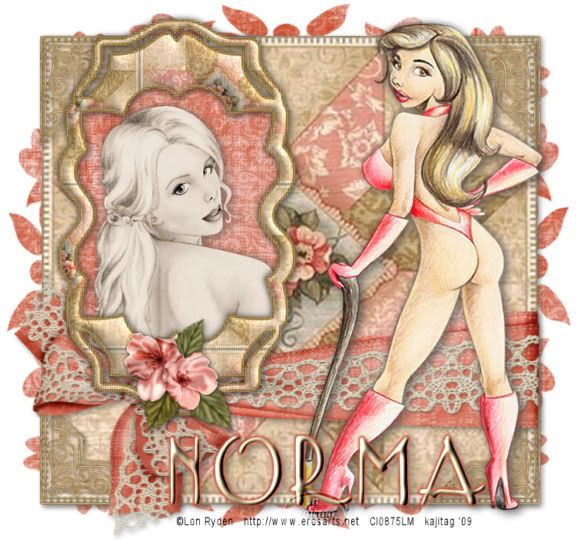
Two tubes by the same artist. I've chosen to use the great artwork of Lon Ryden. He used to be licensed through CILM, but has since gone out on his own. That's why you'll see a license number on my example. In fact, I used one tube I had bought and one that was FTU.
Scrap kit is by Norma of Paradise 4 Scrappers. The kit I'm using is PTU and called Antique Lace. They're having a sale on Valentine's Day -- everything 50% off, so grab it while it's marked down! The tutorial just above this one uses the same kit.
Filters: Eye Candy 4000 Gradient Glow just around the name.
Font: I used Lemon Chicken
Supplies: A mask by Butterfly Flutterby, here.
Okay, let's go for it!
Open your mask and minimize in PSP, or load it into your PSP masks file.
Open new image, 700 x 700, white.
Open Floral1. Resize 150% twice. Copy and paste as new layer.
Open Corner. Resize by 50%, then by 40%. Copy and paste as new layer. Position it in the upper right hand corner of the Floral1 layer. Duplicate this layer. Image > Mirror. Merge these two layers down. Then duplicate that layer and Image > Flip. Merge *these* two layers down. Add a soft drop shadow.
Open RibbonLaceTieBow2. Resize 70%. Copy and paste as new layer. Move below center of the Floral1 layer. Use your pick tool to stretch it across all the way. Drop shadow.
Add your main tube of choice. Position to the right side of your tag. Drop shadow.
Open Frame1. Resize 75%. Copy and paste as new layer. Rotate 90° either way. Position to the left side of your tag.
Grab your magic wand and click in the middle of the frame.
Open Bkg13. Resize to 700 x 700 pixels. Copy and paste as new layer, under the frame layer.
Selections > Invert. Hit delete. Do not deselect!
Add your second tube, position as you like under the frame, and over Bkg13. Drop shadow.
Selections > Select none.
Effects > Photo Effects > Sepia Toning. Set this to 35.
Open Blossoms2. Resize 20%. Copy and paste as new layer, centered at the bottom of the frame. Drop shadow.
Open Bkg13 again. Resize down. Copy and paste as a new layer above your bottom white background layer.
Apply your mask BflyFlbyMask17. Delete mask layer. Answer "yes" to the pop-up question and merge group.
Use your pick tool again, to stretch your mask to the outer edges of your tag. See my tag for reference.
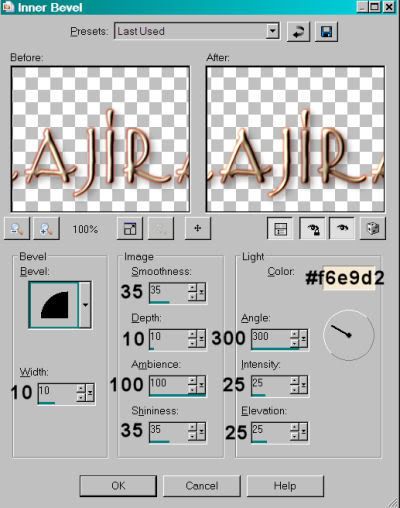
Now, add your name. I used color #f6e9d2. If you like, add Eye Candy Gradient Glow set at 4 - 0 - 100, color #d05035. I also used an inner bevel of:
Drop shadow.
Add your copyright, license information if applicable and tagger's/watermark.
Resize your work and save. We're done! Thanks so much for trying my tut!
.


No comments:
Post a Comment