
You will also need:
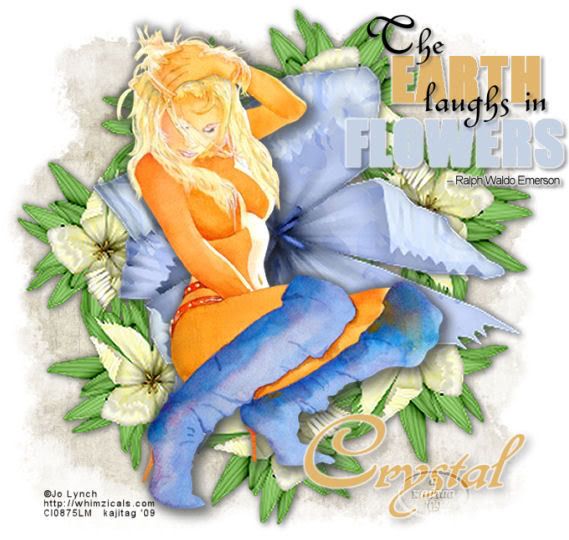
Tube of your choice. I've chosen to use the water painted artwork of Jo Lynch. You must have a license to use her art. You may purchase that license at CILM.
Scrap kit is by Crystal of Scrap It Sassy. The kit I'm using is PTU and called Isle of Desire. They're having a sale, so grab it while it's marked down! The tutorial just below this one uses the same kit.
Filters: Eye Candy 4000 Gradient Glow, just around the name and the word art.
Font: I used Bramble
Supplies: Becky_Mask022 and my word art, which you can find here.
Okay, let's start! You'll be done before you know it!
Open your mask and word art, and minimize them in PSP for now. Alternatively, you can load your mask into your PSP masks file and use it from there.
Open new image, 700 x 650, white.
Open paper9. Copy and paste as new layer.
Apply your mask. Delete mask layer, answer "yes" to the pop-up question and merge group.
Open floralring2. Copy and paste as new layer. Resize by 125% twice, then again by 115%. Drop shadow.
Open flower1. Copy and paste as new layer. Resize by 125% twice, then again by 115%. Drop shadow.
Add your tube. Position as desired, and drop shadow.
Open the word art provided. Copy and paste each layer and position them where you think they look best on your tag.
If you'd like to change your colors as I have done, grab your magic wand and click into each individual layer on the larger, more pronounced words. Then flood-fill with color of choice. I used #e1b66c for "EARTH" and #c5d2e4 for the "FLOWERS."
On these same larger word layers, Effects > Plugins > Eye Candy 4000 Gradient Glow, set at 3 - 0 - 100 and color white.
Merge down all your layers of the word art, then drop shadow.
Add your name. If you like, add the same Gradient Glow as above. Drop shadow.
Add your copyright, license information if applicable, and your tagger's/watermark.
Merge your layers and you're done! Quick -n- easy!!
.


No comments:
Post a Comment