
You will also need:
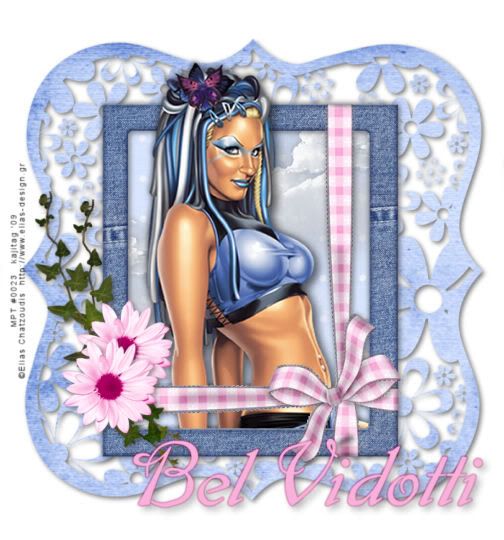
A tube of your choice. I'm using the great artwork of Elias Chatzoudis. You must have a license to use his work. You may purchase that license at My PSP Tubes.
Scrap kit is by Bel Vidotti. It's a FTU kit, called Flutter Girl. Be sure to leave some love for the beautiful freebie!
Filters: Eye Candy 4000 > Gradient Glow
Font: I used 38
Supplies: No outside supplies in this tut!
Let's do it!! This is another quick-n-dirty tut!
Create a new file, 750 x 700, white.
Open frame06. Copy and paste as a new layer.
Open paper07. Copy and paste as a new layer. Drag this below your frame layer in the layer palette.
Highlight the frame layer. Grab your magic wand and click inside the frame. Be sure to click inside all the nooks and crannies created by the gingham ribbon!
Selections > Modify > Expand by 4. Selections > Invert.
Highlight your paper layer. Hit delete. Selections > Select none.
Open your clouds. Copy and paste as a new layer, below the frame but above the paper layer. Place to your liking. Duplicate this layer and Image > Mirror. Give the clouds a soft drop shadow. There will be parts to the left and right side of the frame that you don't want. Grab your lasso tool, set on point-to-point, and draw around the portions of the clouds you don't want to see. Hit delete. Selections > Select none.
Add your tube. Resize, position and drop shadow as you like. If you want it to be coming out of the frame as I have done, then.....
Highlight the frame layer again. Click again inside all the nooks and crannies in the frame. Selections > Invert.
Highlight your tube layer. Get your eraser brush and erase any of the tube that overlaps the frame and ribbon. Selections > Select none.
Open leaves02. Resize 65%. Image > Mirror. Copy and paste as a new layer. I put mine on the lower left side of the frame. See my tag for placement. Duplicate this layer. Rotate left 10°. Merge these two layers down. Drop shadow your leaves.
Open flower02. Resize 40%. Copy and paste as a new layer. Place as you like, over the leaves. Again, see my tag for placement. Duplicate this layer. Move the duplicate to a place of your choosing. Merge these two layers down. Drop shadow your flowers.
Highlight the white background layer.
Open brackets01. Resize 80%. Copy and paste as a new layer. Add a SOFT drop shadow.
When I did this, the frame and everything else I'd already done was too low on the canvas. So I merged it all down from the top to the paper layer. Then, using your move tool, click lightly on the merged layer. Hold down the Ctrl key while hitting the down arrow key. Do this until the frame looks more centered with the brackets layer. I hope that was clear!!
Add your name. I used color #f9b0da. Stroke width of 2, same color. I then added a Gradient Glow of 3 - 0 - 100, color #a8005d, preset of "diffuse."
Drop shadow your name.
Add your copyright, license information if applicable and taggers'/watermark.
Resize your tag to the size of your choice. Merge your layers, and save! We're done! I hope you enjoyed this tut!
.


No comments:
Post a Comment