
You will also need:
A tube of your choice. I'm using the fun artwork of Pinuptoons. You must have a license to use his work. You may purchase that license at CILM.
Animation Shop - I've found it here! This is from CNET, so it's a safe download, too!
Scrap kit is by Stacey of Treasured Scraps. It's a PTU kit, called Hurry Spring. It's on sale right now for only 40¢!!
Filters: No outside filters in this tut!
Font: I used FloraDoraNF
Supplies: The bubbles, which we will resize, and the mask. I'm again not sure from where I got these supplies, so if they're yours, please let me know (nicely) so I can give you proper credit! You can get these supplies here.
Let's get to it!!
Open your mask in PSP and minimize. Alternatively, you can load your mask into your PSP masks file, for use again later. Place your bubbles wherever they will be easily accessible to you when you get to Animation Shop.
Create a new file, 700 x 700, white.
Open Pink Bracket Frame. Copy and paste as a new layer. Resize 93%.
Open Pink Ribbon Flower. Resize 75%. Copy and paste as a new layer. Drop shadow.
Open Pink Swag. Copy and paste as a new layer. Put it up to the top of the bracket, so it looks like a naturally draping element. See my tag for reference purposes. Drop shadow your pink swag.
Open Pink Dangle. Resize 65%. Copy and paste as a new layer. Position so the opening at the top of the "dangle" (looks like a paperclip) appears as though it's hooked over the swag rod. Again, see my tag for reference purposes. Duplicate this layer. Image > Mirror. Merge these two layers down. Drop shadow your pink dangles.
Add your tube. Resize, position and drop shadow to your taste.
Open the Pink Bear Sticker. Resize 25%. Image > Mirror. Copy and paste as a new layer. Position where you'd like it best. Drop shadow your pink bear sticker.
Highlight your white background layer. Open paper 10. Resize to 700 x 700 pixels. Copy and paste as a new layer.
Apply your mask. Delete mask layer, answer "yes" to the pop-up question and merge group.
Take your selection tool, set on Rounded Rectangle. Feather set to 10. Draw a rounded rectangle around the outside of your tag. I used the pointy thingies (technical term lol) on the bracket to judge and make it even-looking. Selections > Invert.
Hit delete. Selections > Select none.
Add your name. I used color #e585c2 for the fill. Stroke width of 3, color #fbc5e7.
Drop shadow your name.
Add your copyright, license information if applicable and taggers'/watermark.
Resize your tag to the size of your choice. You can save here and be done, if you choose not to animate.
A N I M A T I O N
Close out your name layer (if your name layer happens to be at the top, like mine....)
Edit > Copy merged.
Open animation shop, right-click on the desktop area and paste as a new animation.
Duplicate this frame until you have a total of 4 frames. Move the slider on the bottom of this animation to frame 1.
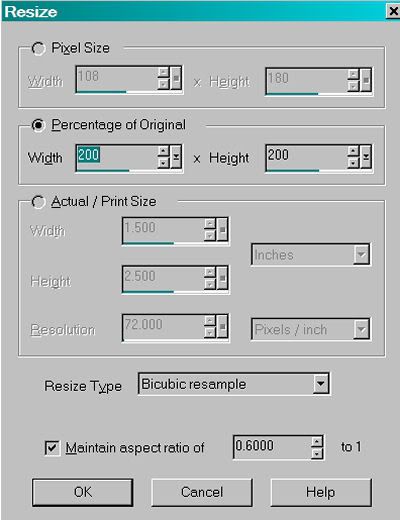
Open your bubbles animation. We're resizing the bubbles by 200%.
Edit > Select All. Animation > Resize Animation with the following settings:
Edit > Select All. Edit > Copy
Go back to the animation you are building and Edit > Select All. Edit > Paste > Into Selected Frame.
Place your bubbles where you want them (I put them close to the mouth and the first bubble on the tube) and release your mouse button.
Return to PSP.
Layers > View > None. Open your name layer.
Edit > Copy merged
Return to Animation Shop, right-click on the desktop area, and paste as a new animation. Duplicate this frame until you have 4 frames. Move the slider over so it's on frame 1.
Edit > Select All. Edit > Copy.
Go back to the animation we're building and Edit > Select All. Edit > Paste > Into Selected Frame.
Position your name where you want it to be and release your mouse button.
Edit > Select All.
Right-click on the top bar of your animation and choose "Frame Properties." Change this number to 20.
View > Animation. If you like what you see, save as a .gif and we're done! Thanks for trying my tut!
.


No comments:
Post a Comment