
You will also need:
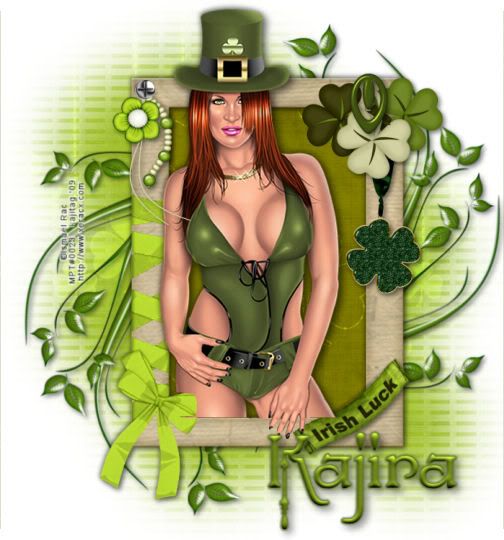
A tube of your choice. I'm using the fantastic artwork of Ismael Rac. You must have a license to use his work. You may purchase that license at My PSP Tubes.
Scrap kit is part of the Lucky Blog Train! That means it's all free! The portion I'm using for this tutorial was created by Bel Vidotti. It's very generous, so far as how much you get, so.... go get it! LOL
Filters: Eye Candy 4000 > Gradient Glow
Font: I used Yolanda Princess
Supplies: Just a mask and a screw.
Let's get to it!!
Open your mask in PSP and minimize. Alternatively, you can load it into your PSP masks file, for use again later.
Create a new file, 700 x 750, white. I'm starting this at this size so things will be all relative to the tall frame I'm using. We will resize layer.
Open frame02. Copy and paste as a new layer.
Add your tube. Resize, position and drop shadow to your taste. If it is like mine, and you'd like it to "emerge" out from the frame, do this:
Highlight your frame layer. Grab your magic wand and click inside the frame. Selections > Invert
Highlight your tube layer. Get your eraser brush and erase any portion of your tube that ovelaps the bottom of the frame. My tube has a hand that I wanted to appear below the frame, so after I Selections > Select none, I grabbed my lasso tool, set at point-to-point, and zoomed WAY in on her hand. I then drew around the fingers and hit delete. Selections > Select none.
Ready? Kewl!
Open paper04. Resize 25%. Copy and paste as a new layer. Drag this below your frame layer in your layer palette.
Highlight your frame layer. Grab your magic wand and click inside the frame. Selections > Modify > Expand by 10.
Highlight your paper layer. Selections > Invert. Hit delete. Selections > Select none.
Open shamrock03. Resize 35%. Image > Flip. Copy and paste as a new layer. Position up on the top right corner of the frame. See my tag for reference purposes.
Open shamrock02. Resize 35%. Rotate right 90°, ALL LAYERS CHECKED! Copy and paste as a new layer. Position up with the other shamrocks on the upper right of the frame.
Open shamrock01. Resize 35%. Rotate left 90°, ALL LAYERS CHECKED! Copy and paste as a new layer, up with the other two shamrocks. Again, see my tag for reference.
Open paperclicp02. Resize 30%. Bring this up to the cluster of shamrocks. Copy and paste as a new layer. Drag the layer up above all three shamrocks, so it looks as though the paper clip is holding them in place.
Drop shadow all shamrocks and paper clip.
Open shamrockcharm03. Resize 40%. Copy and paste as a new layer, below all the shamrock layers, so it looks as though it's hanging from there. Drop shadow the charm.
Open pendant01. Resize 50%. Copy and paste as a new layer, on the upper left corner of the frame. See my example for placement.
Open the screwshiny file. Notice the bottom screw is selected. Copy and paste as a new layer. Resize 15%. Place this over the loop in the pendant01 layer, so it looks as though the pendant is hanging from the screw.
Drop shadow the pendant.
Open tag04. Resize 50%. Copy and paste as a new layer. Rotate left 35°. Position over lower right corner of the frame. See my example for placement.
Open doodle02. I usually do the doodle stuff on the top layer, so I can see what I'm working with. Resize 75%. Copy and paste as a new layer. Rotate left 90°. Place on the right side of the frame. Duplicate this layer. Image > Mirror. Image > Flip. Position this duplicate as you'd like it. Merge these two layers down. Duplicate this layer. Rotate right 45°. Merge these two layers down. Drop shadow your doodles.
Highlight your white background layer.
Open paper05. Resize 25%. Copy and paste as a new layer.
Apply your mask. Delete the mask layer on the palette, answer "yes" to the pop-up question and merge group.
Add your name. I used color #8eac22 for the fill. Stroke of two, same color.
Effects > Plugins > Eye Candy 4000 > Gradient Glow with settings of 4 - 0 - 100, color #5f6a36.
Drop shadow your name.
Add your copyright, license information if applicable, and taggers'/watermark.
Resize your tag to the size of your choice. Merge your layers, and save! We're done! I hope you enjoyed this tut!
.


No comments:
Post a Comment