
You will also need:
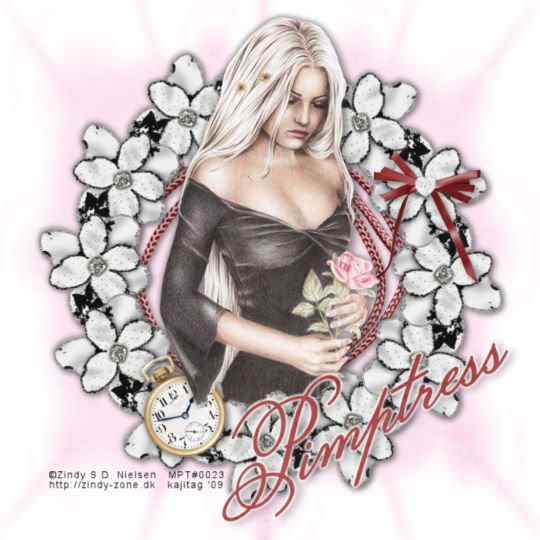
A tube of your choice. I'm using the fantastic artwork of Zindy S.D. Nielsen. You must have a license to use her work. You may purchase that license at Zindy's web site. The tube I am using was purchased while she was still with MPT -- that's the reason the tag has an MPT license # on it.
Scrap kit is by Pimptress of Paradise 4 Scrappers. It's a PTU kit, called The Saga: The Renewal. You can also just get The Complete Series at Paradise 4 Scrappers, as one purchase. (I advise getting them separately! ;) I am doing a tut from each part of the series, so ... one more to go!
Pimptress also has a Saga Freebie on her personal blog. It includes 4 frames, one to coincide with each of the individual kits. I didn't happen to use that frame in this tut, so it's up to you.
Filters: Eye Candy 4000 > Gradient Glow, Mura's Meister > Copies
Font: I used Monsieur La Doulaise
Supplies: The mask, another I got from "somewhere." Please, if it is yours, let me give you proper credit! You can find this mask here.
Let's get to it!! This is another quick-n-dirty tut!
Open your mask in PSP and minimize. Alternatively, you can load your mask into your PSP masks file, for use again later.
Create a new file, 700 x 700, white.
Add a new raster layer. Selections > Select all.
Open pp08. Copy and paste INTO SELECTION. Selections > Select none.
Apply your mask. Delete the mask layer, answer "yes" to the pop-up question and merge group.
Open flower-03. Resize 50%. Copy and paste as a new layer.
Effects > Plugins > Mura's Meister > Copies with the following settings:

Hit okay.
Add your tube. Resize, position and drop shadow as you like.
Open rope-frame-02. Copy and paste as a new layer. Drag this below your copies layer. Resize 85%. Drop shadow your rope frame.
Drop shadow your copies layer.
Open the pocket watch. Resize 50%. Copy and paste as a new layer. Rotate left 30°. Position on the lower left side of the flowered copies layer. See my tag for position, or place it wherever you like. Drop shadow your pocket watch.
Open bow-01. Resize 35%. Copy and paste as a new layer. Position as you like. I placed mine on the upper right side of the flowered copies layer. Drop shadow your bow.
Add your name. For the fill color on the name, I chose to use pp06. Open pp06. Click on your materials palette, and choose "pattern." Click on the side of the square and find pp06. Select it. I also used pp06 for the stroke, stroke width of 2.
Effects > Plugins > Eye Candy 4000 > Gradient Glow set on 4 - 0 - 100. Color white, preset of "medium" chosen.
Drop shadow your name.
Add your copyright, license information if applicable and taggers'/watermark.
Resize your tag to the size of your choice. Merge your layers, and save! We're done! I hope you enjoyed this tut!
.


No comments:
Post a Comment