
You will also need:
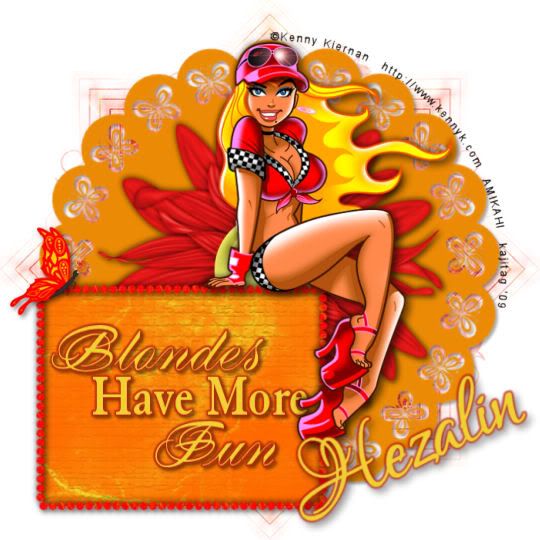
A tube of your choice. I'm using the striking artwork of Kenny Kiernan. You must have a license to use his work. You may purchase that license at Artistic Minds, Inc.
Scrap kit is by Hezalin of Terminally Unique Designs. It's a PTU kit, called Sunset. A gorgeous kit with very vivid colors, as you can see!! It's also on a 50% off sale, so get it while it's hot!
Filters: Eye Candy 4000 > Gradient Glow
Font: I used LoversQuarrelROB
Supplies: The mask, again by Essex Girl, and the word art, from whom I'm not real sure. It was in a folder labeled simply "Blondes" but there were no TOU or identifying things in the folder. So if it's yours, please let me know so I can give you proper credit. And please be nice about it. No need for nastiness in the PSP world! You can get these supplies here.
Let's get to it!!
Open your supplies in PSP and minimize. Alternatively, you can load your mask into your PSP masks file, for use again later.
Create a new file, 700 x 700, white.
Open Butterfly mat. Copy and paste as a new layer. Resize 135%. Drop shadow.
Open Diamond Frame. Resize by 75% twice. Copy and paste as a new layer. Rotate 90° either direction. Position as you like.
Selections > Select All > Float > Defloat > Invert
Open paper 12. Copy and paste as a new layer. Hit delete. Selections > Select none.
Delete your original frame layer.
Grab your magic wand. Click inside the frame. Selections > Modify > Expand by 3. Selections > Invert.
Open paper 5. Copy and paste as a new layer. Hit delete. Selections > Select none. Drag this layer below your diamond frame layer. Make sure both these layers are above your butterfly mat layer.
Drop shadow your diamond frame.
Open Flower 1. Resize 50%. Copy and paste as a new layer. Drag this layer below your frame and paper layers, above your butterfly mat. Drop shadow your flower.
Add your tube. Resize, position and drop shadow to you liking.
Open Butterfly 3. Resize 20%. Copy and paste as a new layer. Position to your liking. Drop shadow your butterfly.
Highlight your white background layer.
Open paper 11. Copy and paste as a new layer.
Apply your mask. Delete your mask layer. Answer yes to the "pop-up" question and merge group.
Resize your mask layer 105%.
Open your word art. Edit > Copy merged
Edit > Paste as a new layer. Position within your diamond frame area. See my example for reference purposes.
Selections > Select All > Float > Defloat. Selections > Invert
Open paper 15. Copy and paste as a new layer. Hit delete. Selections > Select none. Delete your original word art layer.
Effects > Plugins > Eye Candy 4000 > Gradient Glow set at 4 - 0 - 100, color #b71212. Drop shadow your word art.
Add your name. I used color #f0d235 for the fill. Stroke of two, same color.
Effects > Plugins > Eye Candy 4000 > Gradient Glow with settings of 4 - 0 - 100, color #b71212.
Drop shadow your name.
Add your copyright, license information if applicable, and taggers'/watermark.
Resize your tag to the size of your choice. Merge your layers, and save! We're done! I hope you enjoyed this tut!
.


No comments:
Post a Comment