
You will also need:
A tube of your choice. I'm using the wonderful artwork of Elias Chatzoudis. You must have a license to use his work. You may purchase that license at My PSP Tubes.
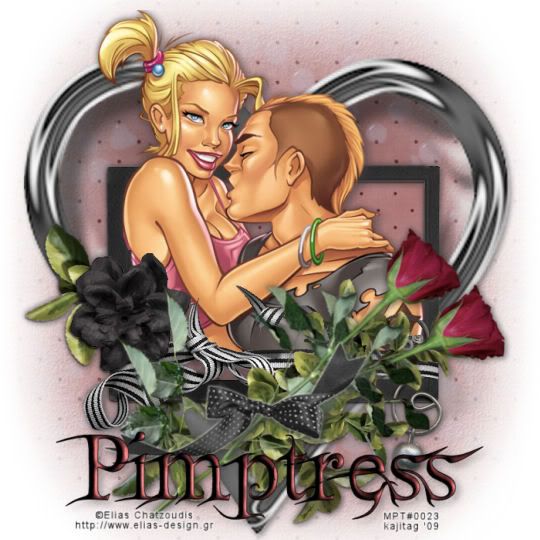
Scrap kit is by Pimptress of Paradise 4 Scrappers. It's a PTU kit, called The Saga: The Happily Ever After. You can also just get The Complete Series at Paradise 4 Scrappers, as one purchase. (I advise getting them separately! ;) This is the last in the series of four. Whew!
Pimptress also has a Saga Freebie on her personal blog. It includes 4 frames, one to coincide with each of the individual kits. That's the frame I used in this one, but there are a few more frames in the kit. The freebie's up to you. If you get it, give her some luv!!
Filters: Eye Candy 4000 > Gradient Glow
Font: I used Fairydust
Supplies: The mask, by whom I do not know. If it is yours, please let me know so that I can give you proper credit! You can get this mask here.
Let's get it done!!
Open your mask in PSP and minimize. Alternatively, you can load your mask into your PSP masks file, for use again later.
Create a new file, 700 x 700, white.
Add a new raster layer. Selections > Select all.
Open pp06. Copy and paste INTO SELECTION. Selections > Select none.
Apply your mask. Delete the mask layer, answer "yes" to the pop-up question and merge group.
Add another new raster layer. Selections > Select all.
Open water-droplet-overlay. Copy and paste INTO SELECTION. Selections > Select none.
Apply your mask again. Delete the mask layer, answer "yes" to the pop-up question and merge group.
Open cluster-04 from the freebie. Copy and paste as a new layer. Put this more toward the bottom of your tag. (Just lower than the center. My tube dictated the placement for me.)
Open pp06 again. Copy and paste as a new layer. Drag this below your frame.
Highlight your frame layer. Get your magic wand and click inside the frame. There are lots of loops and shadows with the ribbon on this frame, so make sure you click inside all of them.
Selections > Modify > Expand by 7. Selections > Invert.
Highlight your pp06 layer. Hit delete. Selections > Select none.
Add your tube. Resize, position and drop shadow.
This is a very tricky thing, too, if you want your tube to "emerge" from the frame, as I have. You have those loops and shadows to deal with again.
Highlight your frame layer. Again, get your magic wand and click inside the frame, and again in the loops of the ribbon.
Selections > Modify > Expand by 3. Selections > Invert.
Grab your eraser brush and erase all the areas of the tube that are overlapping the frame, ribbon, flower, etc.
Selections > Select none.
Drop shadow your frame layer.
Open the heart-locket. Resize 250%. Copy and paste as a new layer. Drag this layer down to just above your mask layer. Drop shadow your heart-locket.
Open the rose. Resize 65%. Copy and paste as a new layer. Rotate right 90°. Place at the bottom of the frame & heart-locket. See my example for reference purposes. Rotate again, to the left 20°. Drop shadow your rose.
Duplicate the rose layer. Rotate left 15°. Have the two roses cross toward the bottom of the stems.
Open bow-01. Resize 60%. Copy and paste as a new layer. Place over the crossed stems of the roses. Rotate right 10°. I wanted it to show up a bit more, so I added a gradient glow, settings of 3 - 0 - 100, color white, with the preset of "diffuse." Drop shadow your bow.
Open green-05. Copy and paste as a new layer. Resize 65%. Rotate left 90°. Place under the rose layers. Drop shadow your green-05.
Add your name. I used pp12 as the fill color, and black as the stroke color, stroke width of one. I also added the following bevel:
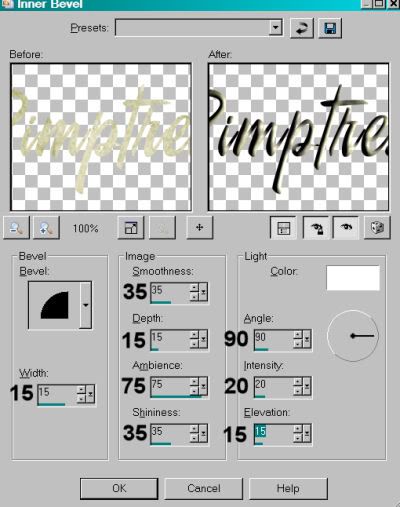
Drop shadow your name.
Add your copyright, license information if applicable and taggers'/watermark.
Resize your tag to the size of your choice. Merge your layers, and save! We're done! I hope you enjoyed this tut!
.


No comments:
Post a Comment